Cron-based scheduler that auto-runs AI agents, flows, and models, delivering results via notifications
Tired of manually requesting daily sales reports or checking weekly system monitoring results?Schedules send the AI prompts at scheduled times automatically and save the results to chat or deliver them via email/Slack/Teams.
Schedules live in two places: the sidebar Schedules section (quick access) and the Schedules list page (full management).Sidebar Schedules section — quick access to recent schedules.
Feature
Description
Expand/collapse
Open or close the section to show recent schedules
New schedule
Create via the + button in the section (requires create permission)
Open
Click an item to jump to its run chat or detail page
Status dot
Green (active) / gray (inactive)
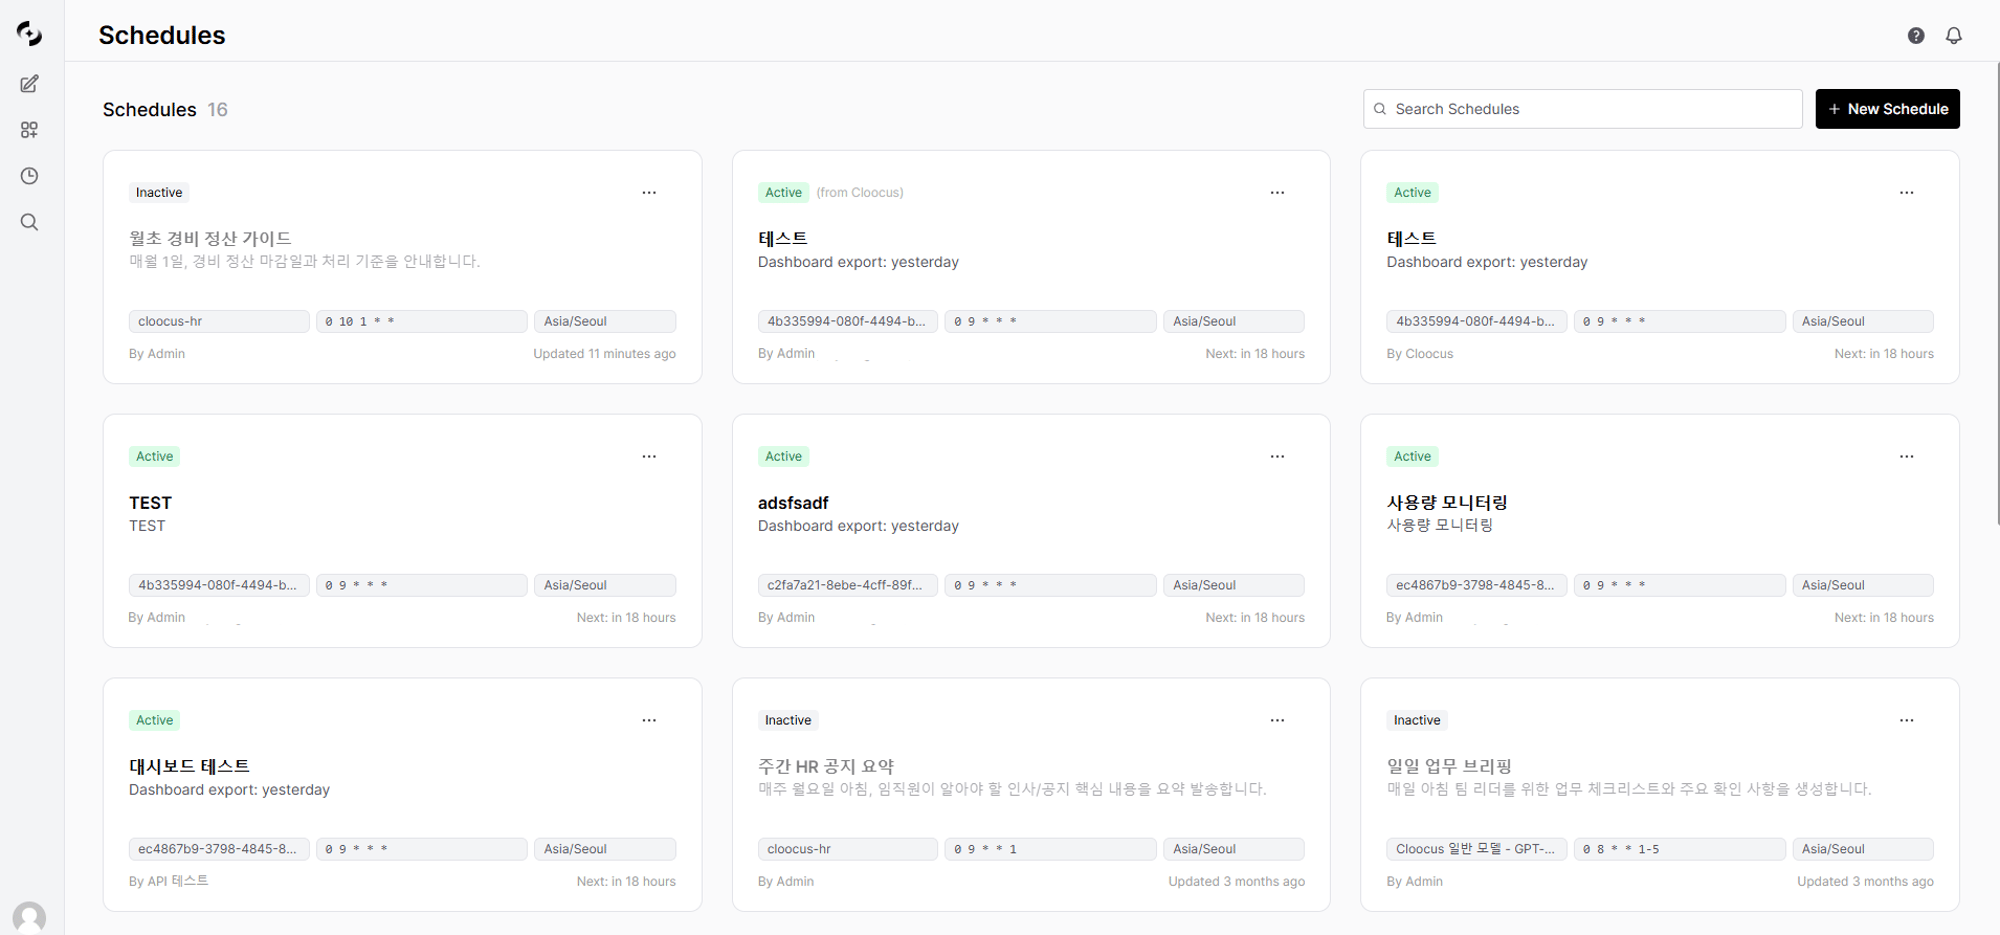
Schedules list page — reached via the sidebar Schedules menu; search and manage all schedules.
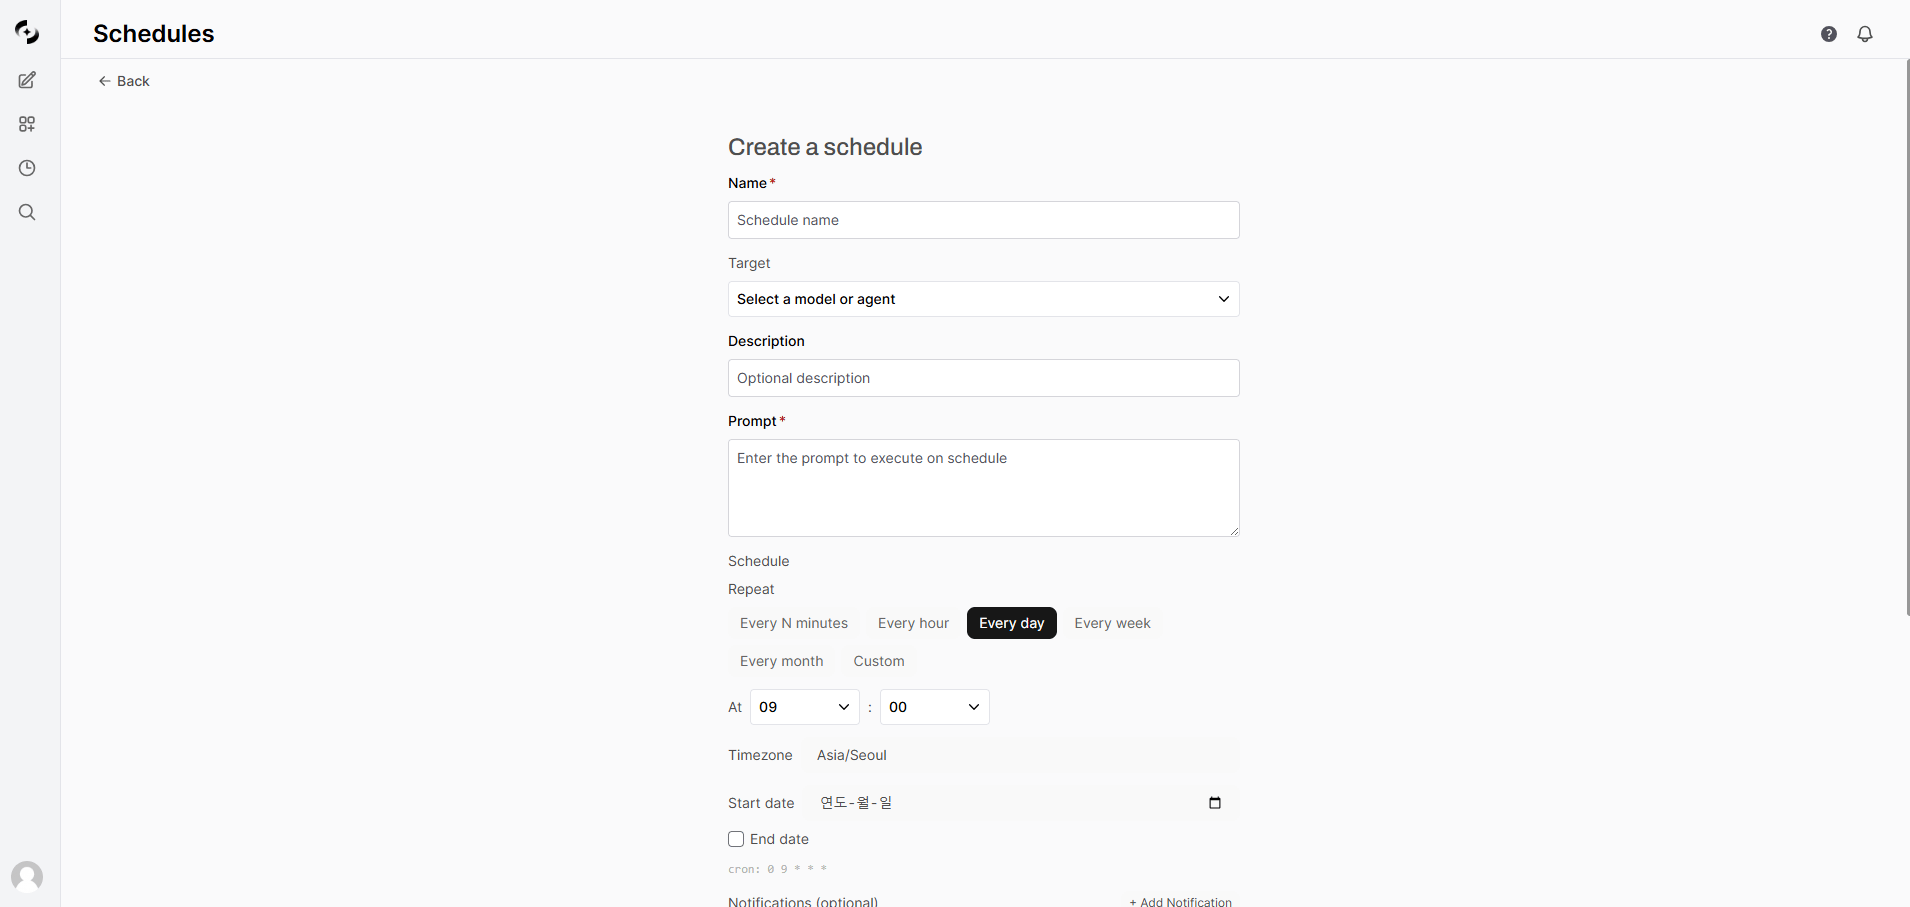
Click the + New Schedule button to create a schedule.
1
Basic info
Enter name and description.
Enter the schedule name and description
Field
Description
Example
Name
Schedule name
”Daily Sales Report”
Description
Purpose (optional)
“Daily 9 AM sales analysis”
2
Pick target
Pick the agent, flow, or model to run.
Target Type
Description
Agent
AI agent connected to Knowledge Bases, databases, etc.
Flow
Multi-step workflow
Model
Base LLM model (direct prompt)
Dashboard
Export a dashboard to HTML (refreshed with latest data)
You can only pick targets you have access permission to. Without permission, they don’t appear in the list.
3
Write the prompt
Enter the prompt to send when running.Tips:
Specify the desired output form
When the agent has structured output (JSON Schema), result fields are accessible from notification templates
Example:
Analyze today's sales data and write a report including DoD growth rateand key drivers. Visualize with charts and summarize 3 key insights.
4
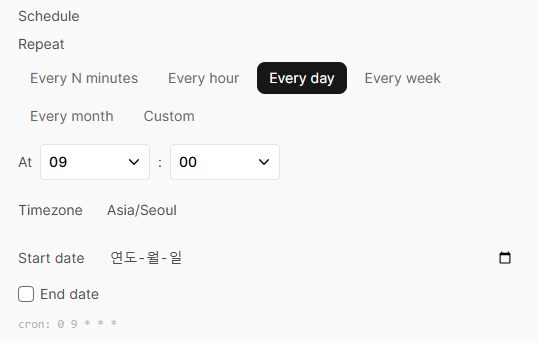
Set frequency (cron editor)
Set the run frequency. An intuitive cron editor is provided.
Set frequency with the intuitive cron editor — no need to know complex cron expressions
Mode
Description
Example
Every N minutes
Run every N minutes (1, 2, 3, 5, 10, 15, 20, 30 min)
Every 10 min
Every hour
Every hour at a specific minute
Every hour at :30
Every day
Daily at a specific time
Daily 9:00 AM
Every week
Specific weekday + time
Mon–Fri 9:00 AM
Every month
Specific day + time
1st of month 8:00 AM
Custom
Direct cron expression
0 9 * * 1-5
You can also set timezone and run period.
Setting
Description
Timezone
Reference timezone for run time (default: browser timezone)
Start date
Schedule start date (optional)
End date
Schedule end date (optional, indefinite if unset)
5
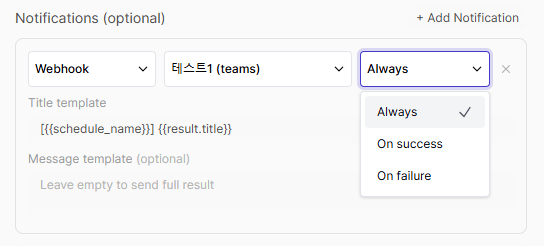
Notification setup
Set channels to receive run results. Add multiple notifications.
Add multiple notification channels with success/failure conditional branching
Setting
Description
Channel type
Email / Webhook / Direct URL
Channel / URL
Email and webhook types pick an admin-configured channel; Direct URL type enters the webhook URL directly
Trigger
Always / On success / On failure
Title template
Common to all channels — used for the notification and chat title (default [{{schedule_name}}] {{result.title}})
Recipients
Email address list (email channel only)
Subject/Body template
Email subject and body (email channel only)
Message template
Webhook message (webhook and Direct URL channels only, optional — empty sends full result)
The channel type list shows only the types that have a registered channel. If Email is missing, the admin has not registered an email channel yet — see Email channel setup. Slack, Teams, Telegram and others are not separate types; admins register them as providers of a webhook channel.
Add multiple notifications to a single schedule for conditional branching — e.g., email on success and Slack on failure.
Newly created schedules are saved as active (is_active=True) by default. The next run is scheduled immediately upon creation.
When you set a preset mode (Every N minutes, Every hour, Every day, Every week, Every month), the cron expression is auto-generated. Use Custom mode only for complex schedules.
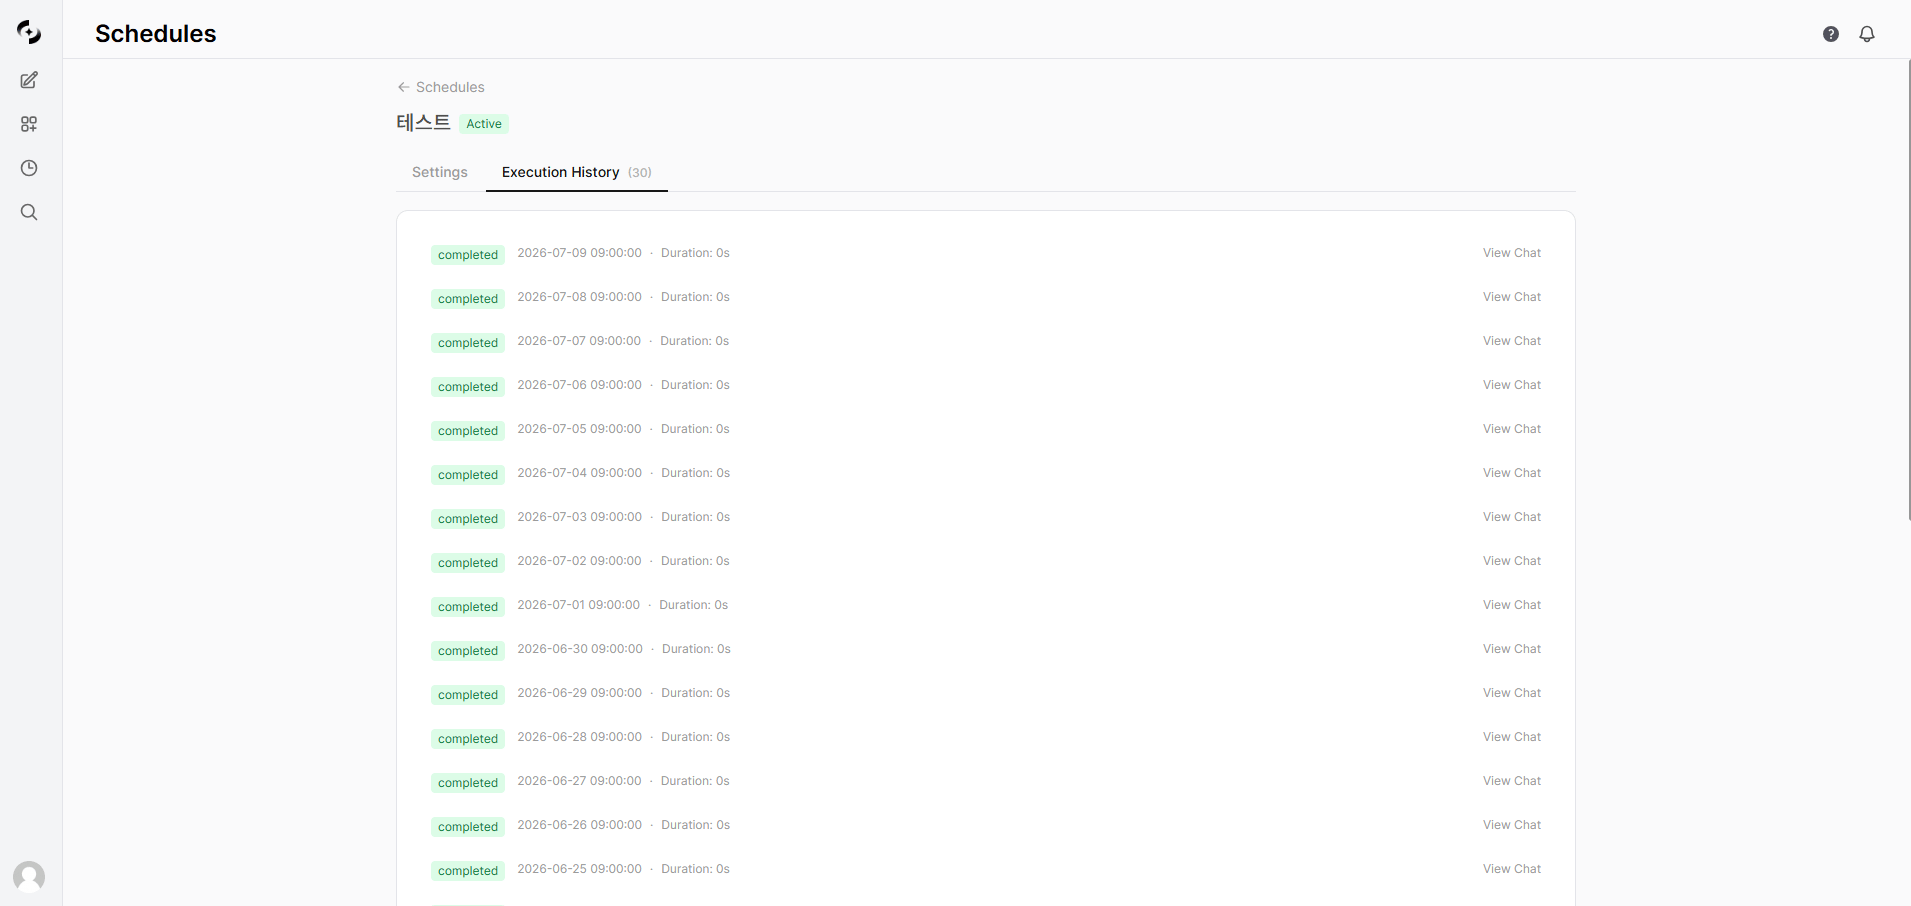
The status reflects the prompt execution only. If notification delivery fails, the status still stays Completed. When a message never arrives but the history shows Completed, check the notification settings — see the Email & Notifications section in Troubleshooting.
Transient errors (timeouts, connection errors, rate limits, 502/503/504 server errors) are auto-retried up to 2 times. Other errors fail immediately with no retry and are recorded as failed — so rather than waiting for a retry, check the error message in the execution history. Tasks stuck in the running state for over 10 minutes are auto-recovered (re-queued for another run).
Variables you can use in notification subject, body, and message templates.Insert via button — click at the bottom of the notification settings to insert into the template.
Variable
Description
Example
{{schedule_name}}
Schedule name
Daily Sales Report
{{prompt}}
Executed prompt
Today’s sales data…
{{result}}
Full execution result
(Full AI response)
{{completed_at}}
Completion time
2025-02-27 09:00:45
Type directly — not offered as buttons, but work the same when typed into the template.
Requires both features.scheduled_tasks and workspace.schedules at write level (default is read, so an admin must raise the group level to write; admins always can)
Edit/delete
Owner, admin, or anyone granted write via access_control (includes toggle and run-now)
Sharing (read/write)
Grant view (read) or edit (write) permission to groups via access_control
Target access
Read permission required for target agent/model (or it’s hidden)
If a schedule read private data (e.g., Google Workspace) into its results, only the owner and admins can view its execution history and results — even if it was shared with read access. This safeguard prevents already-captured private data from being exposed retroactively when access is later widened.
Verify access permission to the target agent/model
Verify features.scheduled_tasks permission is enabled for the user’s group
It runs 1–2 minutes late, not on time
The scheduler checks for run targets at 1-minute intervals. Once queued, workers process at 5-second intervals. So up to ~1 min delay can occur, which is normal.
What if users are in multiple timezones?
Each schedule can have its own timezone. Example: Seoul office uses Asia/Seoul, NY office uses America/New_York. The default auto-detects the browser’s timezone.
Execution result doesn't appear in chat
The execution may have failed. Check the status and error message in execution history.
Where do I configure notification channels?
Email and webhook channels are pre-configured by admins in Admin > Settings > Channels. The Direct URL method can be entered directly in the schedule without preconfiguration.
I don't know cron expressions
Picking a preset mode (Every N minutes, Every hour, Every day, Every week, Every month) auto-generates the cron expression. For Custom mode, see the Cron Expression Guide above.
Can I copy a schedule to other users?
Yes — click Copy to Users on the schedule detail page and select target users. An independent copy is created for each user, separate from the original and freely editable.