User Profile › Admin Panel
- Control all platform settings: user management, organizational structure, LLM connections, security policies, notification channels, and more.
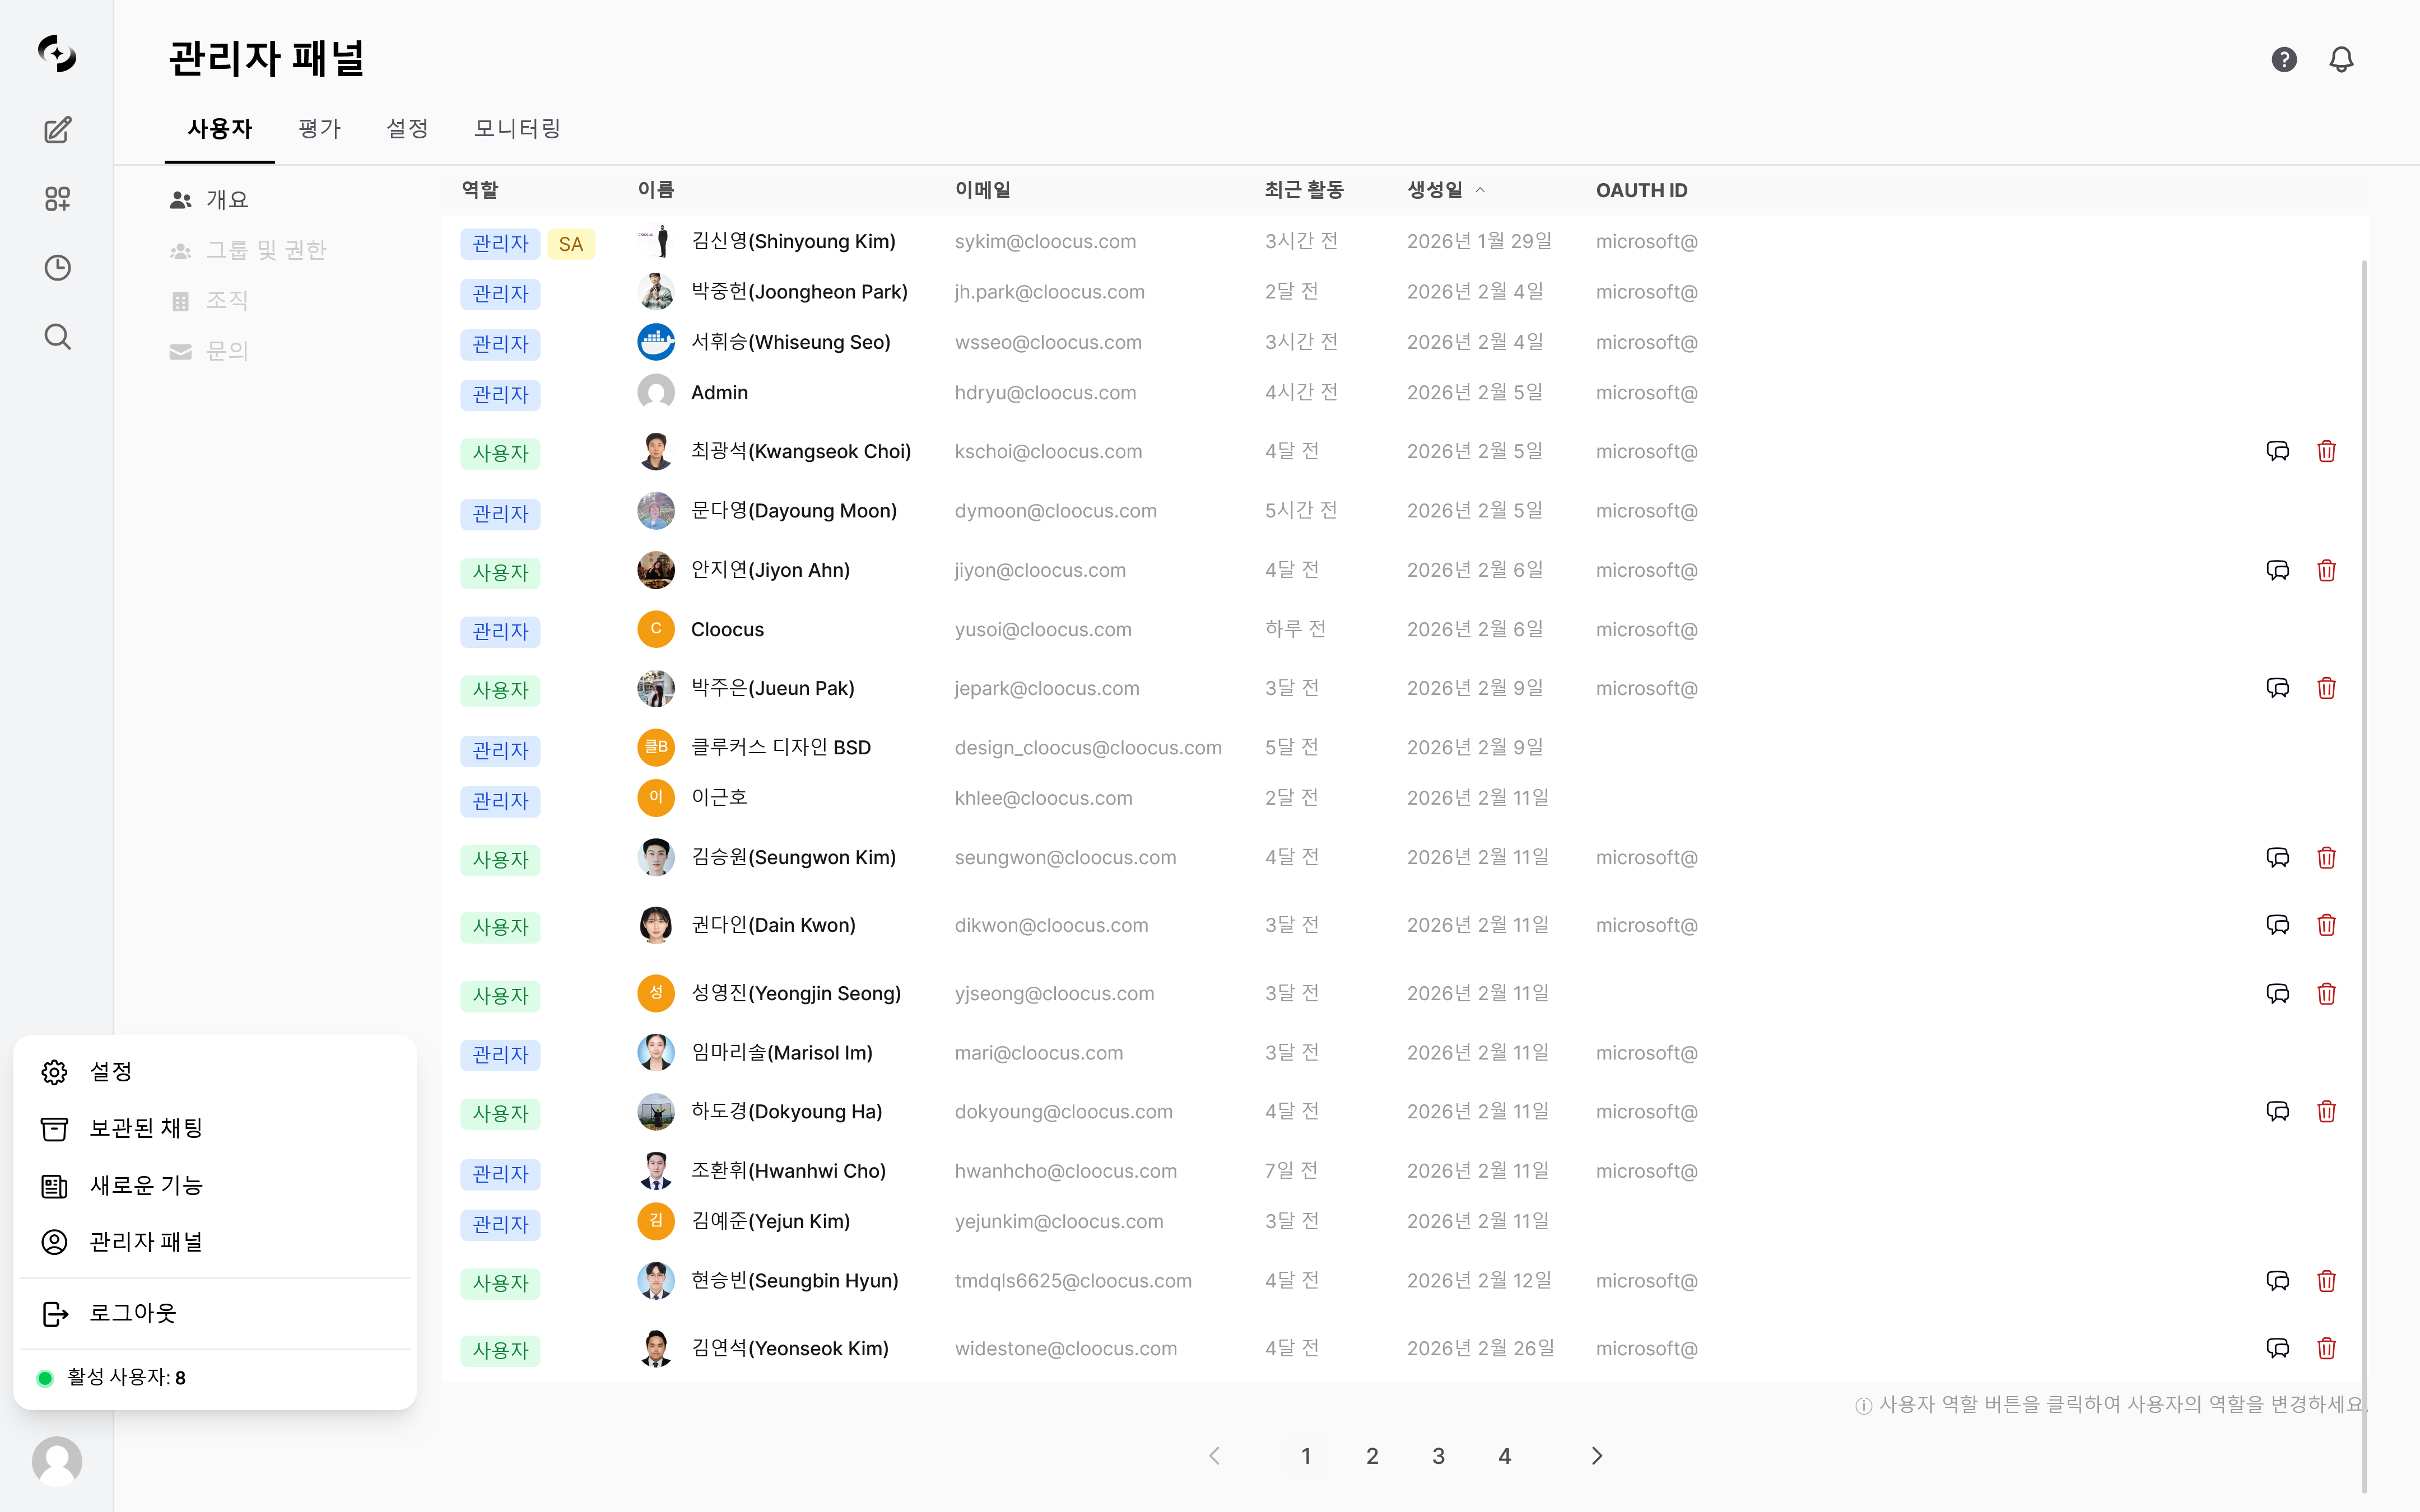
Admin panel entry path and main screen
Users
User list · role assignment, group permissions, organization management, inquiry handling
Settings
LLM connections · documents · search · guardrails · channels · code gateway · license, and other Settings tabs
Monitoring
Dashboard · usage · audit · guardrail · conversation · file logs
Evaluation
Arena · leaderboard · feedback · auto-evaluation · tracing
Accessing the Admin Panel
Only users with the Admin role can access the admin panel. Regular users (User role) won’t see the admin menu.
Per-Role Access
Cloosphere has three user roles.- Admin panel access is determined by role.
Admin Panel Navigation
The admin panel switches between feature areas via top-tab navigation.Settings Tabs
Settings split into the four areas in the diagram above. Each tab shows the navigation path (Admin › Settings › …) and the settings it contains.
- General
- Channels · Bot Connection
- Code Gateway
- Embed Widgets
Navigate — Admin › Settings › General (Connections, Models, and other tabs)Platform basics — LLM connections, documents, search, guardrails, interface, etc.
Quick Start
1
Configure LLM connections
Register OpenAI API keys or Ollama server URLs in Connections.
2
Manage users
Add users and assign roles in User Management. Create groups for organized permission management.
3
Configure security
Set authentication methods, JWT expiration, and signup permission in General.
4
Set up channels
Register email or webhook channels in Channels to enable scheduled task notifications.
Service Request (SR)
A feature for admins to directly submit service requests (usage increases, feature inquiries, bug reports, etc.) to the Cloosphere operations team.Activation Conditions
Activated when both theSR_KEY and CLOOCUS_PUBLIC_URL environment variables are set.
- Without them, the menu doesn’t appear.
How to Use
1
Pick Service Request from the user menu
Click your user avatar at the bottom of the sidebar, then pick Service Request from the dropdown.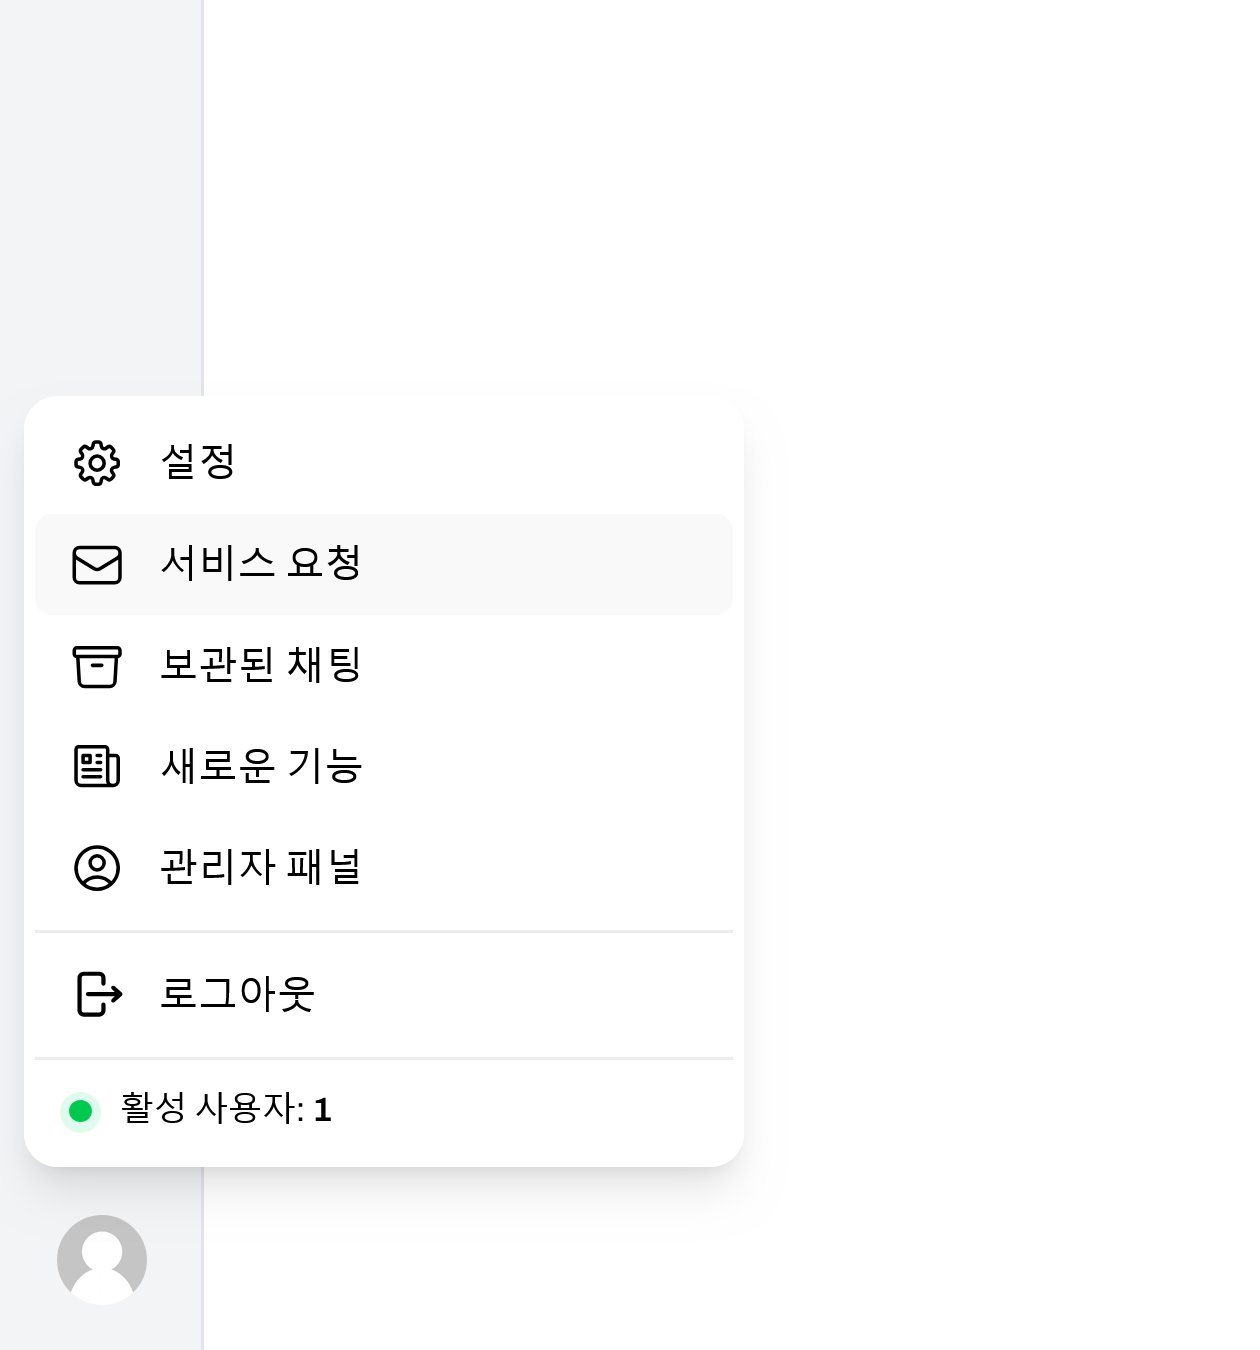
2
Fill in and submit the request
Enter the type, title, and content in the modal, then click Submit.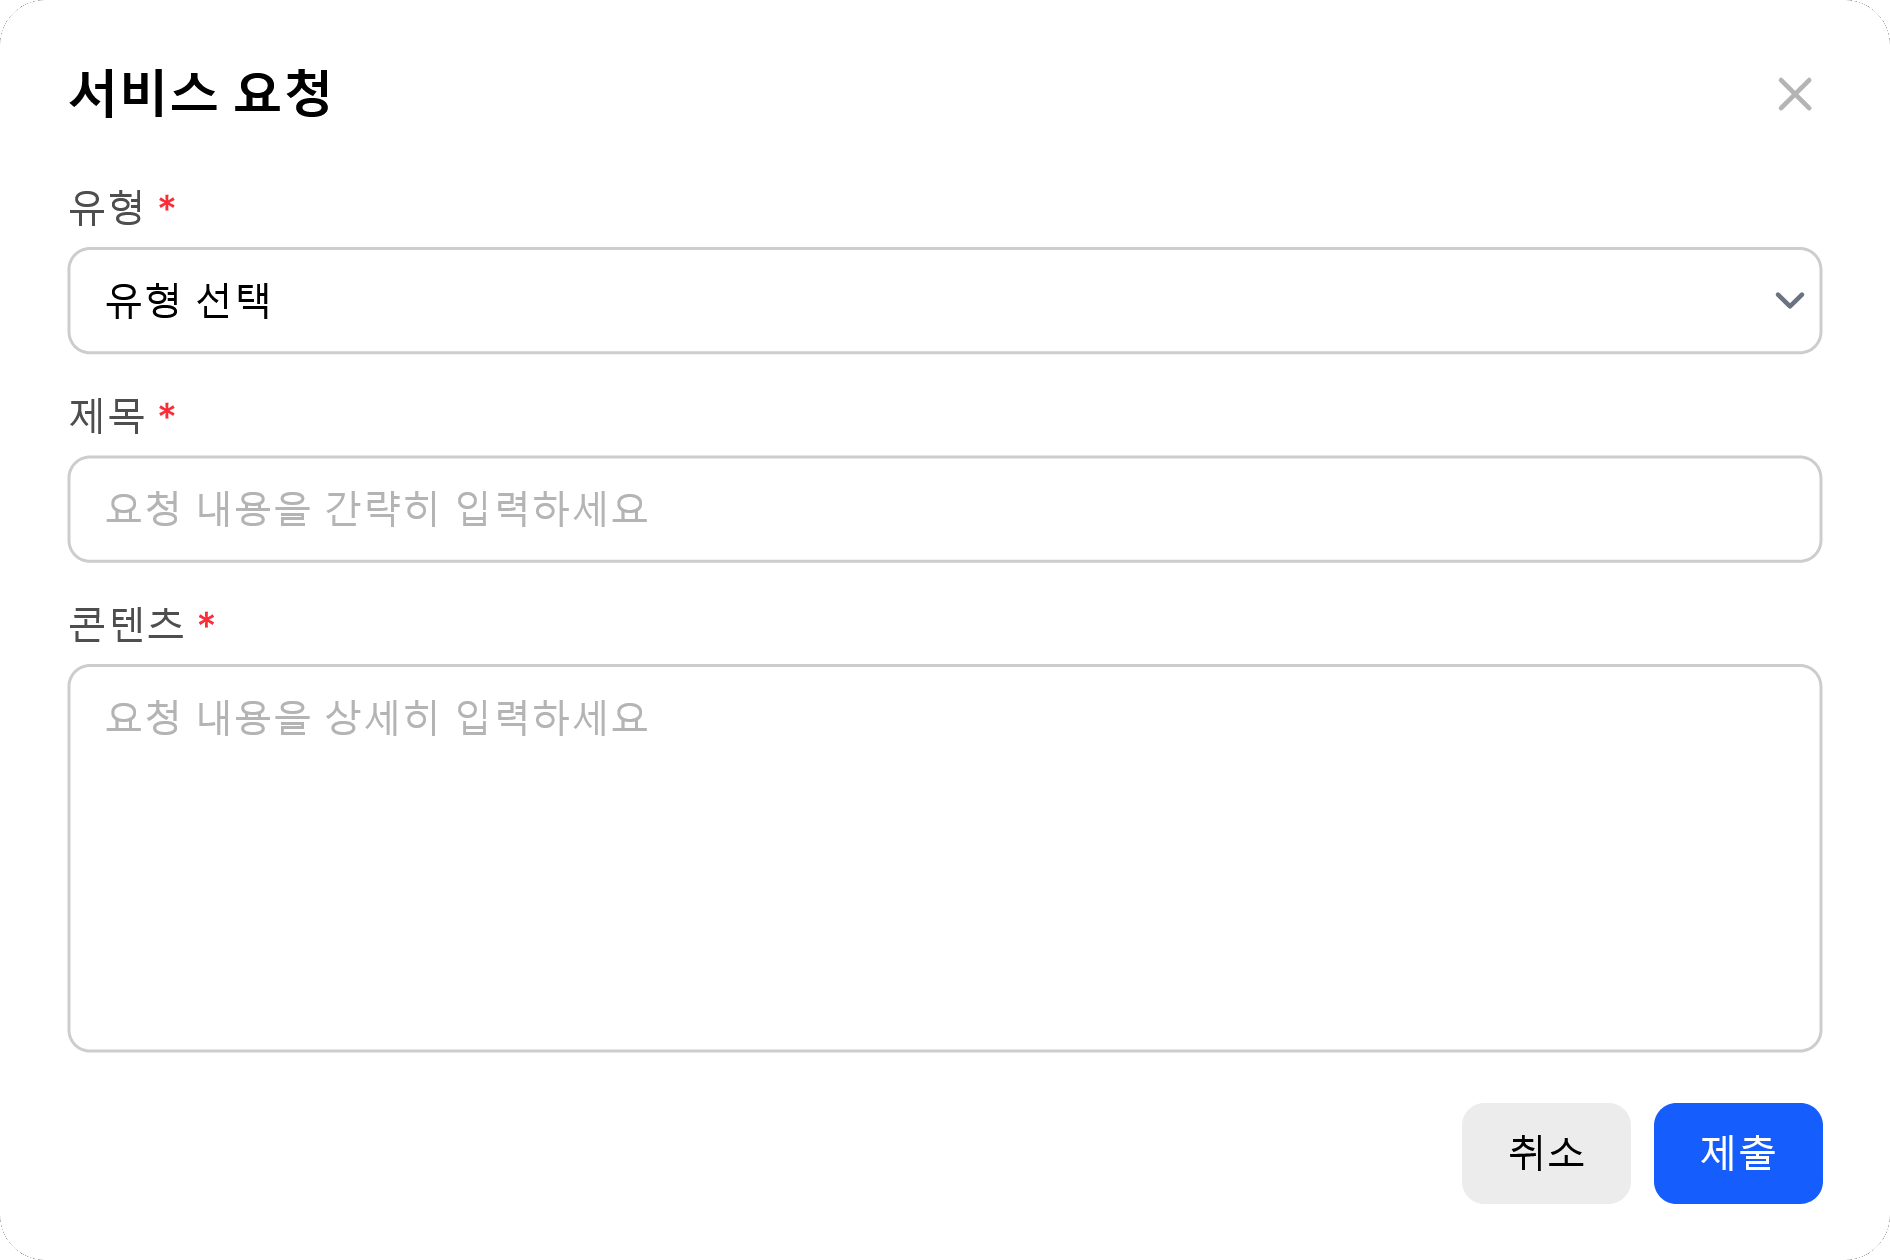
Requester name and email are auto-attached from sign-in info. SR is shown only to Admin role users.