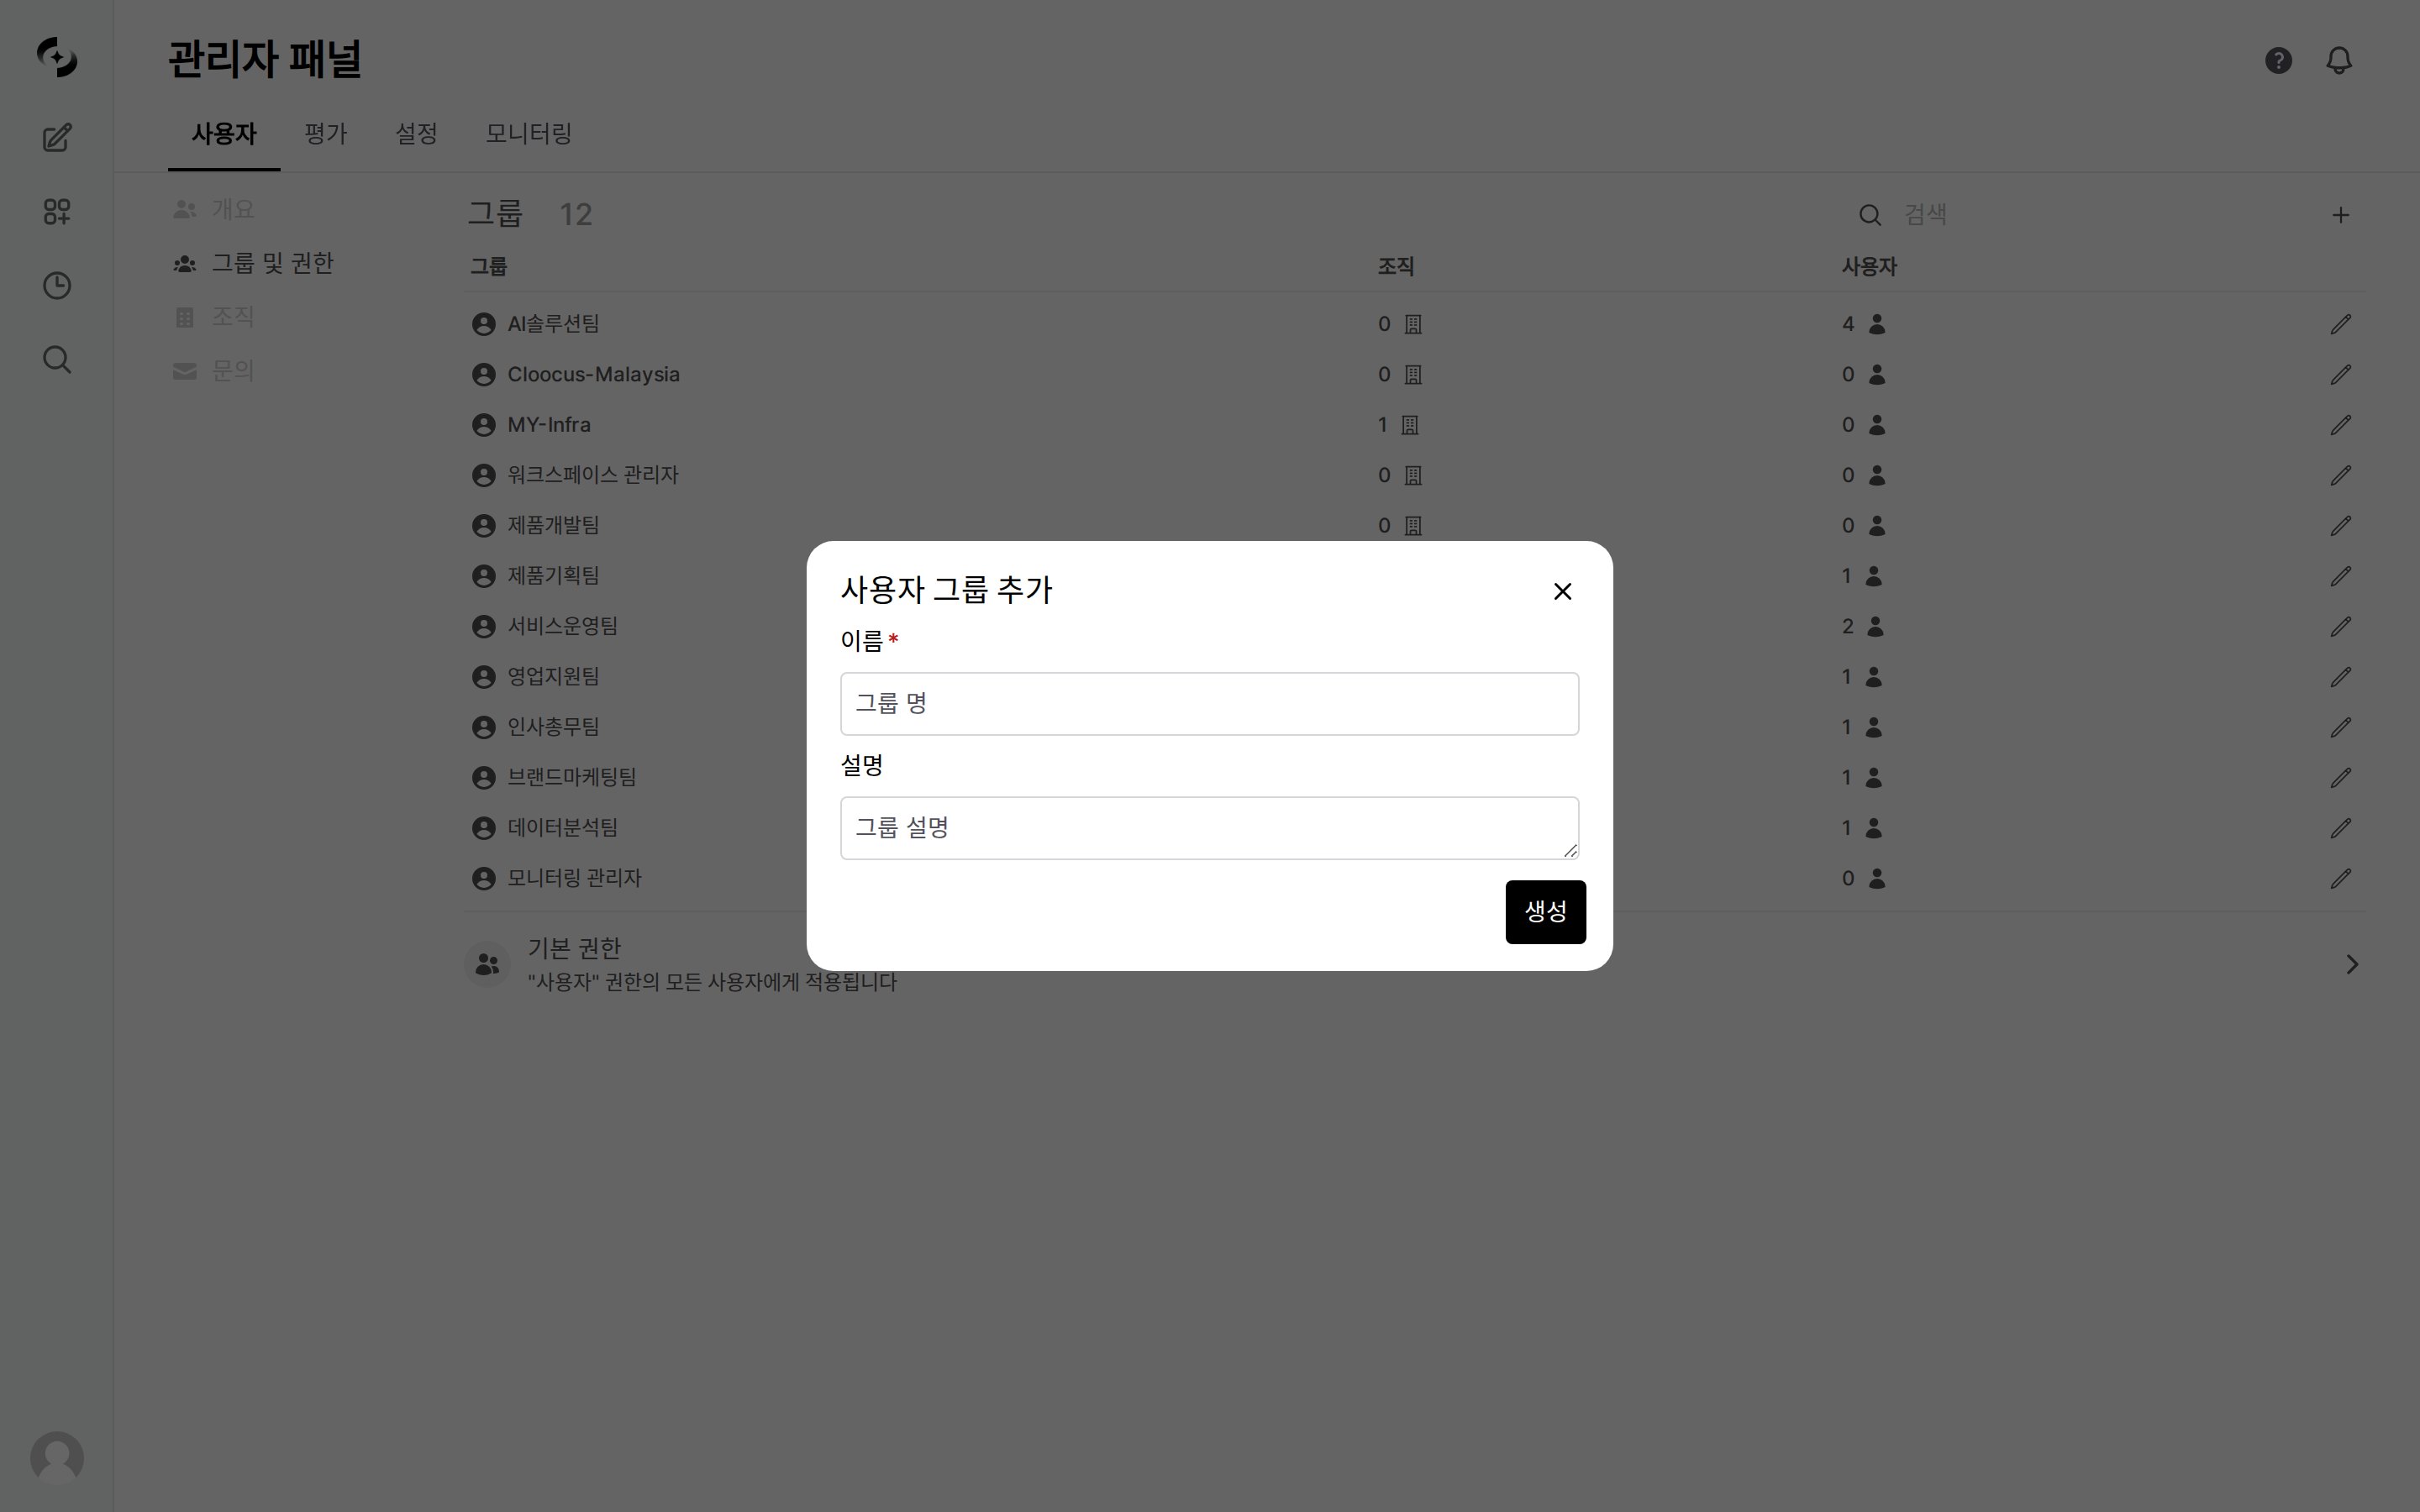
Pick the Groups & Permissions tab under Admin Panel > Users. The list shows each group name along with the number of linked organizations and member users.
2
Create a new group
Click the + icon (tooltip: “Create group”). The creation modal only takes the group name (e.g., “Marketing Team”) and description.
Click '+' on the group list → Add User Group modal
3
Edit group — detailed settings
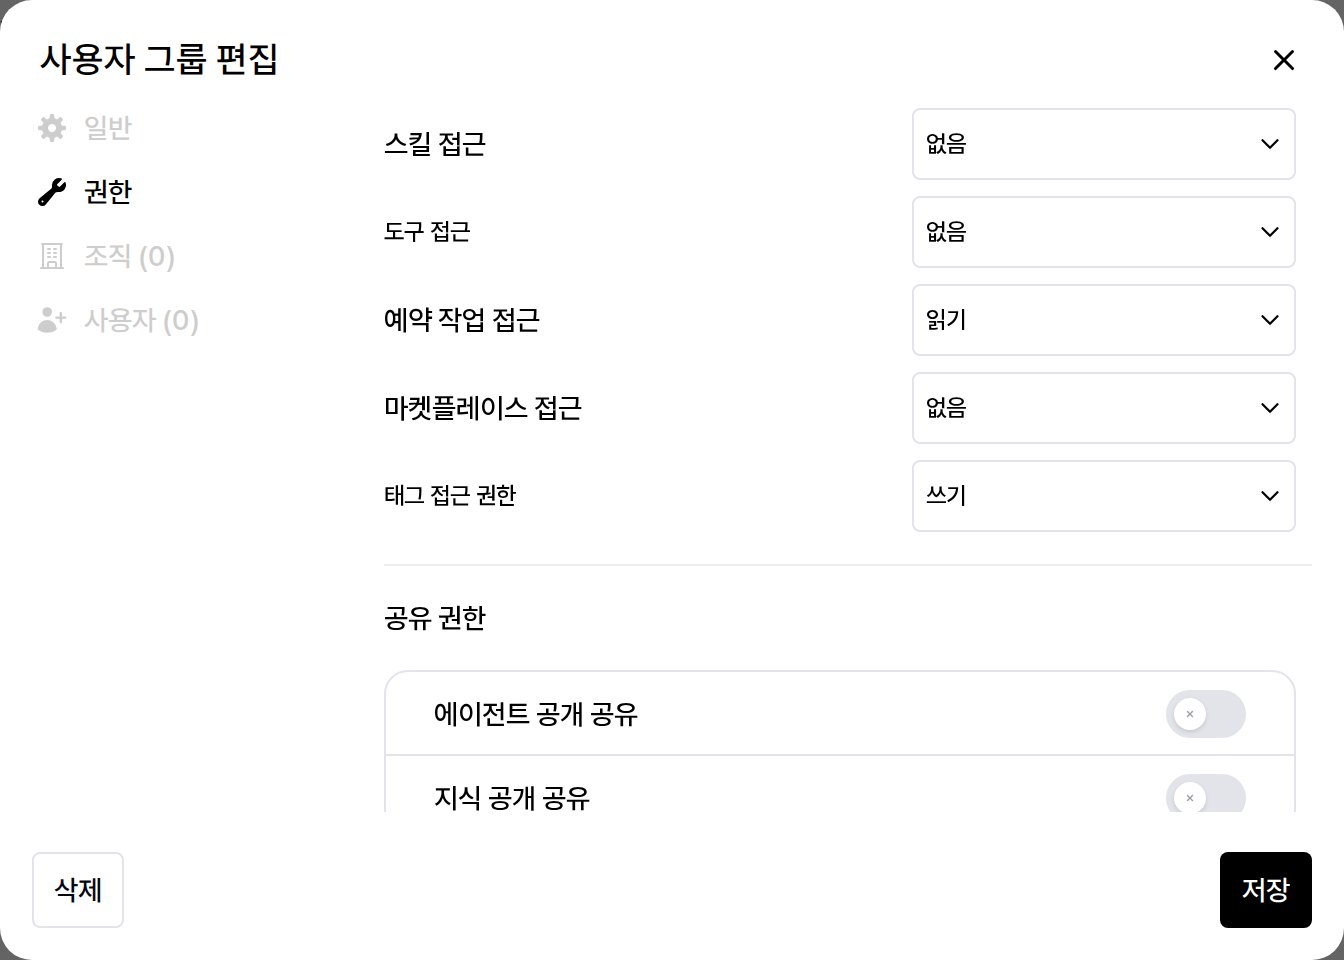
Open the created group to configure details in the edit modal’s General / Permissions / Organization / Users tabs.
Tab
Settings
General
Edit name/description, select the chat guardrails to apply to this group
Link the group to an organizational unit (OU). The number in parentheses is the count of currently linked OUs
Users (N)
Search and add users to the group. The number in parentheses is the count of current members
4
Connect to Organizational Unit (optional)
In the edit modal’s Organization tab, link this group to a specific organizational unit. All users in the linked OU automatically get the group’s permissions — useful for applying the same permission set to an entire department.
Linking the “Marketing Team” group to “Company / Marketing Division” OU automatically grants permission to new employees as IdP sync adds them to Marketing Division.
These are the levels applied to Admin and Workspace permissions.
The available levels vary by item.
Level
Description
None
Cannot access the feature
Access
Entry only (no detail view or change) — applies to Admin permission items only
Read
View list and details
Write
View + create/edit/delete
Permission category
Available levels
Admin — User management, Evaluation, Settings
None / Access / Read / Write
Admin — Monitoring
None / Access / Read (no Write; read-only area)
Workspace permissions
None / Read / Write (no Access)
Workspace permissions detail (13)
Set each item to None, Read, or Write (no Access level). Read allows viewing; Write allows create/edit/delete.
Item
Default
Agent access
None
Flow access
None
Knowledge Base access
None
Database access
None
Glossary access
None
Knowledge Graph access
None
Guardrail access
None
Prompt access
None
Skill access
None
Tool access
None
Scheduled task access
Read
Marketplace access
None
Tag access permission
Write
Default is the value filled in when you create a new group. Only Scheduled task access and Tag access permission start out open; everything else is None.
Tool access and Tag access permission carry explanatory tooltips on screen.
Tool access — a warning that granting Write lets users upload arbitrary code to the server
Tag access permission — Read views and assigns existing tags; Write also creates, edits, and deletes them
Admin permissions detail (4)
You can delegate parts of admin features to regular users.
The number of usable levels varies by permission item.
User management, Evaluation, and Settings — None, Access, Read, Write (4 levels)
Monitoring — None, Access, Read (3 levels; no Write, as it’s a read-only area)
Permission
None
Access
Read
Write
User management access
No access
Enter menu
View user list and details
Create/edit/delete
Evaluation access
No access
Enter menu
View evaluations
Configure/run evaluations
Settings access
No access
Enter menu
View setting values
Change settings
Monitoring access
No access
Enter menu
View monitoring
— (none)
Sharing/Chat/Feature permissions detail
All are ON/OFF toggles.Sharing permissions (6)
Public agent sharing, public knowledge sharing, public prompt sharing, public tool sharing, public database sharing, public glossary sharing
Multi-model, temporary chat, force temporary chatForce temporary chat appears on screen only while Allow temporary chat is on. Turning temporary chat off hides this item as well.
Set default permissions applied to users not in any group.
Configure them under Default Permissions at the bottom of the group list; they apply to all users with the User role.
Default permissions are the initial permissions for users not in any group. Per least-privilege principle, set defaults restrictively and grant additional permissions through groups as needed.
In the Organization tab of the edit modal (Edit User Group), you can map this group to one or more organizational units (OUs).
All members of mapped OUs automatically inherit the group’s permissions, so when IdP sync adds a new employee to an OU, permissions apply without any manual action.
Field
Description
Tab location
Edit User Group → General / Permissions / Organization / Users
Selection
Multi-select checkboxes. Search box filters OUs by name, display name, or description
Mutual exclusivity
Each OU can be assigned to only one group. OUs already claimed by another group are automatically excluded from the list
Displayed info
OU display name + internal name, member count, Assigned badge for OUs already attached to the current group
Save behavior
Mappings are persisted when you save the group — not the moment you tick a checkbox
OUs themselves are imported via IdP sync (Entra/Google Workspace OIDC) or created manually under Admin > Organizations. See Organization Management for OU creation and sync.
Mapping the “Marketing” group to the “Company / Marketing” OU means that the moment IdP adds a new hire to the Marketing OU, they receive the group’s permission set automatically — eliminating the operational overhead of adding/removing users from groups one by one.