In Admin > Users, manage all platform users, groups, and organizations. Role-based access control with fine-grained per-group permissions enables systematic user management at any organization scale.
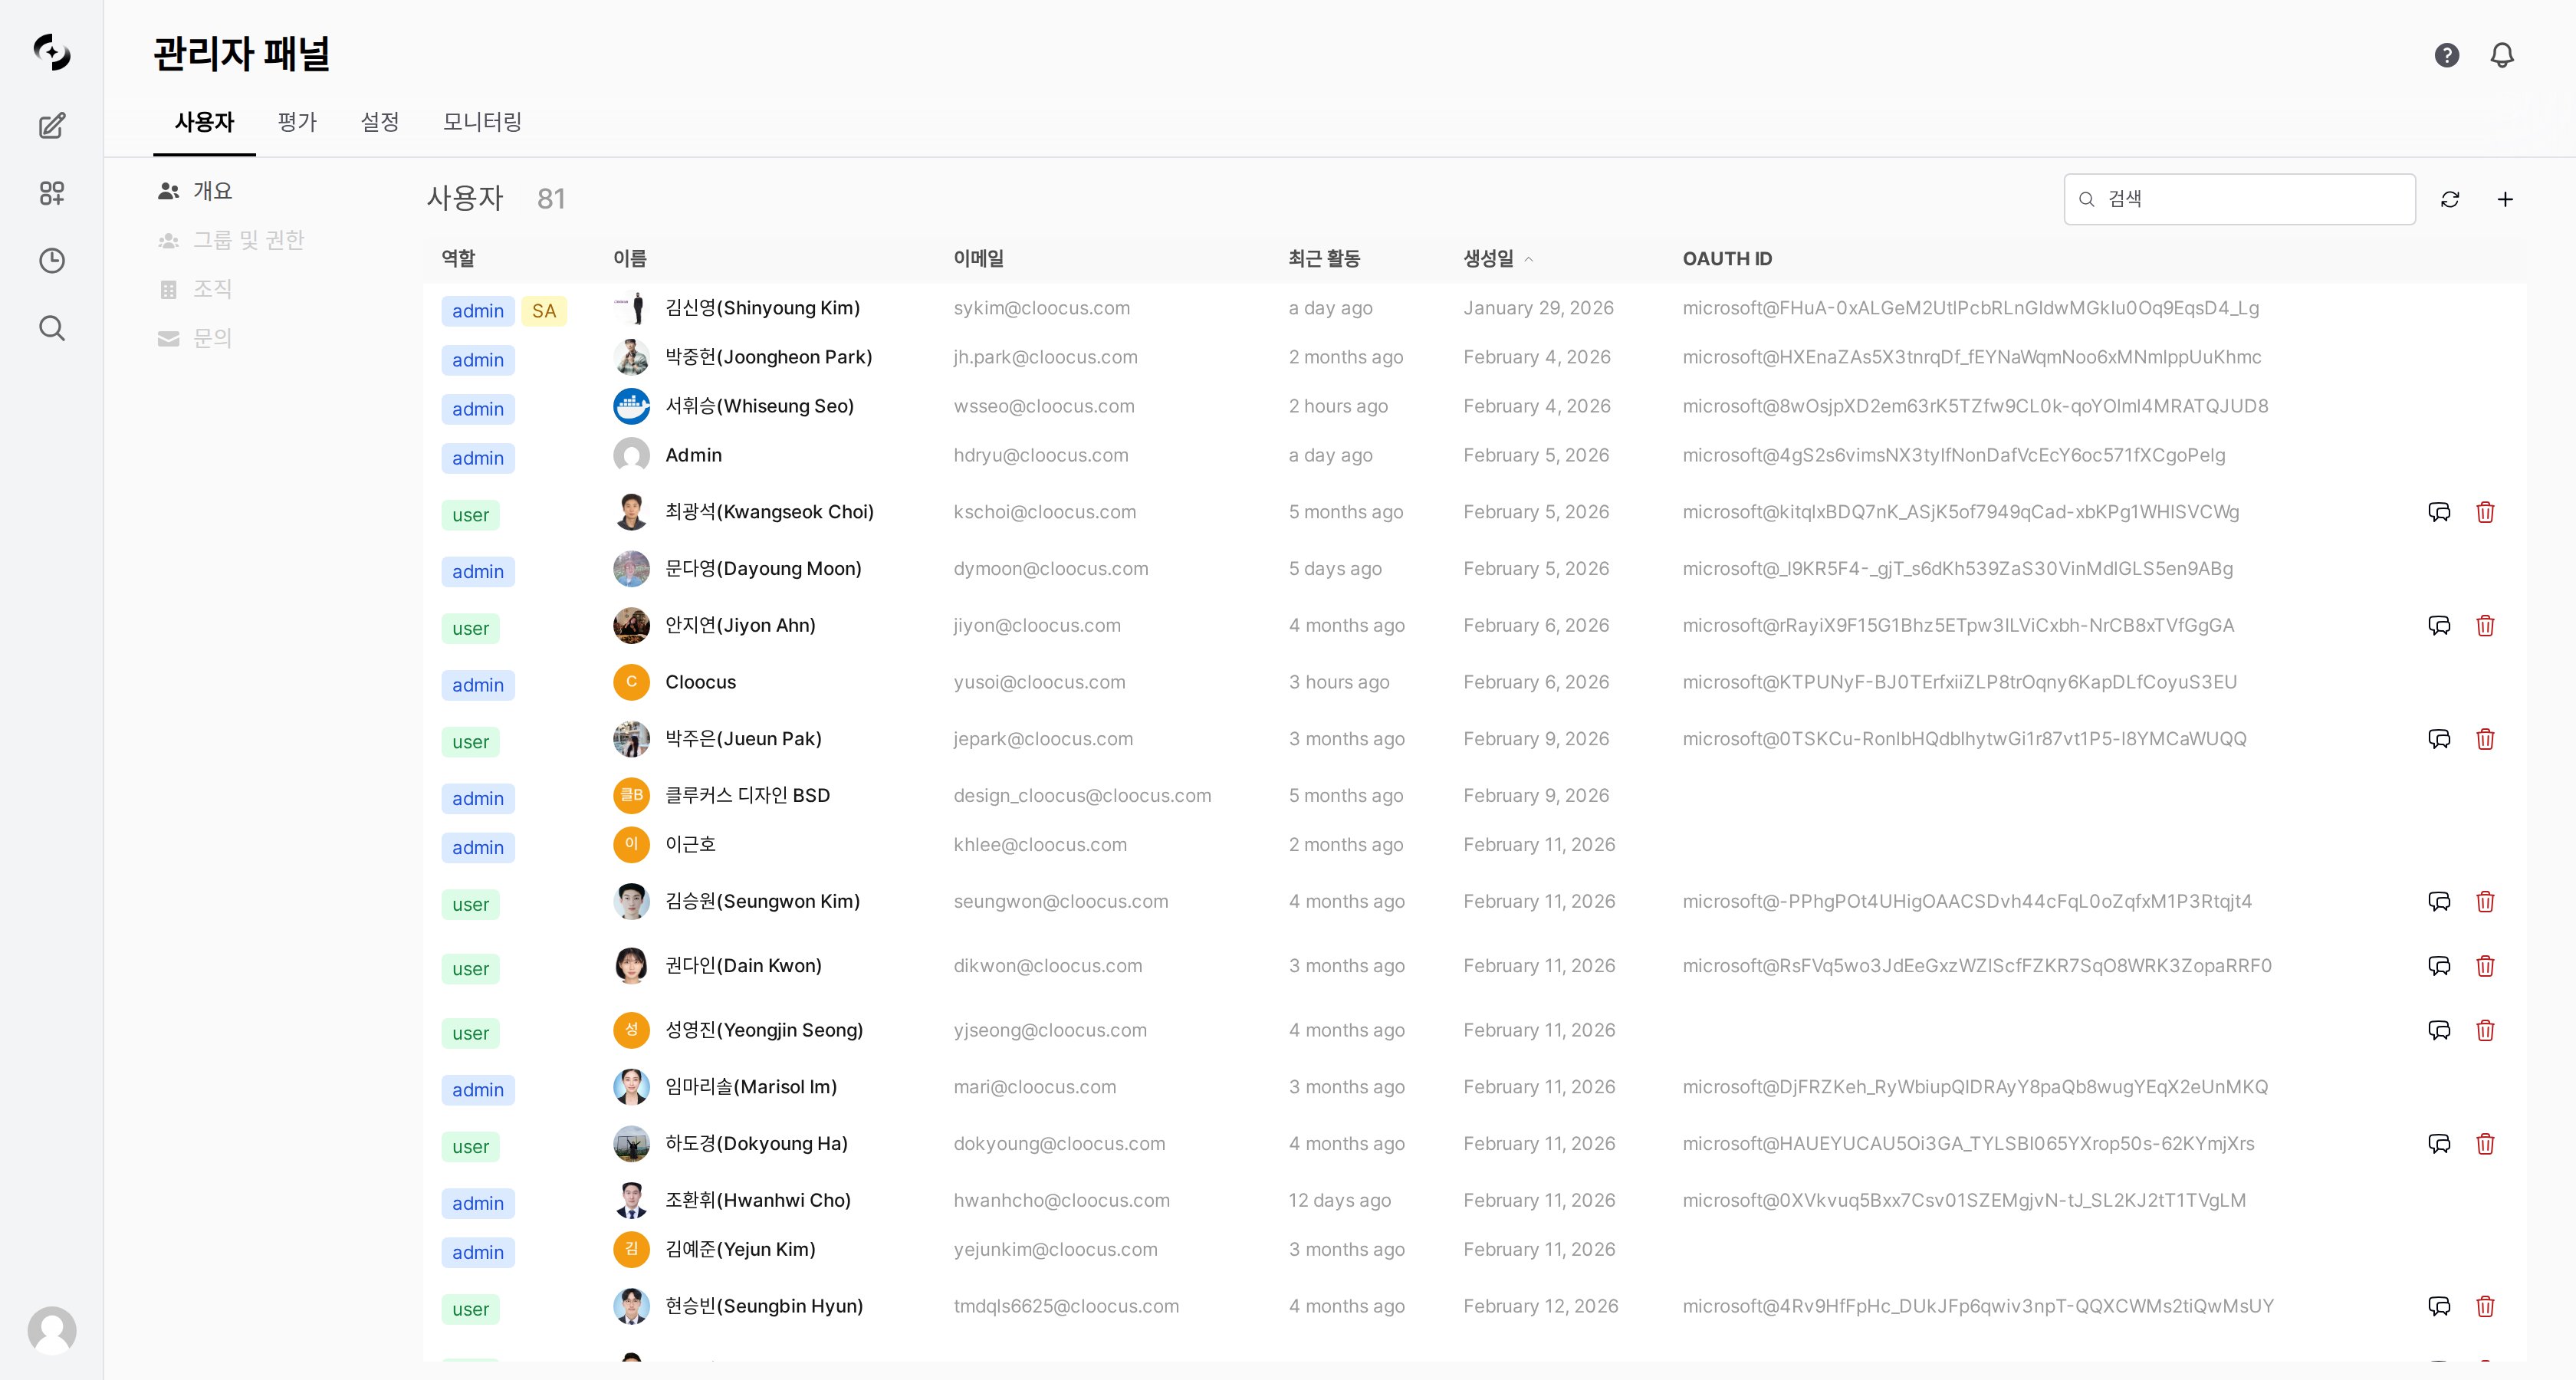
User management main screen

Tabs

The user management screen has four tabs.
TabDescription
OverviewView, add, edit, delete individual users
GroupsCreate and manage permission groups
OrganizationsManage organizational units based on Entra ID sync (see Organization Management)
InquiriesReceive and respond to user inquiries

User List

View and Search Users

Users appear as a table with these columns.
ColumnDescription
NameUser display name
EmailSign-in email address
RoleAdmin, User, Pending
OAuth IDExternal authentication ID for SSO
Last activityMost recent access time
JoinedAccount creation date
Search:
  • Real-time search by name or email
  • Sort by name, joined date, or last activity

User Roles

Cloosphere has three roles.
RoleDescriptionAdmin PanelWorkspaceChat
AdminFull management permissionFull accessFull accessFull access
UserRegular userPer groupPer groupPer group
PendingAwaiting approvalNo accessNo accessNo access
The Admin role can access all settings and data. Grant to minimum users only.

Super Admin (SA)

New feature — Designate one Admin as Super Admin (SA).
SA isn’t a separate role but a feature to mark the representative admin among Admins. The SA’s email is shown as contact info on the account activation pending screen after sign-up.
ItemDescription
TargetAdmin role users only
How to assignClick Set as SA in the user edit modal
DisplaySA badge shown in the user list
EffectThe admin’s email is shown on the account activation pending screen
Only 1 SA can be designated. Designating a new user as SA auto-removes the existing one. Only Admins can designate SA.

Changing Roles

1

Pick the user in the list

Click the edit button on the user row.
2

Change role

Open the role dropdown in the edit modal and pick a new role.
3

Save

Click Save to apply the change.
User edit modal
You can’t change your own role. The first user (First User)‘s role also can’t be changed.
User role changes are auto-recorded in the audit log (ROLE_CHANGE event). Track who changed whose role when and how in Monitoring > Audit Logs.

Adding and Editing Users

Adding a User

Click the + icon (tooltip: “Add user”) to manually create a user.
FieldDescriptionRequired
EmailSign-in email address
NameDisplay name
PasswordInitial password
RoleAdmin / User / Pending
To register many users at once, use CSV file import. Pick the CSV upload option in the user add modal.

Editing a User

Click the user’s name or thumbnail, or the edit button on the row, to open the edit modal. Editable items:
  • Name
  • Email
  • Role
  • Profile image URL
  • New password
  • Member groups — view groups the user belongs to and add/remove
  • Member organizational units (OU) — read-only display of the user’s OU tree (Entra/Google Workspace sync result)
Organizational units are shown read-only in the user edit screen. OU membership is determined by external IdP sync — to modify directly, change IdP sync settings in Organization Management.

Deleting a User

Deleting a user permanently removes all the user’s chat history, settings, and data. This action is irreversible.

User Chats

Admins can view a user’s chat list. Click the Chats button on the user row.

Usage Limits

Set per-user daily token usage limits. Set Daily token limit in the user edit screen.
SettingDescription
Daily token limitMaximum tokens usable per day (0 = unlimited)
Daily usageTokens used so far (read-only)
Usage limits can be set at four levels — global, user, group, organization. When set at multiple levels, the most permissive (highest) value applies.

Group Management

Groups bundle users for unified permission management. Design groups by department, role, project, etc., to match your organization.

Why Groups?

Per-userPer-group
Set permissions per user individuallySet once on the group, applies to everyone
Edit one by one when changingEdit only the group setting
Becomes complex as users growScales systematically

Creating a Group

1

Select the Groups tab

Pick the Groups tab in user management.
2

Create a new group

Click the + icon (tooltip: “Create group”).
3

Enter group info

Enter group name (e.g., “Marketing Team”) and description.
4

Add members

Search for users in the Members tab and add to the group.
5

Connect to Organizational Unit (optional)

In the Organization Assignment area, link this group to a specific organizational unit. All users in the linked OU automatically get the group’s permissions — useful for applying the same permission set to an entire department.
Linking the “Marketing Team” group to “Company / Marketing Division” OU automatically grants permission to new employees as IdP sync adds them to Marketing Division.

Group Permission Settings

Configure detailed permissions per group. All permissions are split into 4 levels.
Group permission settings

Permission Levels

LevelDescription
NoneCannot access the feature
AccessView list (no detail access)
ReadView list + view details
WriteView + create/edit/delete
PermissionNoneAccessReadWrite
AgentsNo accessList onlyView detailCreate/edit
Knowledge BaseNo accessList onlyView detailCreate/edit
PromptsNo accessList onlyView detailCreate/edit
ToolsNo accessList onlyView detailCreate/edit
DatabaseNo accessList onlyView detailCreate/edit
GlossaryNo accessList onlyView detailCreate/edit
GuardrailsNo accessList onlyView detailCreate/edit
Flow accessNo accessList onlyView detailCreate/edit
You can delegate parts of admin features to regular users.
PermissionNoneAccessReadWrite
User managementNo accessView user listView detailCreate/edit/delete
Settings accessNo accessView settings listView setting valuesChange settings
EvaluationsNo accessView evaluation listView detailChange settings
MonitoringNo accessView monitoringView detail
Sharing permissions (ON/OFF):
  • Share agents, KBs, prompts, tools, databases, glossaries
Chat permissions (ON/OFF):
  • File upload, chat deletion, message editing, chat controls
  • Voice input (STT), voice output (TTS), voice calls
  • Multi-model concurrent use, temporary chat
Feature permissions (ON/OFF):
  • Direct tool server connection, web search, image generation, code execution

Default Permissions

Set default permissions applied to users not in any group. Click Default Permissions at the top of the Groups tab.
Default permissions are the initial permissions for users not in any group. Per least-privilege principle, set defaults restrictively and grant additional permissions through groups as needed.

Inquiry Management

Receive and respond to user inquiries to admins.

Sending User Inquiries

Regular users click Contact Admin in the bottom sidebar menu to send inquiries.
User inquiry modal
TypeSubtypeDescription
Usage limitLimit increase, limit checkToken limit related
FeatureChat, agents, KBs, databases, toolsFeature usage
BugChat error, agent error, upload error, etc.Error reports
AccountPermission request, account issueAccount/permission related
OtherImprovement, othersOther inquiries

Handling Admin Inquiries

Manage received inquiries in Admin > Users > Inquiries tab.
Inquiry management Kanban view
Drag cards across status columns (Open, In Progress, Resolved, Closed) to change status.
Status flow:
Admins can’t change directly to Closed. Only users can close their inquiries. Admins set Resolved so users can confirm and close themselves.

Best Practices

  1. Minimize Admins — Designate only essential users as admins
  2. Use Pending — Set new sign-ups to Pending and approve after review
  3. Periodic review — Periodically delete or deactivate (Pending) departed user accounts
  1. Department-based — Per-department groups (Marketing, Engineering, Sales, etc.)
  2. Role-based — Per-rank groups (Manager, Senior, Junior, etc.)
  3. Project-based — Project participant groups (temporary)
  1. Least privilege — Grant only minimum permissions needed for the job
  2. Group-first — Prefer group permissions over individual user permissions
  3. Periodic audit — Periodically review permission settings and revoke unnecessary

FAQ

Admin can set a new password in user edit. With SSO (Entra ID), contact your company’s IT department.
In the agent edit screen’s Access settings, specify the group or organization. Set visibility to “Private” and add the allowed groups.
Either delete the account or change the role to Pending to deactivate. Deletion also removes chat history — to preserve history, prefer Pending.