
- What documents were searched, what tools were invoked, what prompt was sent to the LLM — every step is transparently visible.
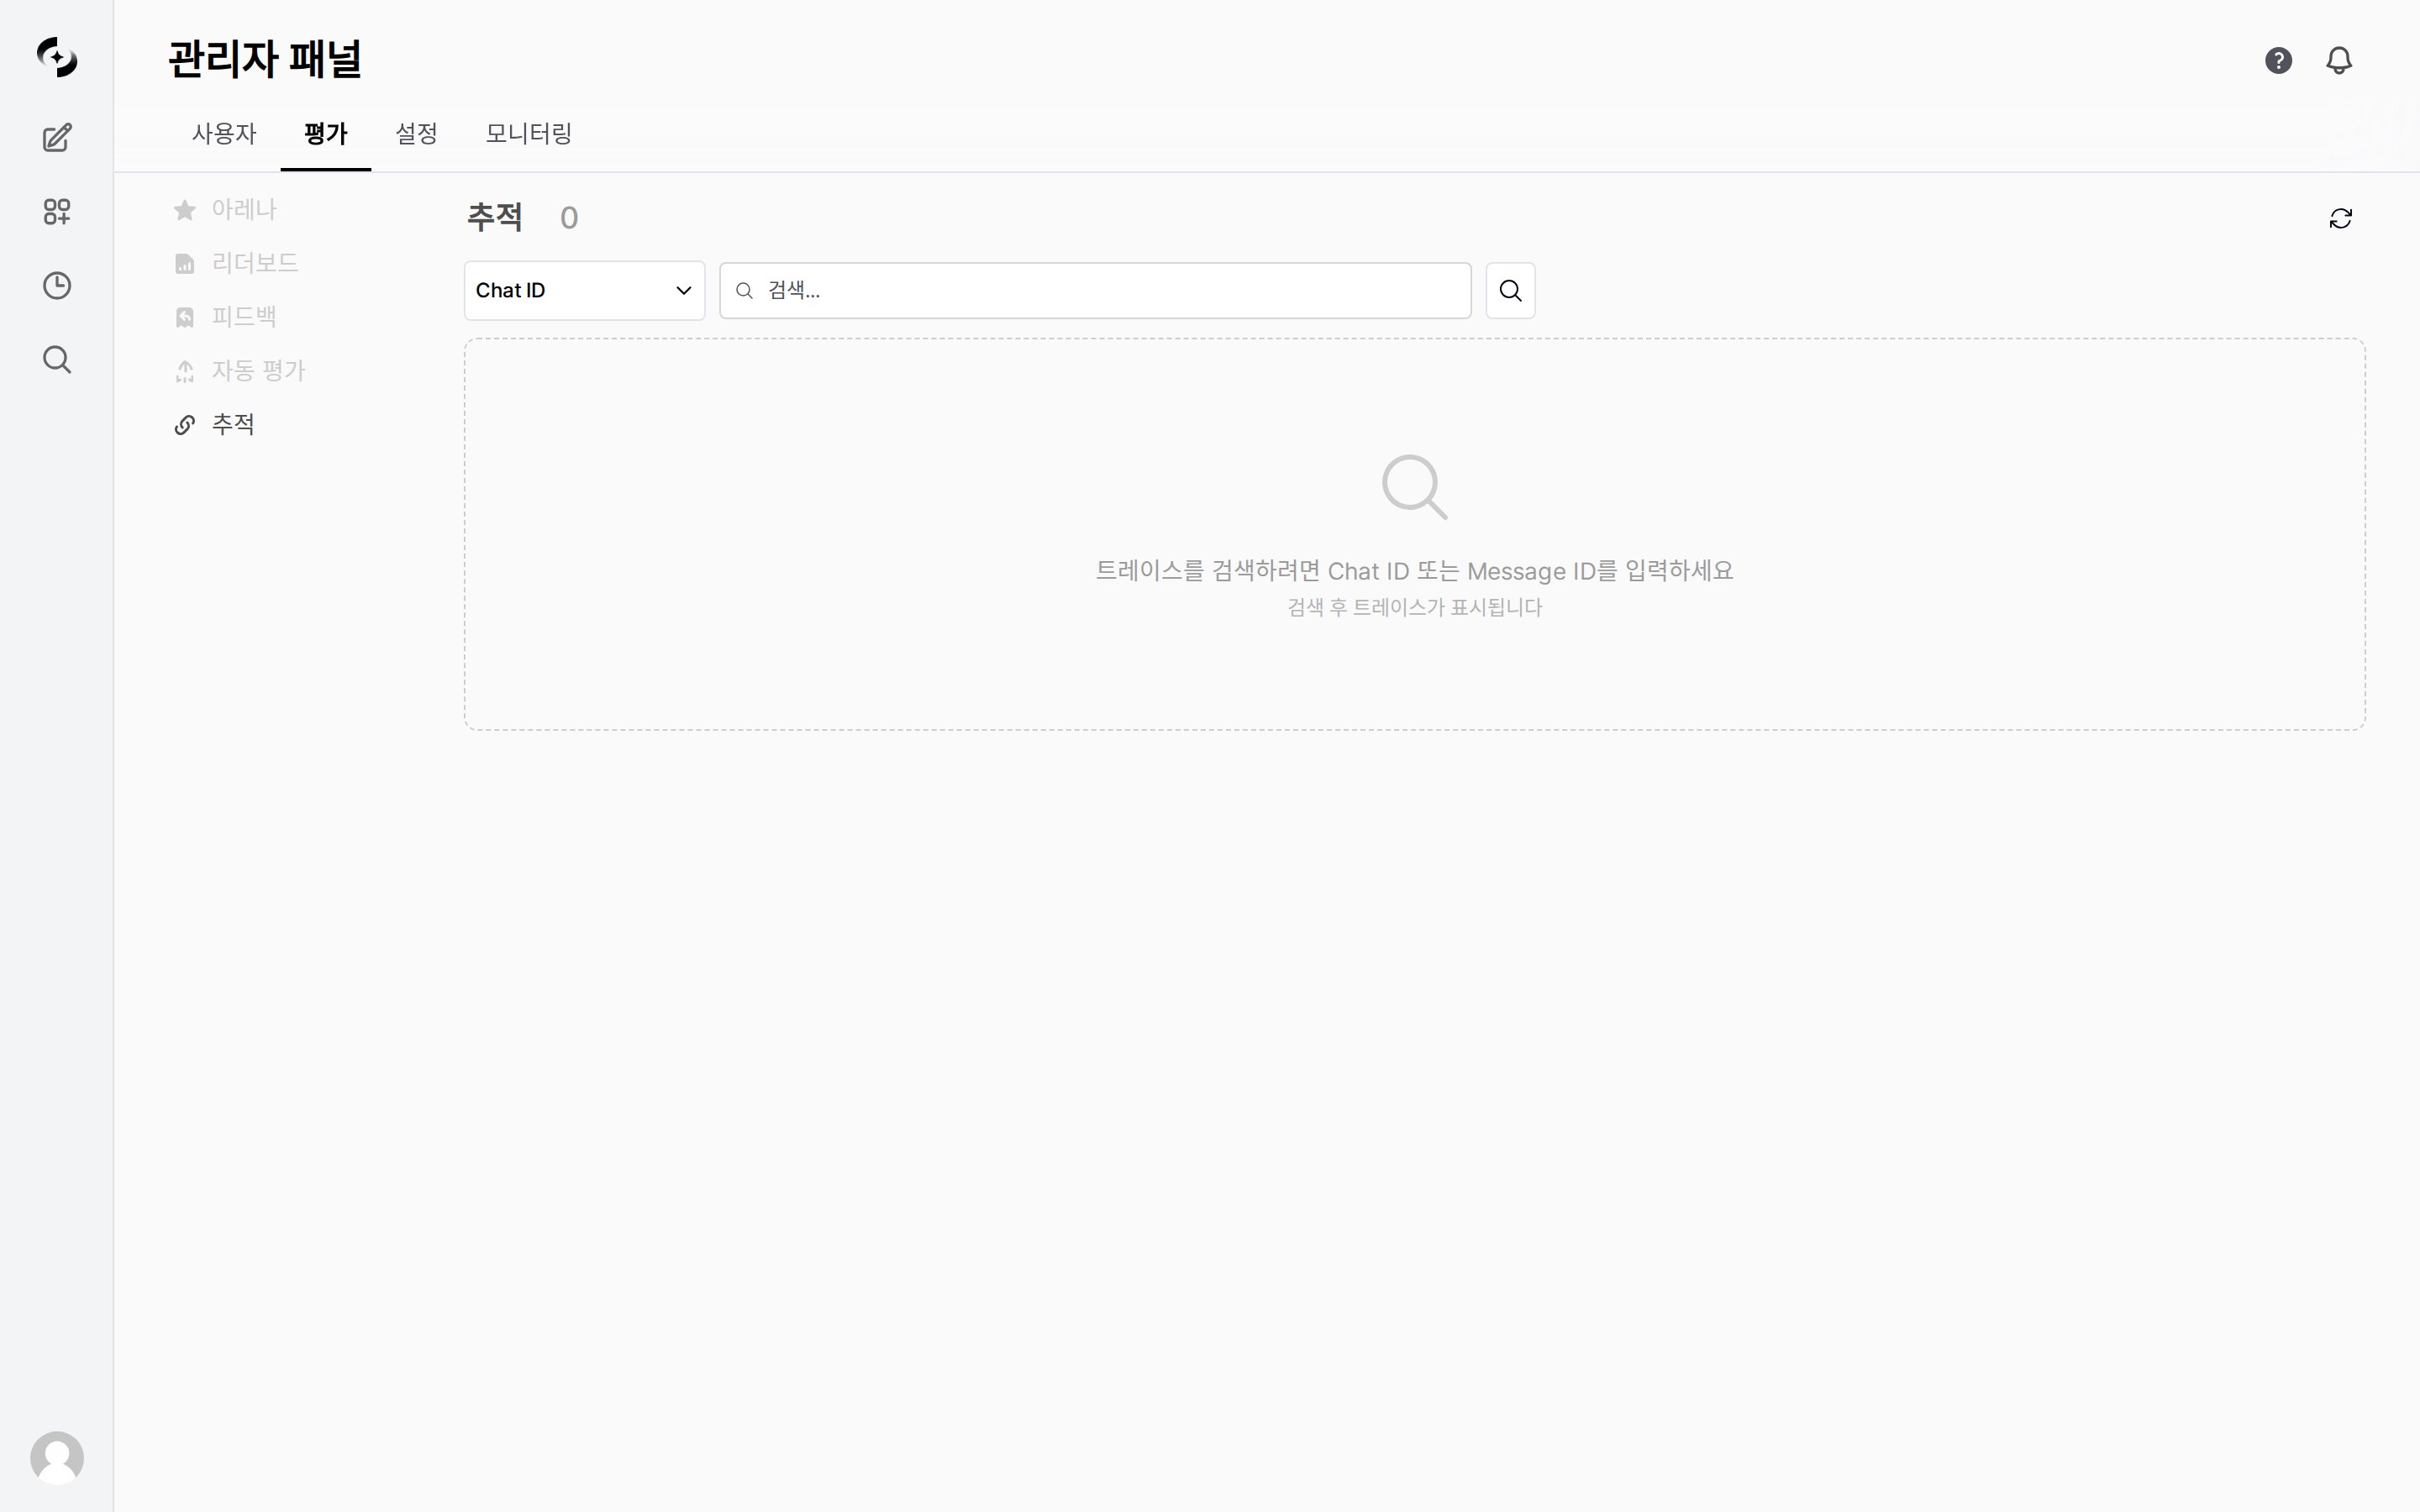
Admin > Evaluation > Tracing — search traces by Chat ID or Message ID
Agent answered “I can’t find that information”
trace feature enabled.Tracing Concepts
Processing a single user message involves multiple steps.- Tracing records all these steps in a Trace > Run hierarchy.
Tracing Entry Methods
All three paths lead to the same Evaluation › Tracing screen — buttons ① and ② navigate automatically when clicked, while ③ searches directly by ID.- ① From Conversation Logs (Admin)
- ② Directly from Chat
- ③ Search by ID
Open conversation logs
Select a conversation
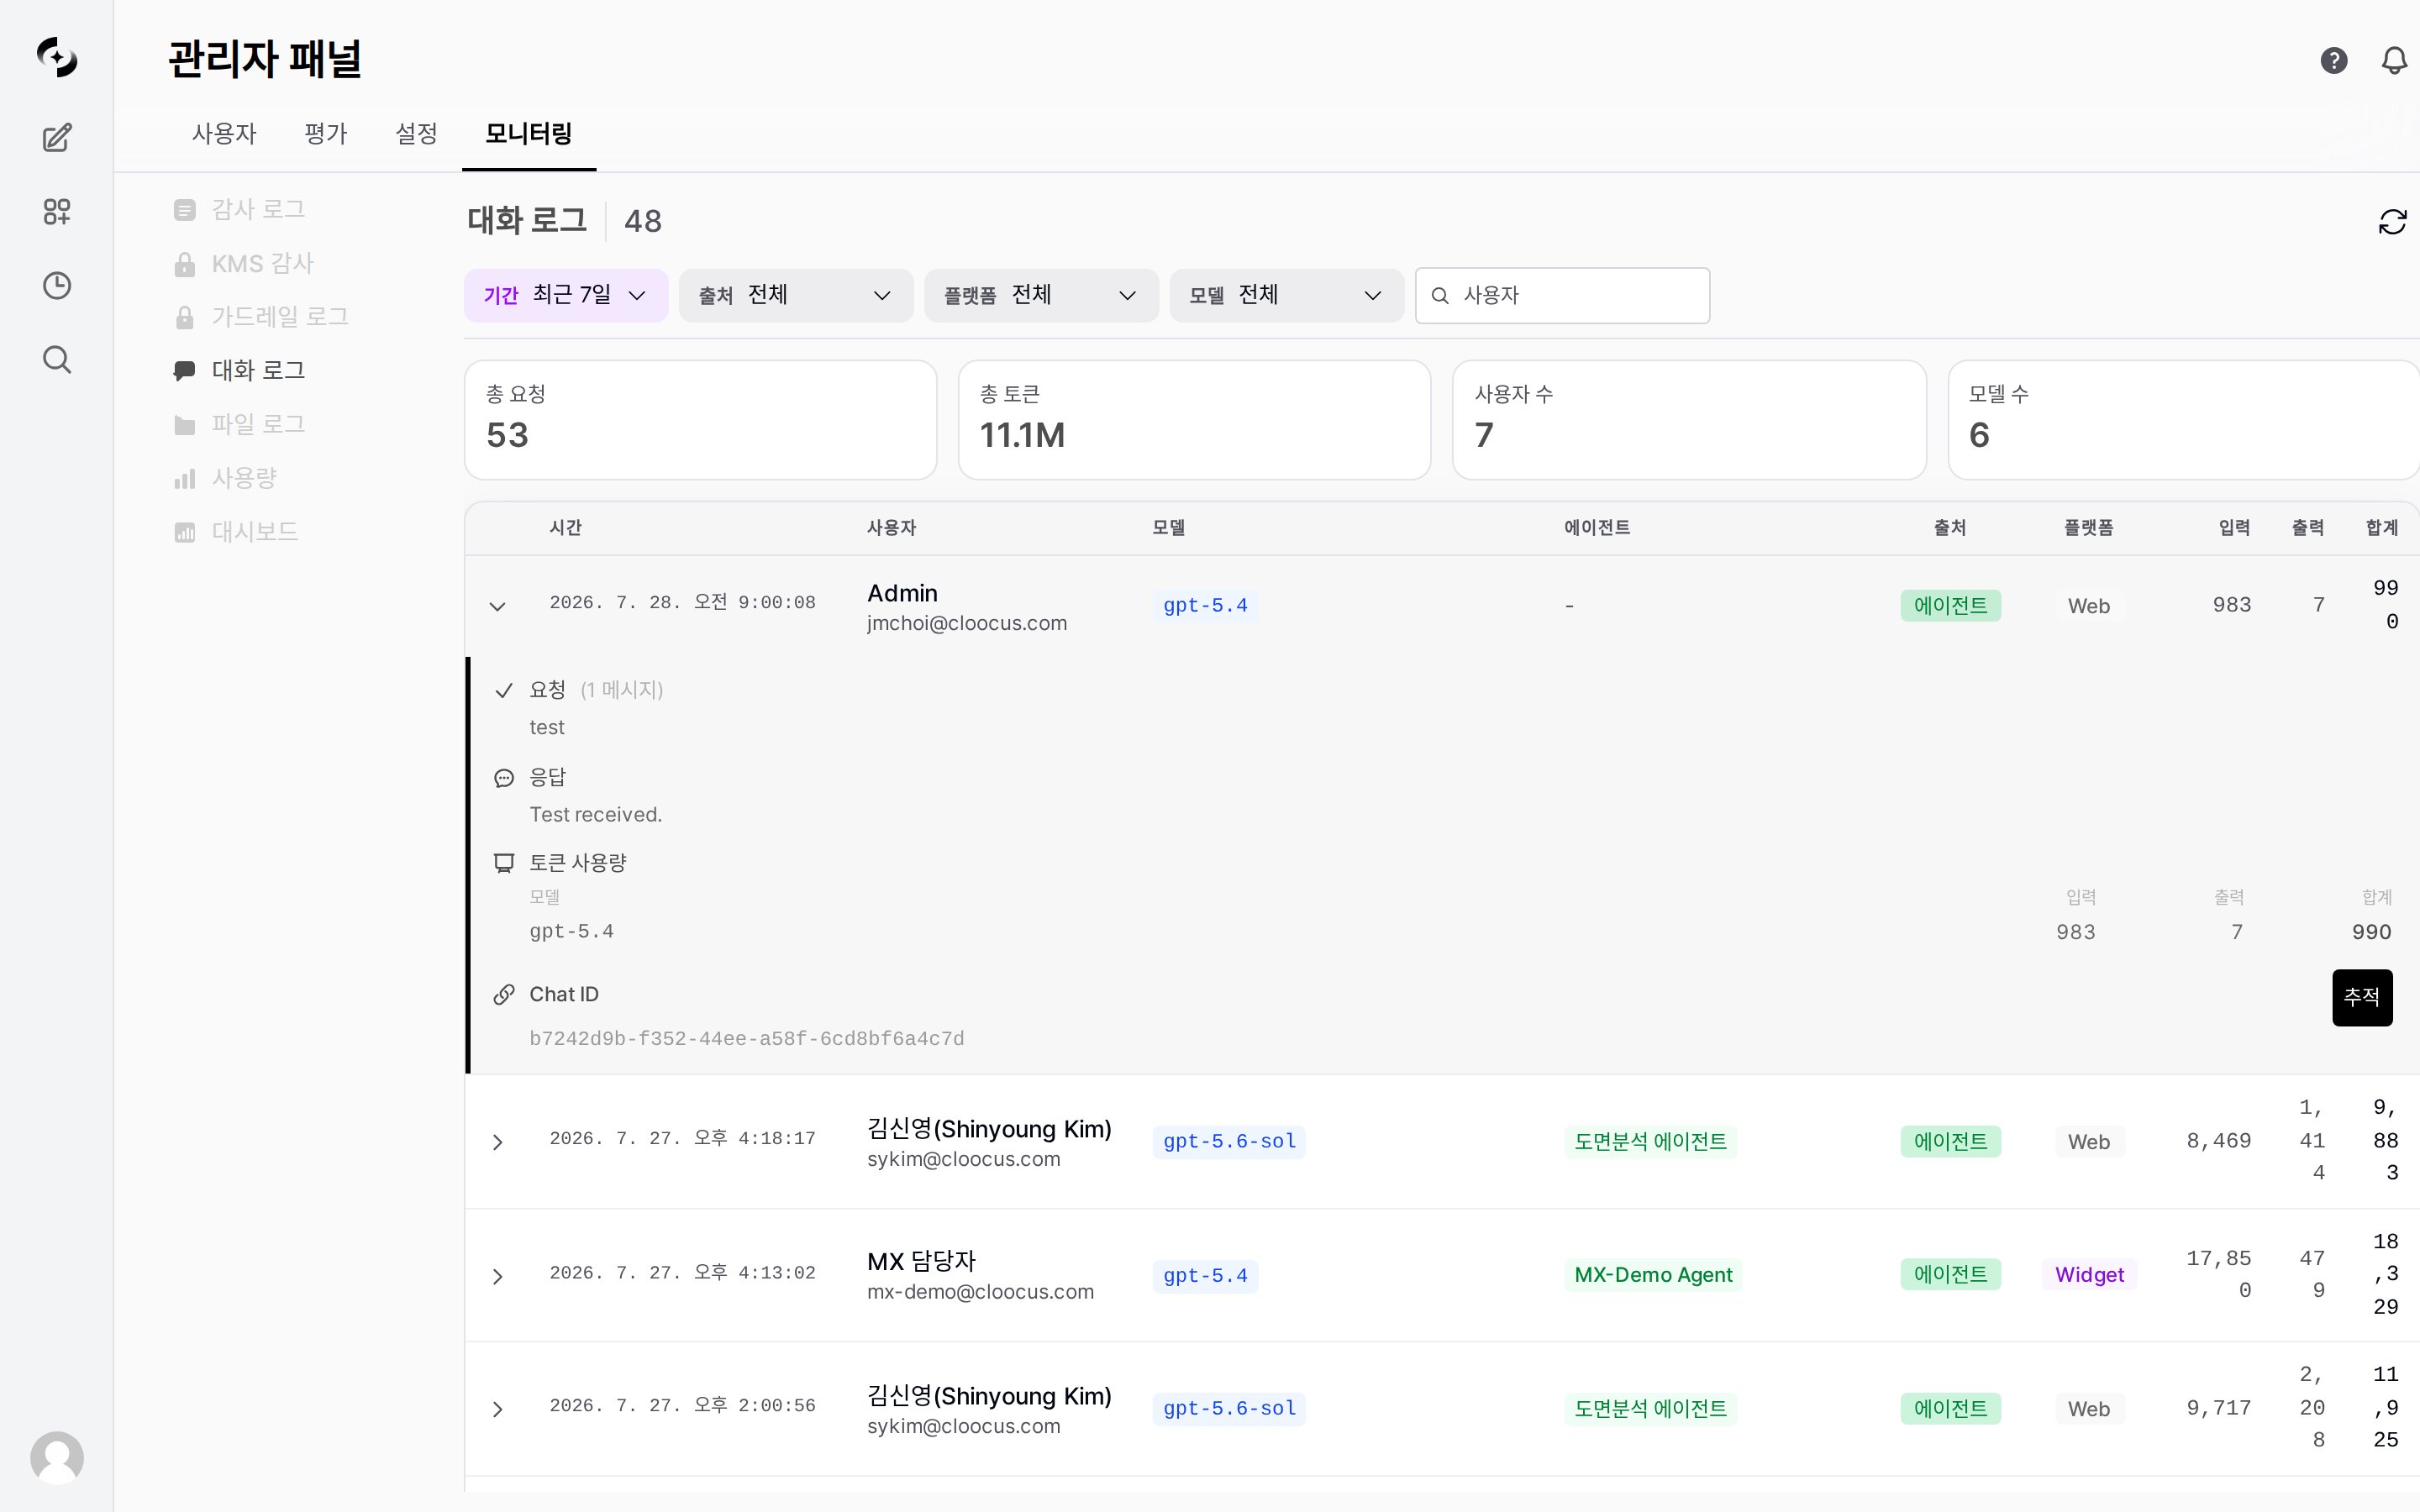
Expanding a conversation shows a 'Trace' button on the right
Arrive at Evaluation › Tracing
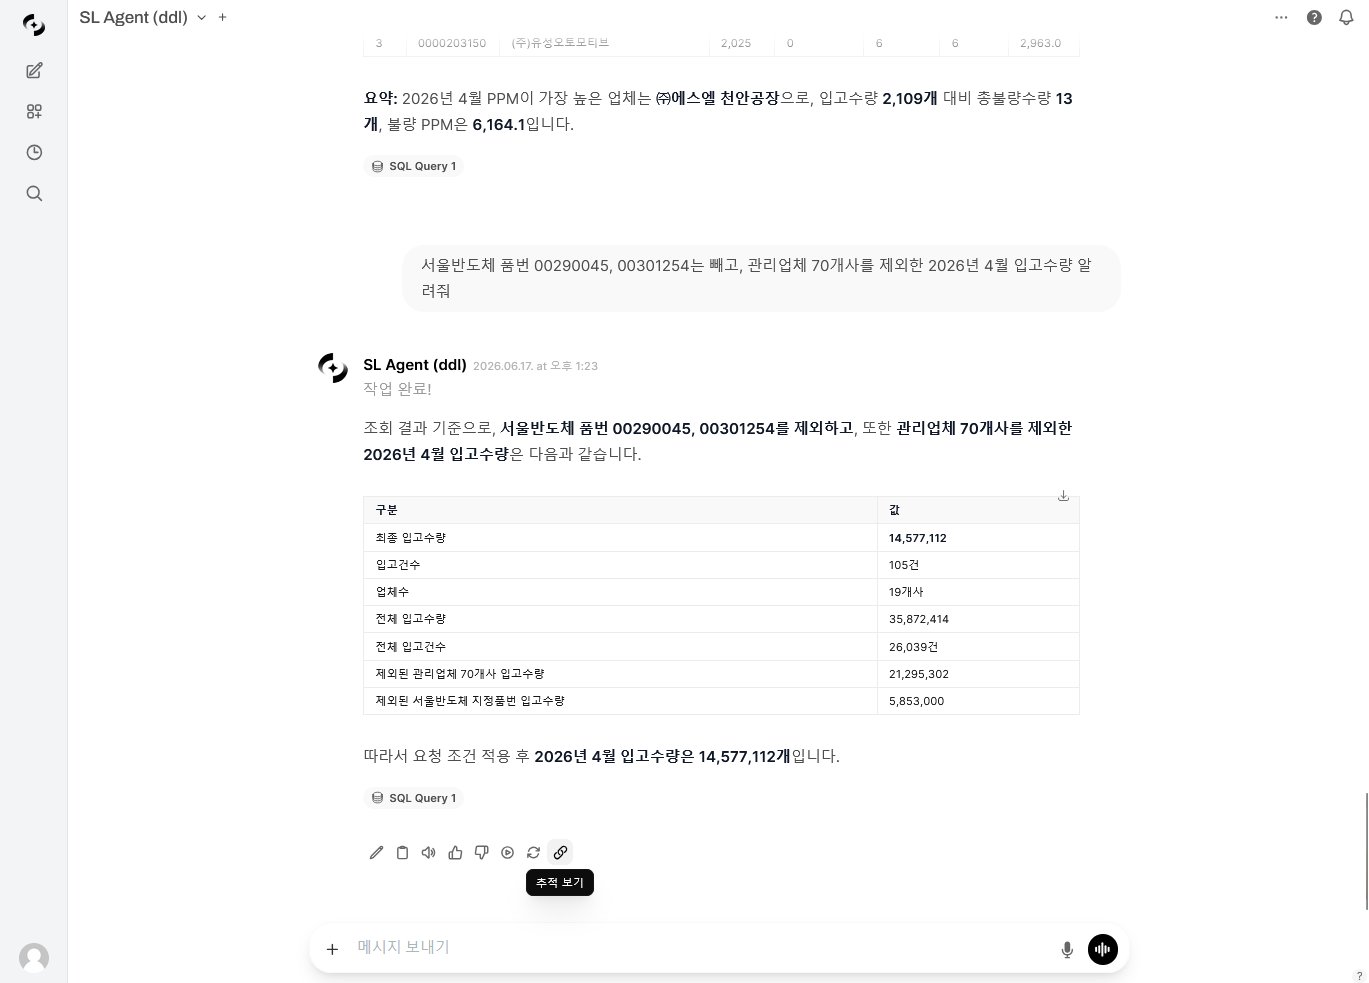
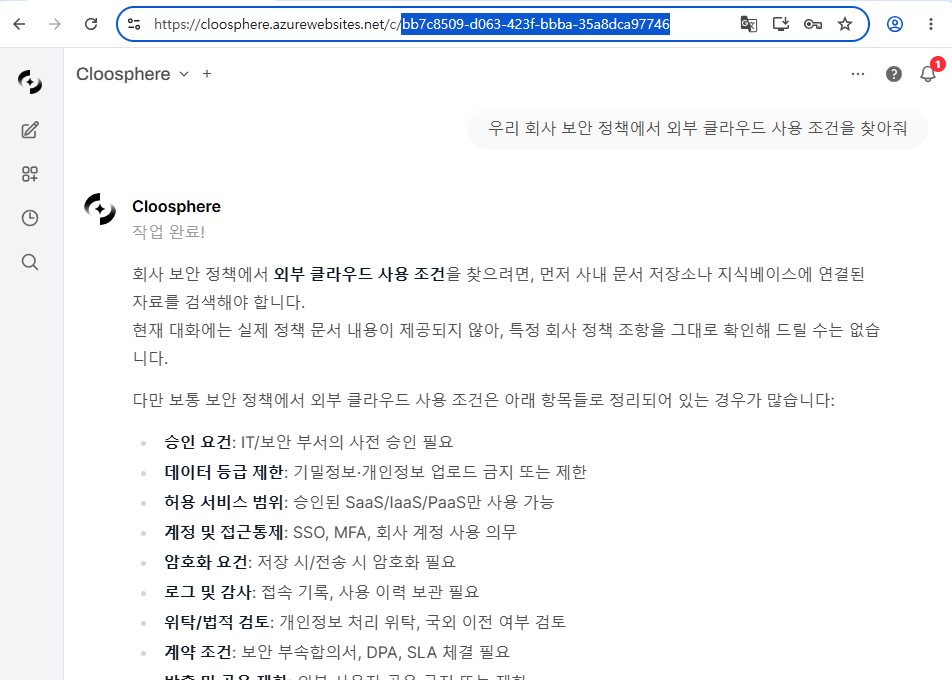
Destination · Evaluation › Tracing
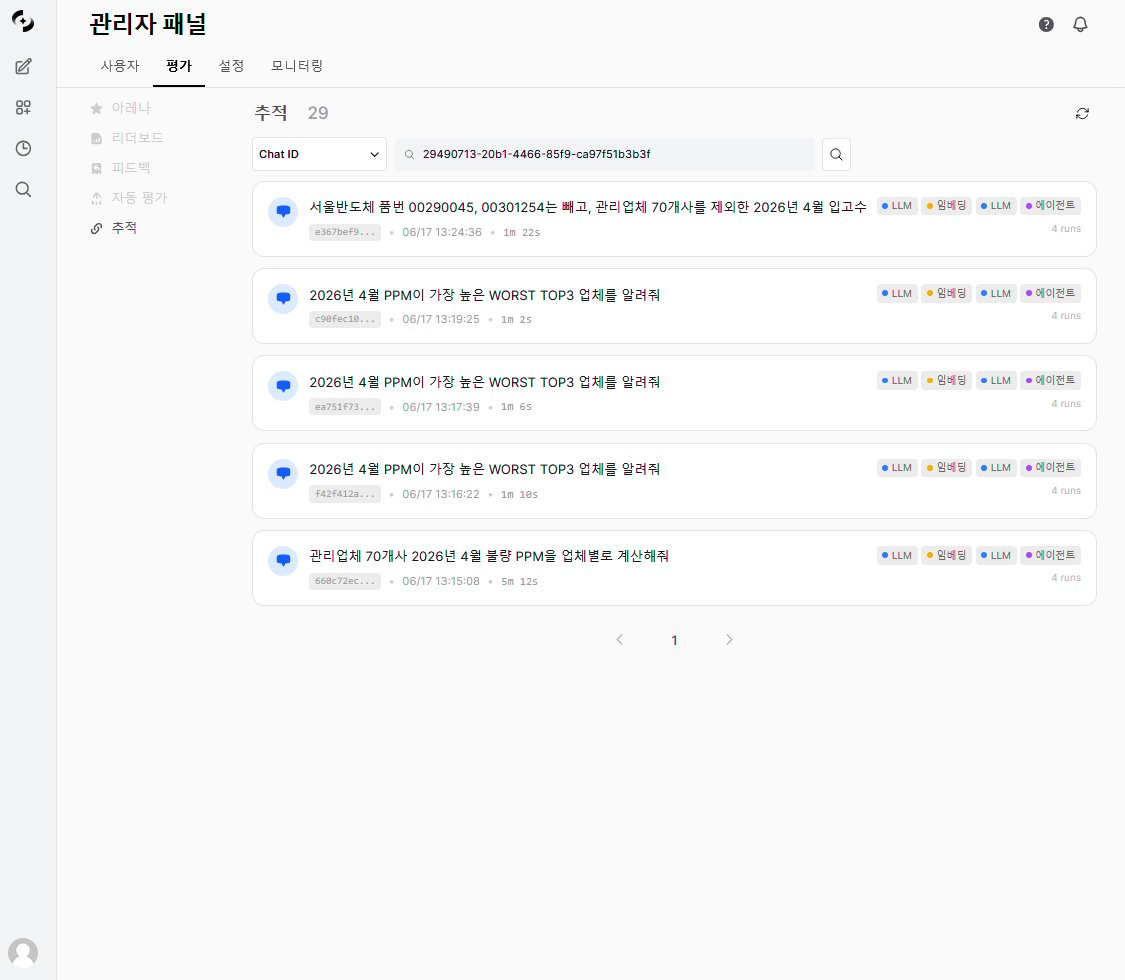
Evaluation › Tracing arrival screen — search list (message cards)
Searching Traces
Searching by Chat ID or Message ID on the Evaluation › Tracing screen produces a list of message cards like the screen above.- Each card is a summary of one user message’s trace, and clicking a card opens the detail view.
Search criteria — Chat ID vs. Message ID
Search criteria — Chat ID vs. Message ID
Message card items
Message card items
How to Read the Trace Detail View
This is the heart of tracing.- Here you see what steps a message went through and what went into and came out of each step.
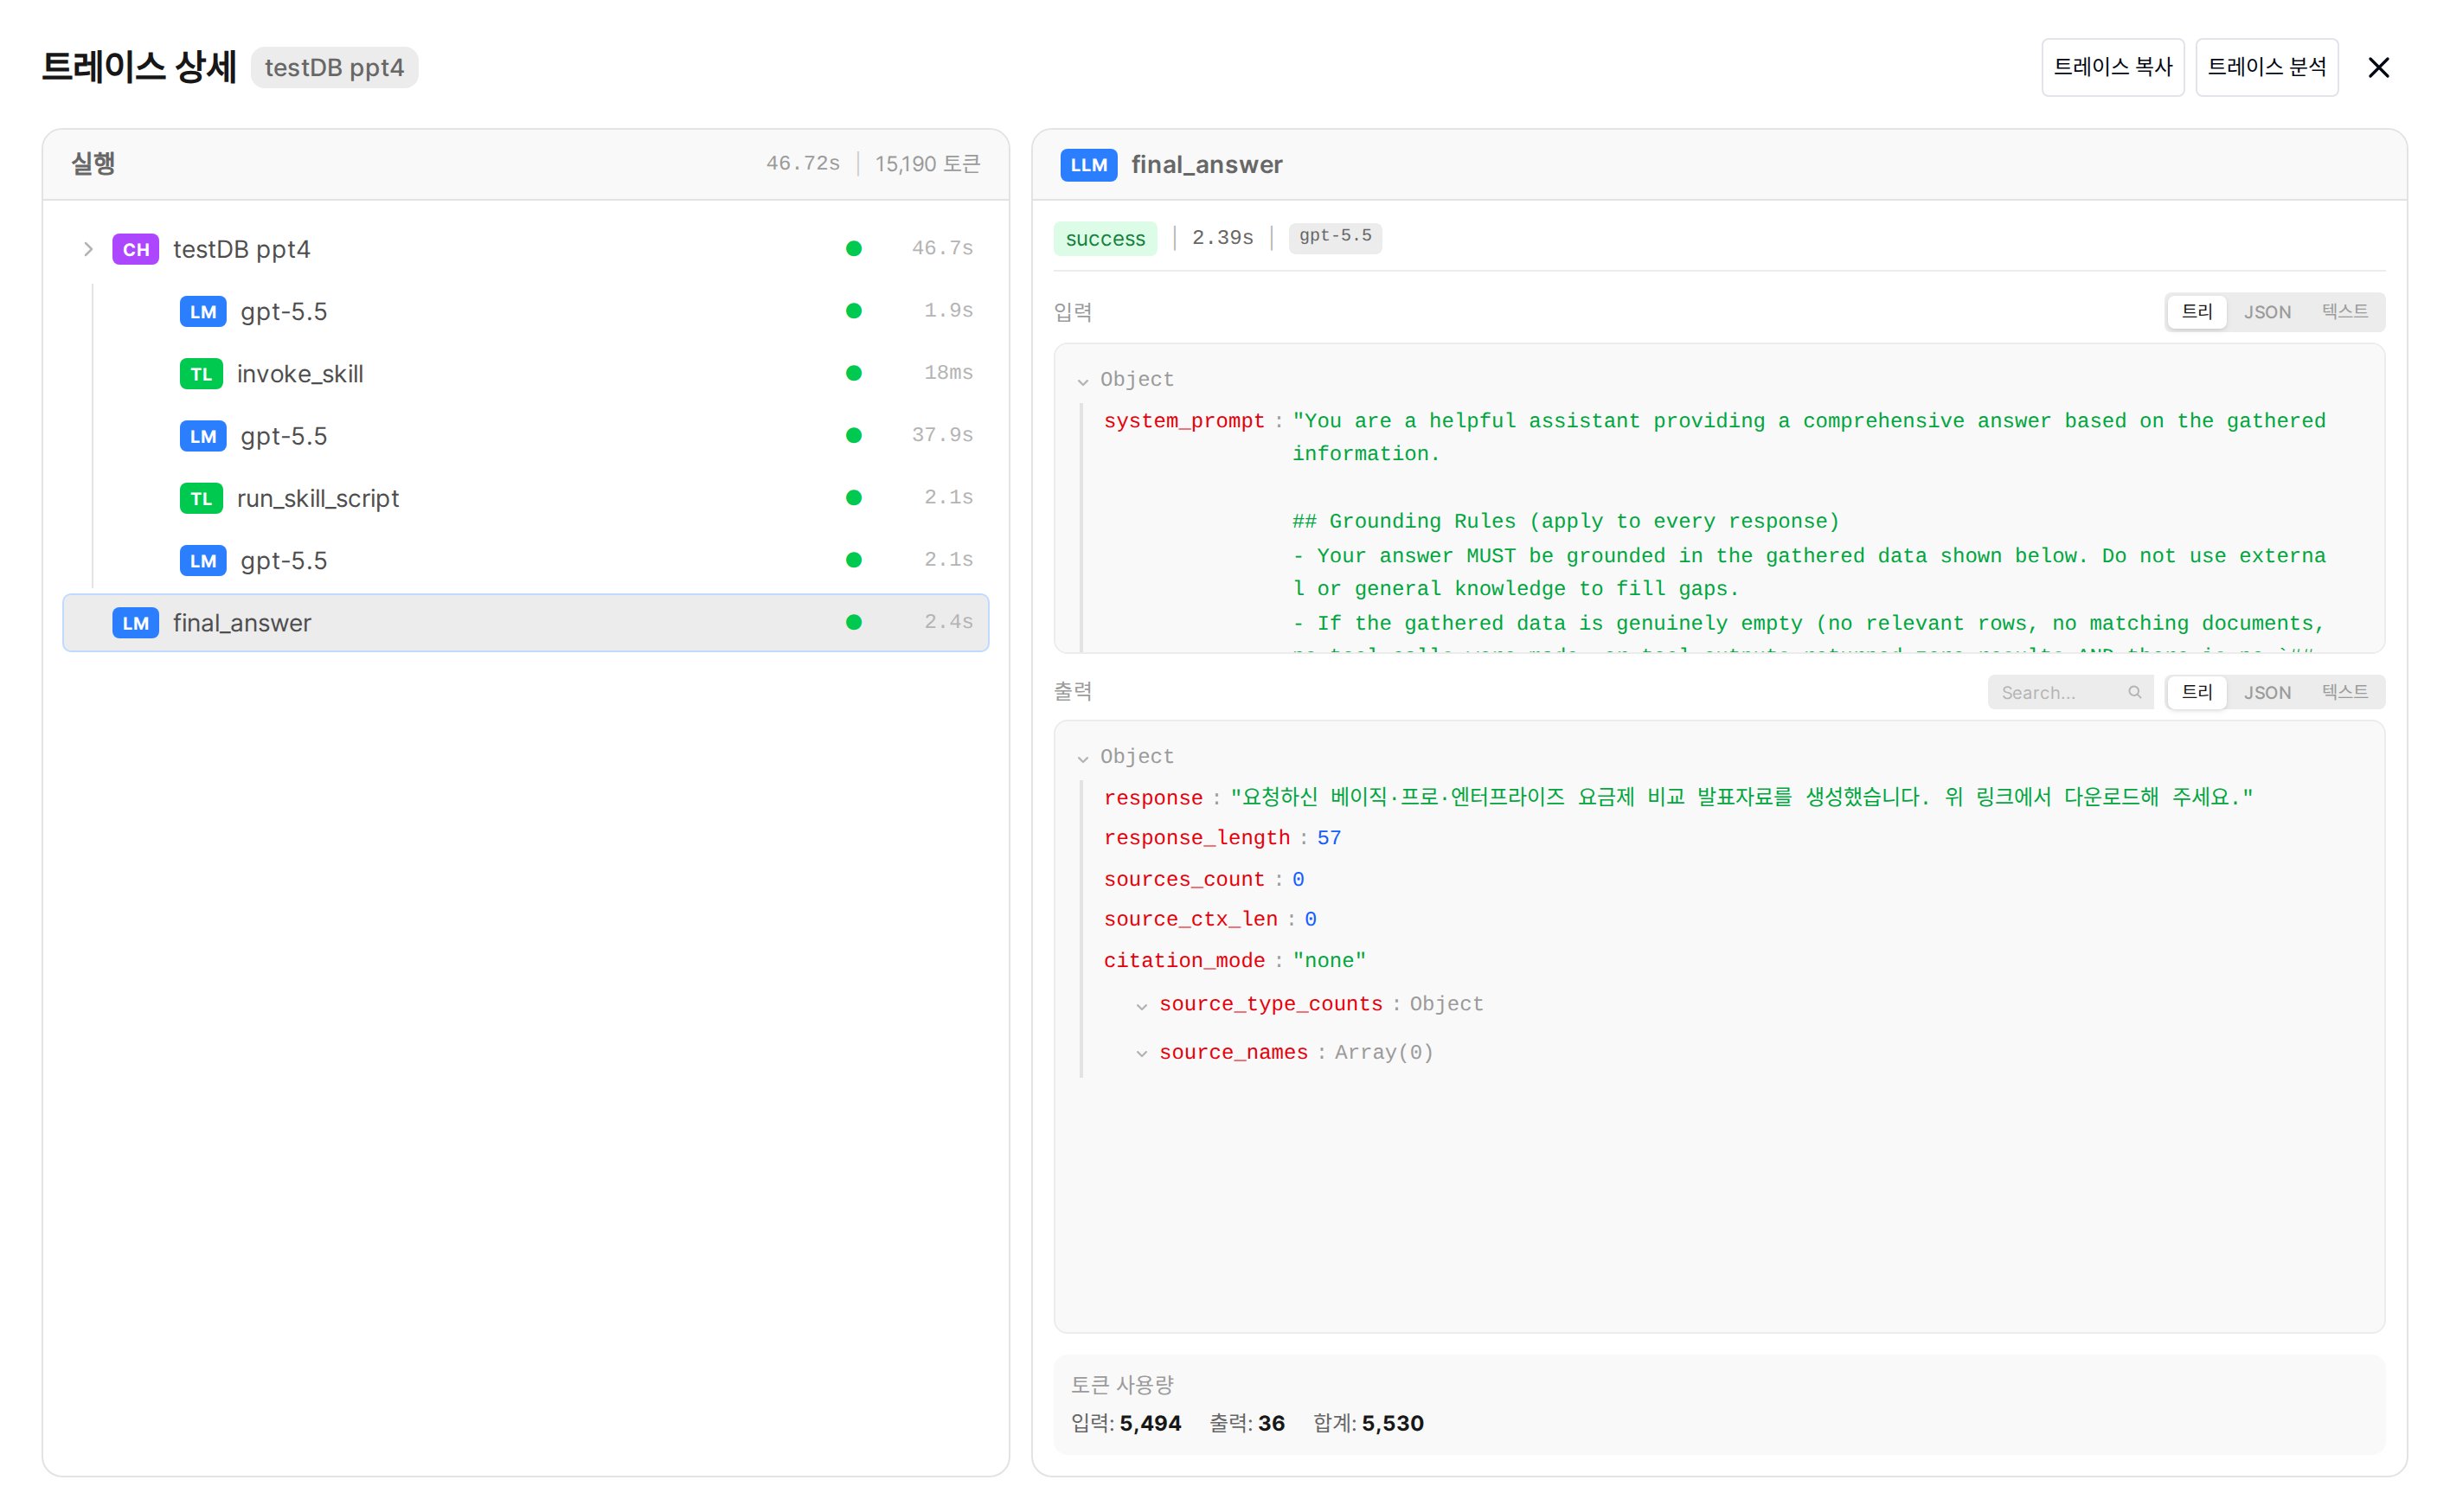
Trace detail — pick a step in the left Run tree and its inputs/outputs appear on the right
CH) repeats LM reasoning and tool calls to gather data, and finally final_answer (LM) writes the answer.
- Left — Run Tree
- Right — Detail Panel
- ● Status — green means OK, red means an error at that step.
- Adjacent time — that step’s latency. Note that a parent step (CH, ACT) includes the time of its children, so the largest raw value is not necessarily the bottleneck. The bottleneck the product computes is shown with its latency highlighted in red.
background_tasks trace.All Run types (color legend)
All Run types (color legend)
Agent · LLM · Embed.)Status display (● color)
Status display (● color)
Reading in Two Phases
Reading the agent’s response in two phases helps you find the cause quickly.Debugging Points
Agent didn't use a tool (Knowledge Base / DB)?
Agent didn't use a tool (Knowledge Base / DB)?
tool_descriptions (the names and descriptions of the tools attached to that run) in the Inputs of Phase 1’s first LM reasoning Run. To keep traces small, this entry is recorded only on the first LLM call, so later LM Runs may not have it.- Desired tool not in
tool_descriptions→ that feature (Knowledge Base, DB, etc.) isn’t connected to the agent - Tool present but not called → the model judged low relevance between the question and the tool. Make the tool/feature description more specific
active_capabilities (the set of features enabled at that moment) is visible in the Inputs of the Phase 2 final_answer Run.Search ran but the answer is inaccurate?
Search ran but the answer is inaccurate?
knowledge_search, or knowledge_fetch_chunks when chunks are re-fetched). Check the hit count, scores, and rerank status in that Run’s Outputs via total_results, top_scores, reranked, and sources.- No RG Run at all → search never ran. Check that a Knowledge Base is connected to the agent
total_resultsis 0 → zero search results. A KB document is missing, or search settings (Top K, Reranker, etc.) need review- Sources exist but the answer is off → check what was passed in the
final_answer(LM) Run’s Inputs and adjust the answer prompt
sources_count and source_names in the final_answer Outputs are the number of source bundles placed in the answer prompt, so they can differ from the search hit count.Tool execution failed?
Tool execution failed?
Response too slow?
Response too slow?
Slowest extraction step: <name> · time (n%) summary underneath. The final answer step and any post-processing after it are excluded from the bottleneck calculation, since they happen after the answer is delivered.- LM slow → consider switching to a faster model
- TL/EM slow → check tool/search settings or external services
- GD (guardrail) slow → disable LLM judgment or switch to a faster model
Trace Analysis Report
A feature that analyzes trace data with an LLM to automatically identify the root cause of a problem. The top of the detail modal has Copy Trace and Analyze Trace buttons (plus View Report when a previous analysis exists). Copy Trace puts a text version on the clipboard — the trace summary (Trace ID, Chat ID, status, total latency, total tokens) followed by an indented step list (success/failure, step type, name, latency, tokens, model, and a preview of the start of the inputs and outputs). Use it when sharing an issue or attaching context to a support request.Start analysis
Review analysis result
Save/share report
Trace Management
Permissions
Data Cleanup
Old traces are cleaned up in one of two ways.- Admin › Settings › Data Retention — set the retention days for Traces to clean up automatically, or click Run Cleanup Now to delete immediately. (recommended)
- Developer API —
DELETE /api/v1/traces/cleanup?before_timestamp_ms=<timestamp>. Bulk-deletes traces before the given millisecond timestamp; requires monitoring write permission.
Use Cases
Response Quality Debugging
Response Quality Debugging
- Click the View Trace icon on a chat message
- Select the
final_answer(LM) step in the left Run tree - In Outputs, check
sources_count·source_namesto see whether search results were reflected - In Inputs, check what was passed to the model
- Generate a Trace Analysis Report to auto-identify the root cause
Latency Analysis
Latency Analysis
- Open the trace of a slow response
- Switch to the Timeline view and compare each step’s duration
- Identify the bottleneck step highlighted in red (a parent step includes its children’s time, so don’t judge by the raw maximum)
- Optimize that step (adjust search settings, change the model, etc.)
Tool Execution Error Tracking
Tool Execution Error Tracking
- Open the suspected trace
- Select the TL (Tool) Run marked with a red dot
- Check the message in the Error area below Outputs
- Verify the passed parameters in Inputs
Token Usage Analysis
Token Usage Analysis
- Check overall trace usage via total tokens at the top of the detail view
- Switch to the Tokens view, or compare per-LM Run Token Usage (Input/Output/Total)
- Check the token ratio of Phase 1 (agent run) vs. Phase 2 (
final_answer) - Identify unnecessarily large prompts or repeated calls
FAQ
Is tracing recorded automatically?
Is tracing recorded automatically?
How long is trace data retained?
How long is trace data retained?
0 (keep forever). To clean up old traces, go to Admin › Settings › Data Retention, set the Traces retention to 1 day or more and turn automatic cleanup on, or click Run Cleanup Now to delete immediately.Does tracing affect response speed?
Does tracing affect response speed?
Do analysis reports also consume tokens?
Do analysis reports also consume tokens?
trace_analysis. Analysis only runs when manually triggered.