HTML export works with monitoring read permission, but creating or revoking a share link requires write permission. With monitoring read permission alone, the period and custom filters cannot be changed to re-query. Regular users have no dashboard list screen, so the share link must be delivered to them directly.
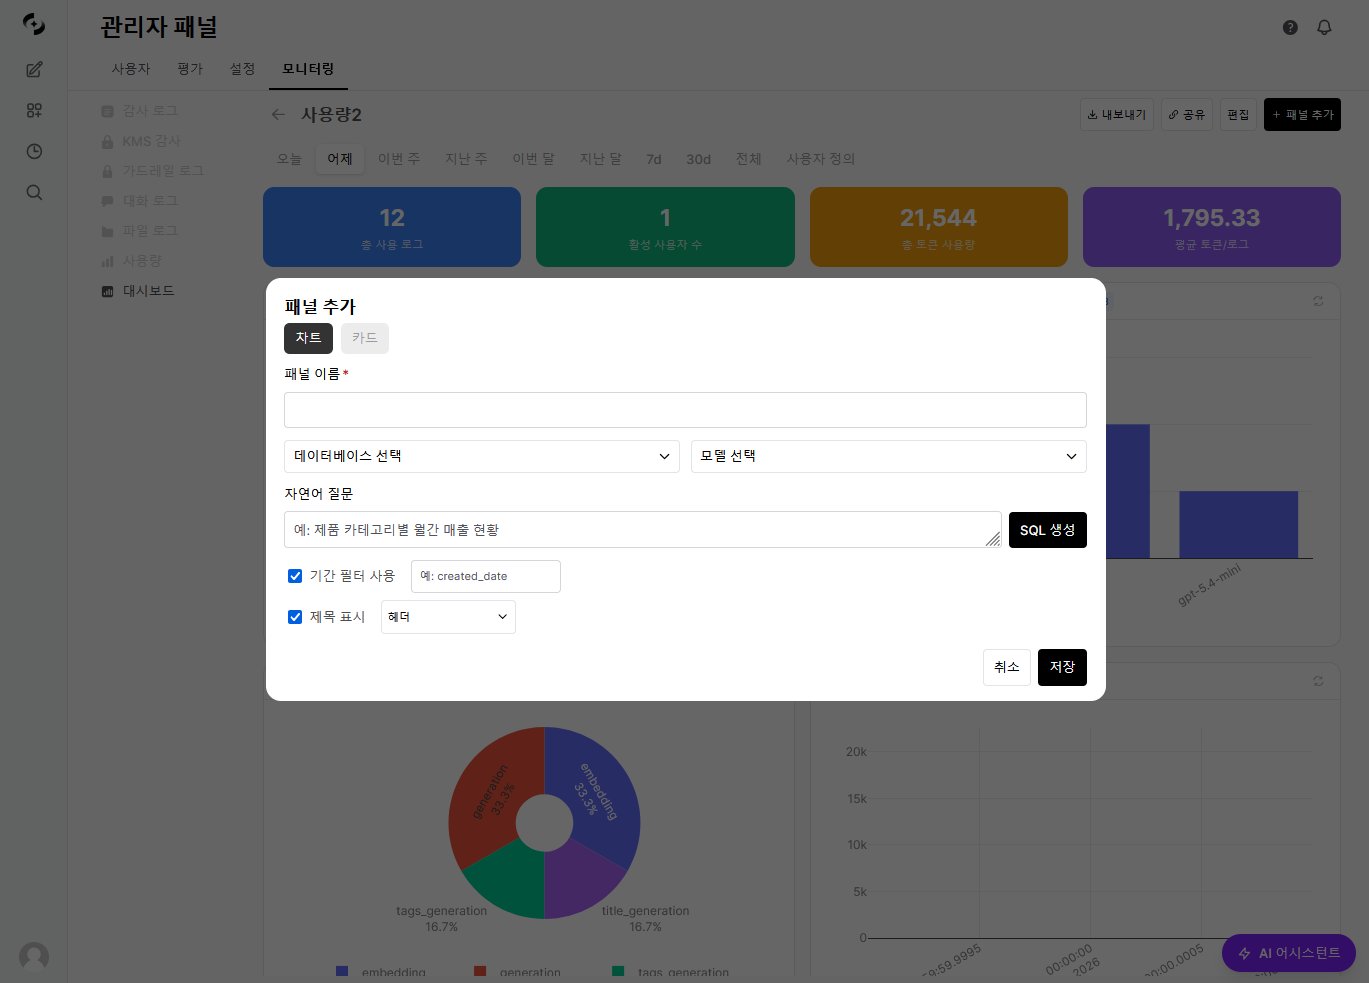
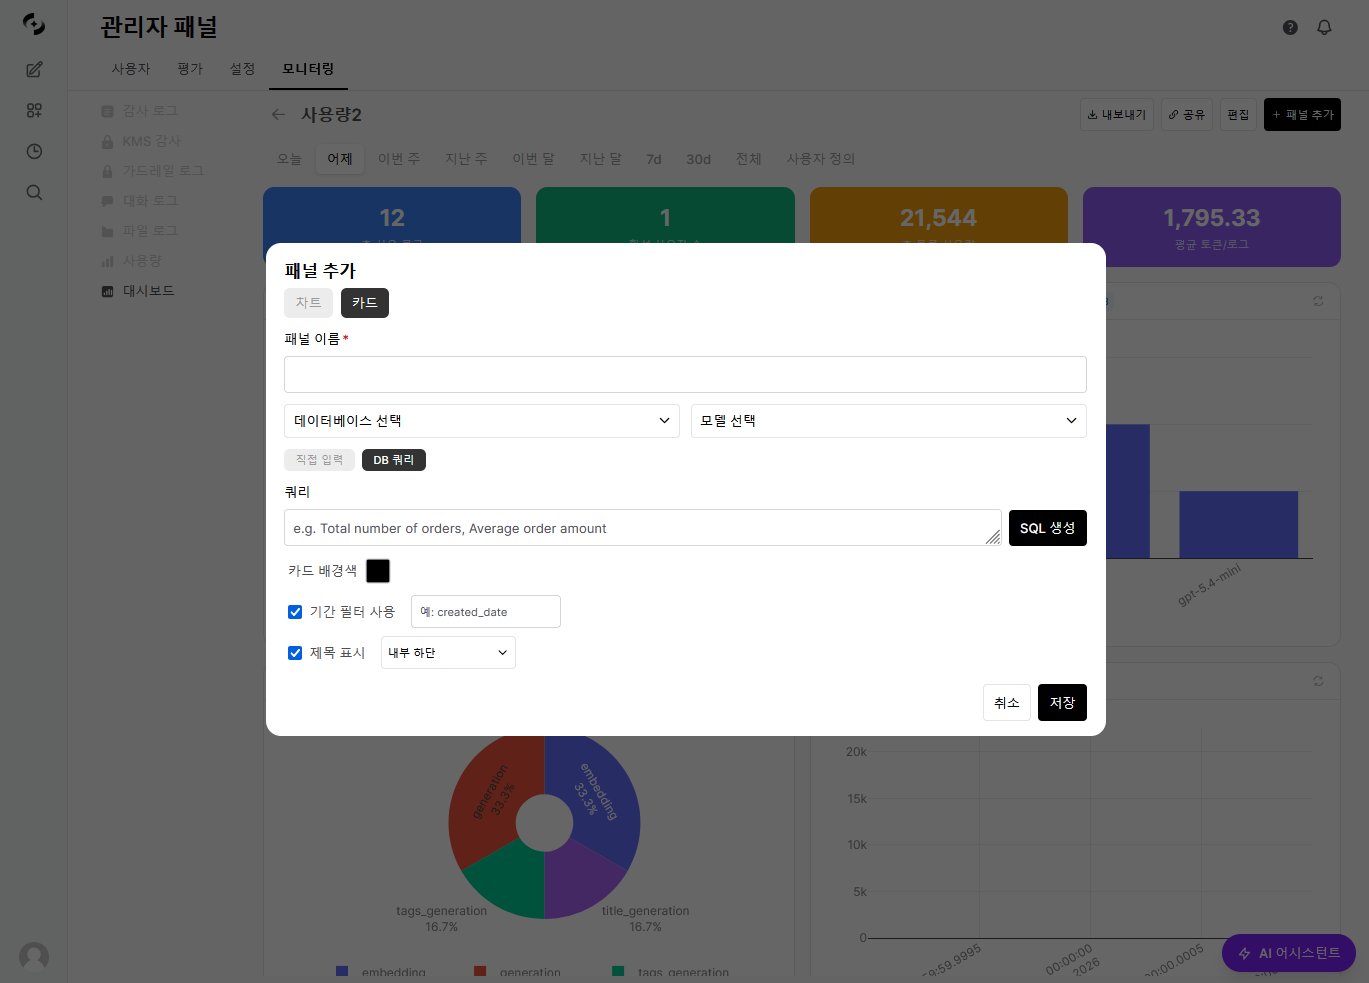
Click Add Panel or the edit icon on an existing panel to open the panel edit modal.
Add/Edit Panel modal fields
Field
Description
Panel name
Panel title (required)
Database selection
Pick the DbSphere to connect
Model selection
AI model used for SQL generation
Natural language question
Describe the data you want in natural language
Generate SQL
AI auto-converts the natural language question to SQL (the generated SQL can be edited directly)
Use period filter
Specify date column to integrate with the dashboard period filter
Title display
Choose whether to show the panel title. When on, pick the position — Header / Footer / Inside Top / Inside Bottom / Inside Left / Inside Right (default: Header for chart panels, Inside Bottom for card panels)
The generated SQL can be edited freely. If the AI-generated SQL isn’t accurate, just edit it directly.
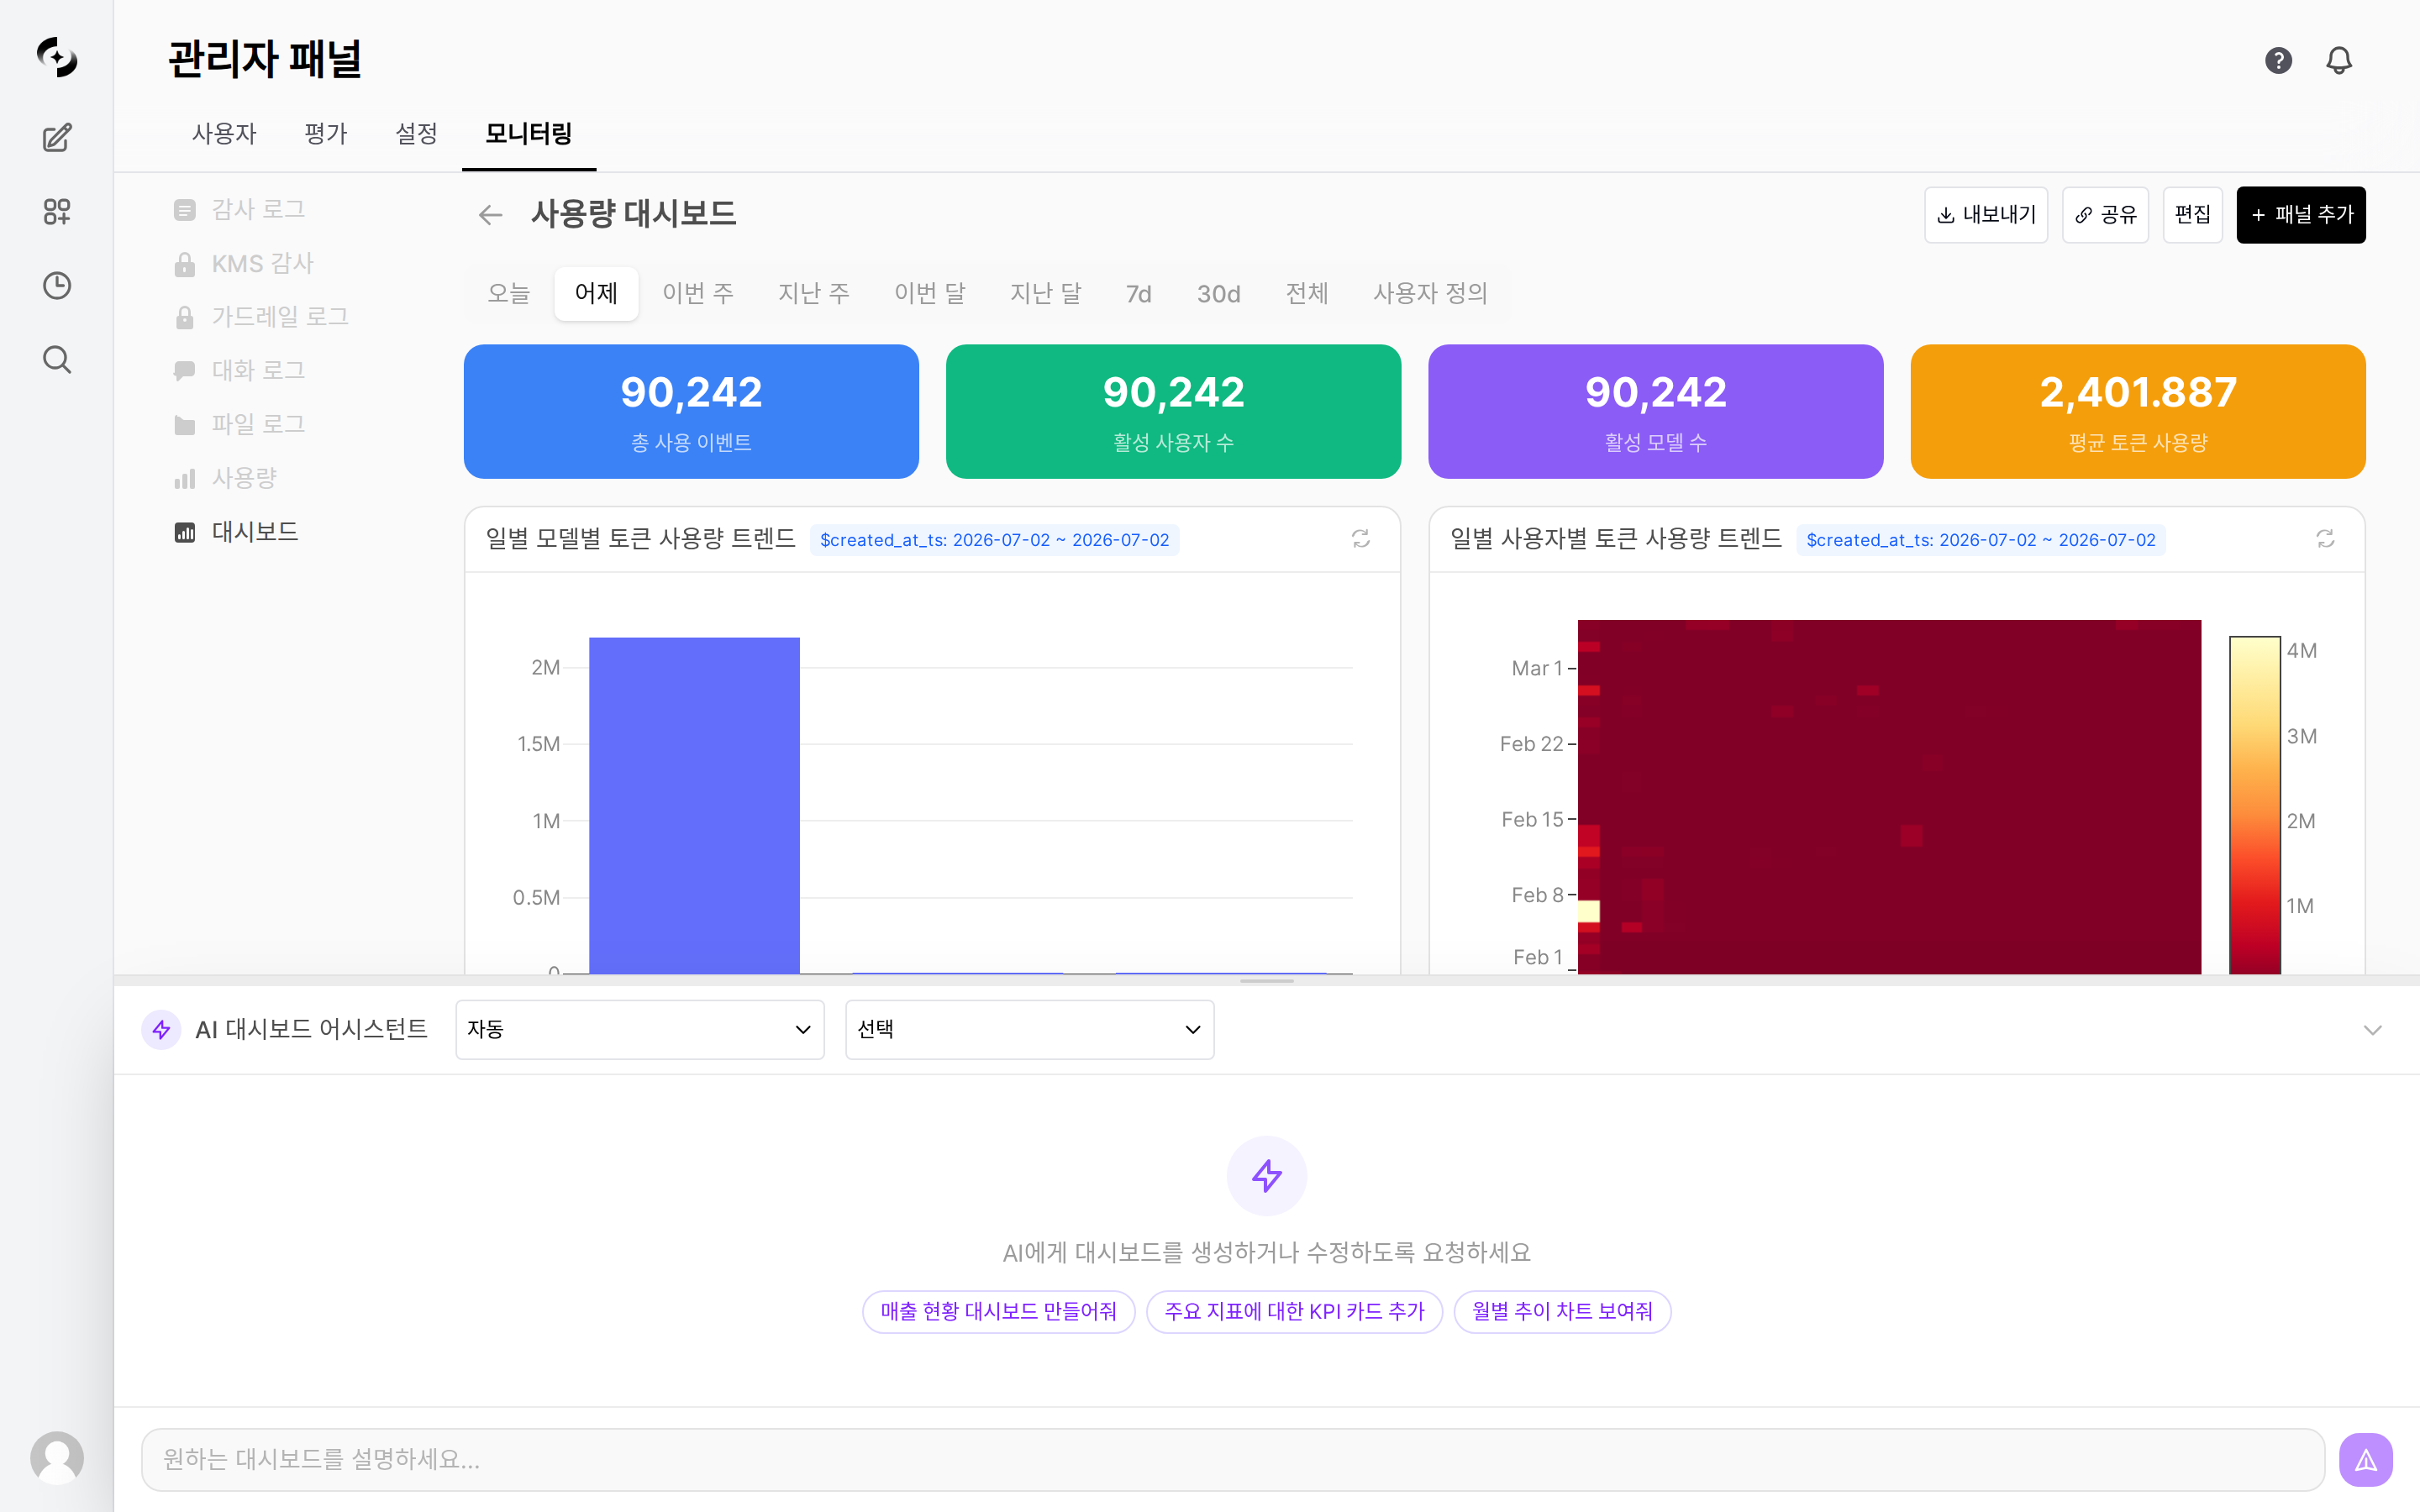
Add, edit, and delete panels by chatting in natural language.
1
Open AI Assistant
Click the bottom-right purple button. Pick DB and model at the top.
2
Request in natural language
Examples:
“Make a chart of this month’s per-model token usage”
“Add a per-user cost card too”
“Change the period to 30 days”
“Change the pie chart to a bar chart”
3
Review AI results
The AI generates SQL and auto-places panels. Positions are auto-adjusted to avoid overlap.
4
Iterate
Continue panel edits/deletes/relayouts via additional conversation. Conversation history is saved on the dashboard.
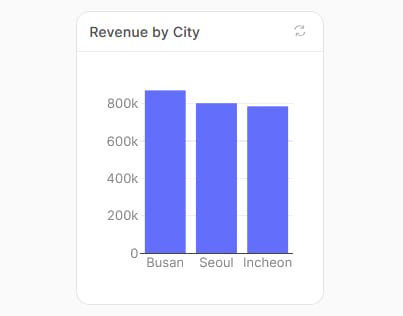
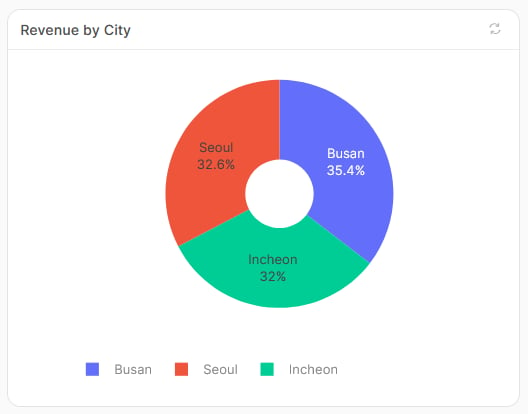
Example — Changing an Existing Chart TypeSpecify the panel to change, and the same data is instantly redrawn as a different chart. For example, entering:
Change the Revenue by City bar chart to a pie chart
Before — bar chart
After — pie chart
The AI sometimes presents button-form choices. Click for quick responses.
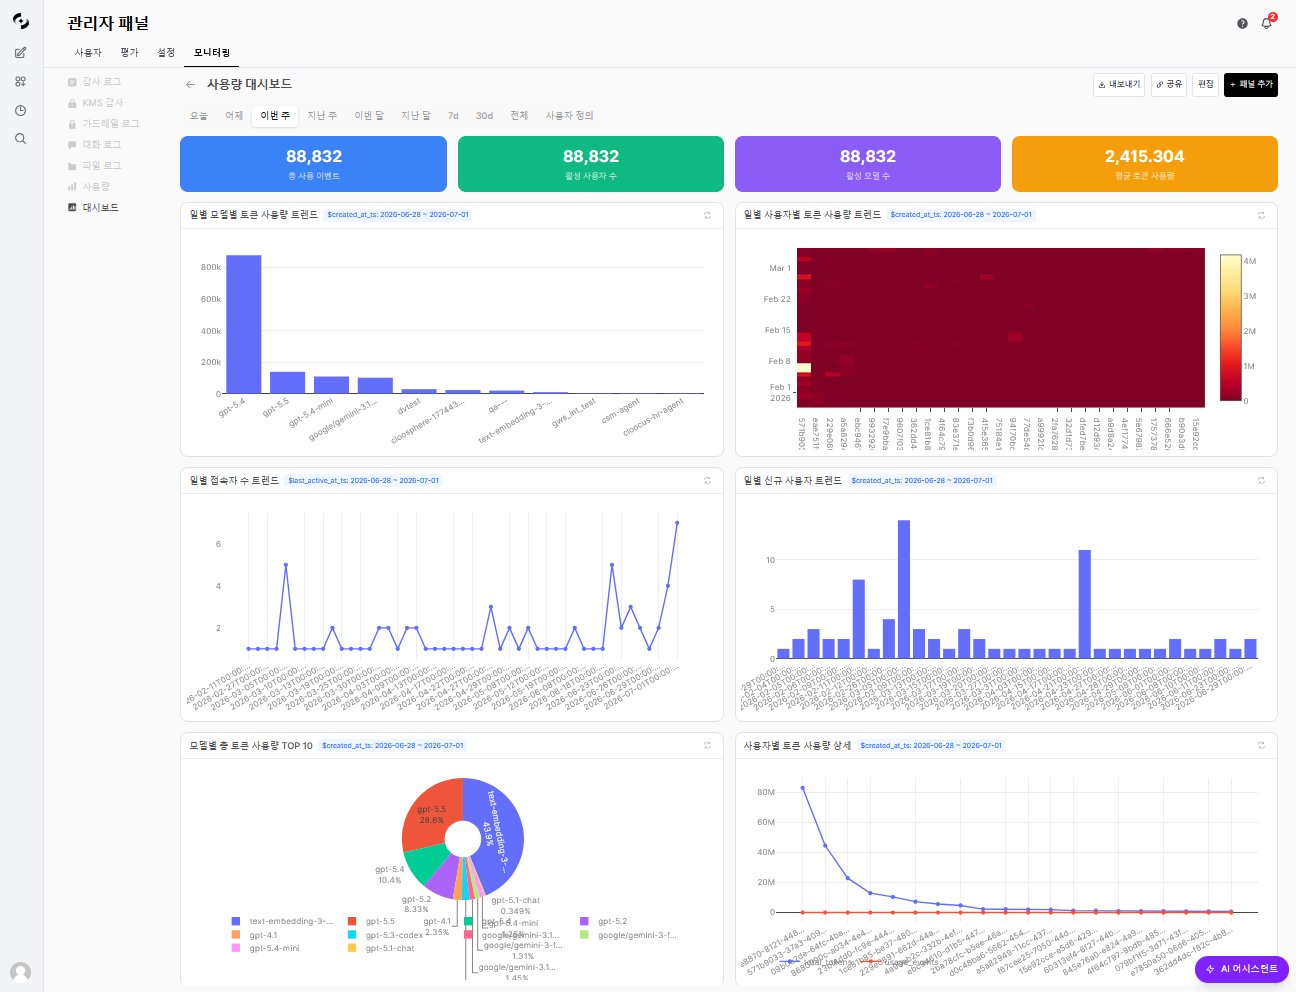
The dashboard top has period filter and custom filters.
Period Filter
Preset
Description
Today / Yesterday
Today / Yesterday
This Week / Last Week
This week / Last week
This Month / Last Month
This month / Last month
7d / 30d
Last 7 / 30 days
All
Entire period
Custom
Specify start/end dates directly
Default is Yesterday. Changing the period auto-re-executes SQL on all panels with period filter enabled.
Custom Filters
In edit mode, use the Add Filter button to add filters that apply to the entire dashboard.
Filter Type
Description
Text
Free text input (e.g., username)
Date Range
Adds start/end date inputs, but they do not affect query results. Use the top period filter to filter by date
Select
Selection options
When adding a filter, specify the Filter Label and Column Name, then choose the filter type. Active filters appear as blue badges at the top of panels whose title is shown in the Header.
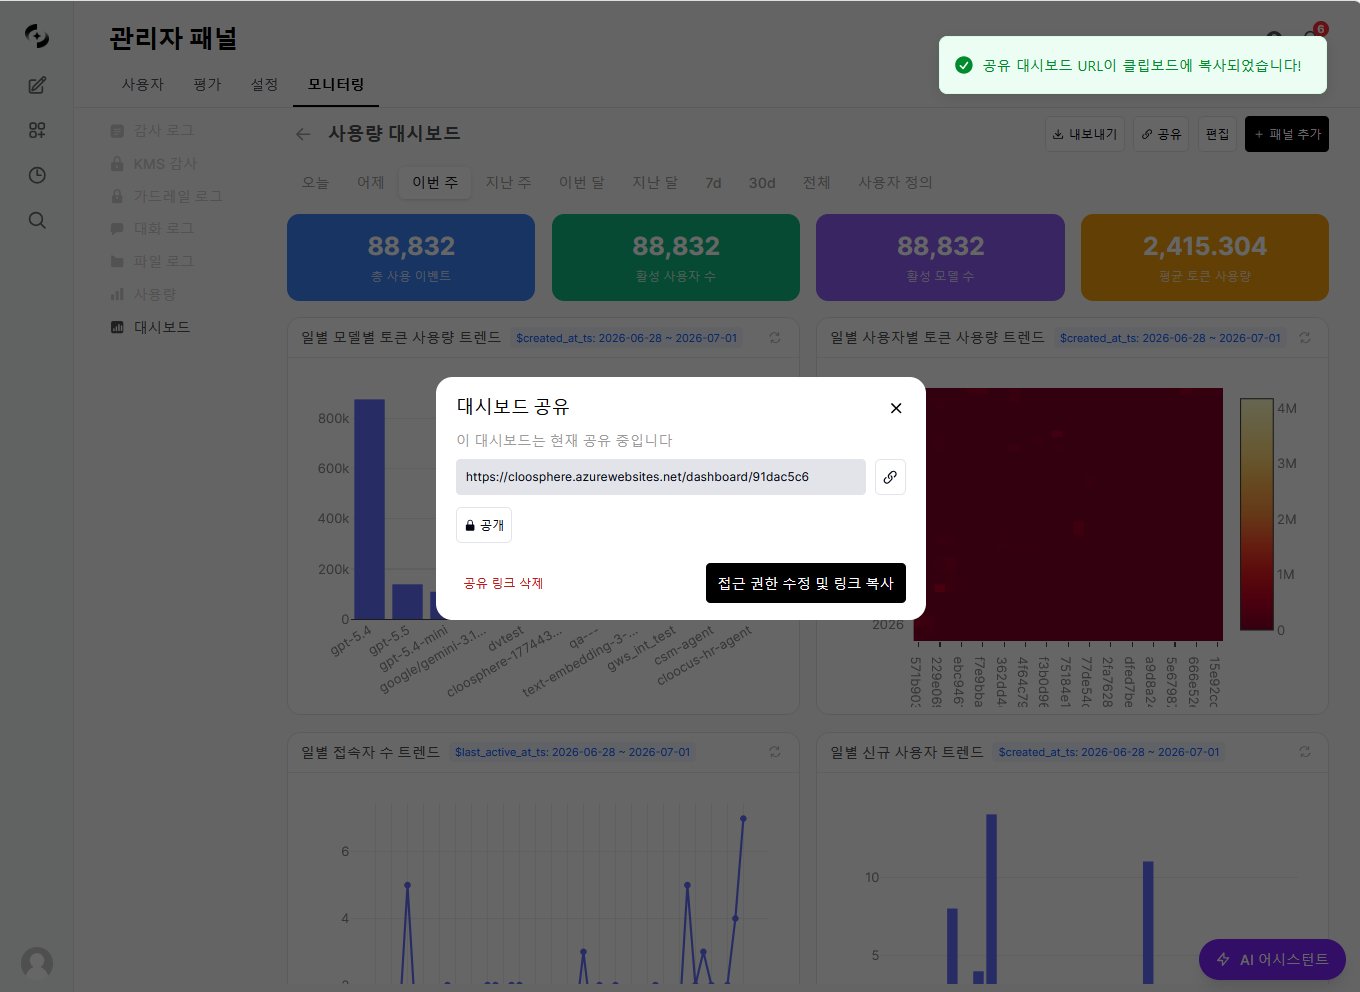
Click the Share button at the top of the dashboard to open the Share Dashboard window.
If the dashboard has not been shared yet, click Create & Copy Link to generate one — it is copied to the clipboard as you click.
Share URL format: https://{domain}/dashboard/{share_id}. Use Delete shared link to revoke sharing at any time.
2
Choose who can access (access control)
In the Share window, click the lock chip to open the Access Control window. The chip shows the current access state — Public (everyone), Restricted (at least one group has been added), or Private (selected groups only, with no group added).
You do not need to create a link first. Pick an Access permission, and if it is Selected groups only, search and add groups.
The Access Control window, opened from the lock chip in the Share window
Item
Description
Access permission
Toggle between Everyone (all signed-in users) and Selected groups only
Accessible groups
Groups you search and add get read access. Edit permission cannot be granted from this screen
When done, click Apply to return to the Share window, then click the button at its bottom right to save on the server — Create & Copy Link if the dashboard has not been shared yet, or Update Access & Copy Link if it is already shared. Clicking only Apply and then closing the Share window does not save the access change. If you try to close the Access Control window with unapplied changes, a Keep editing / Discard changes confirmation appears first.
Clicking the lock chip while the dashboard is Public opens the Access Control window and switches the state to Private. To keep it public, set Access permission back to Everyone in the Access Control window and click Apply. Saving happens only when you click the button at the bottom right of the Share window, so closing the Share window before that restores the original state.
Organizational units cannot be selected here. To grant access by organizational unit, an admin must link the unit to a group — its members are then treated as members of that group. See Sharing and permissions.
Shared dashboards operate as view-only — the top period filter can re-query data, but custom filters saved on the dashboard do not appear on the shared view. Panel edit/add/delete and the AI Assistant are also disabled.
Sign-in is required to access share links. Non-signed-in users go to the sign-in page and auto-return to the dashboard.
Click the Export button at the top of the dashboard to execute SQL with the currently applied period and filter conditions, downloading the HTML file with the latest data.
Exported file characteristics:
Item
Description
Format
Single HTML file. Charts load Plotly from a CDN, so an internet connection is required to view them
Chart interaction
Hover, zoom, and other Plotly default features supported
Theme
Light/dark mode auto-supported (follows system setting)
Layout
Same 12-column grid as the dashboard
Responsive
Charts auto-adjust on window resize
Exported HTML files can be email-attached, uploaded to internal share drives, or integrated with scheduled tasks for regular reports. See Schedules for details.