
Starting a New Conversation
1
Click the New Chat button
Click the New Chat button at the top of the sidebar, or use the
Ctrl + Shift + O shortcut.2
Pick a model
Choose the AI model from the dropdown in the chat header. If you don’t pick one, the default model is used.
3
Type and send
Type your question or request in the input box and press
Enter to start. The chat title is auto-generated from the first message.Searching Chat History
Use the search box at the top of the sidebar to find conversations.- Title search: Search by auto-generated chat titles
- Content search: Full-text search of conversation content
- Tag filter: Type
tag:in the search box to bring up the tag list. Picking a tag inserts its tag ID — the name with spaces replaced by_— and filters to the conversations carrying that tag. Tags whose names contain spaces will not match if you type the display name, so always pick them from the list.
The chat list uses scroll-based pagination. Older conversations load automatically as you scroll down.
Chat Menu
Hover over a chat item to reveal the More (…) button — clicking it opens action options.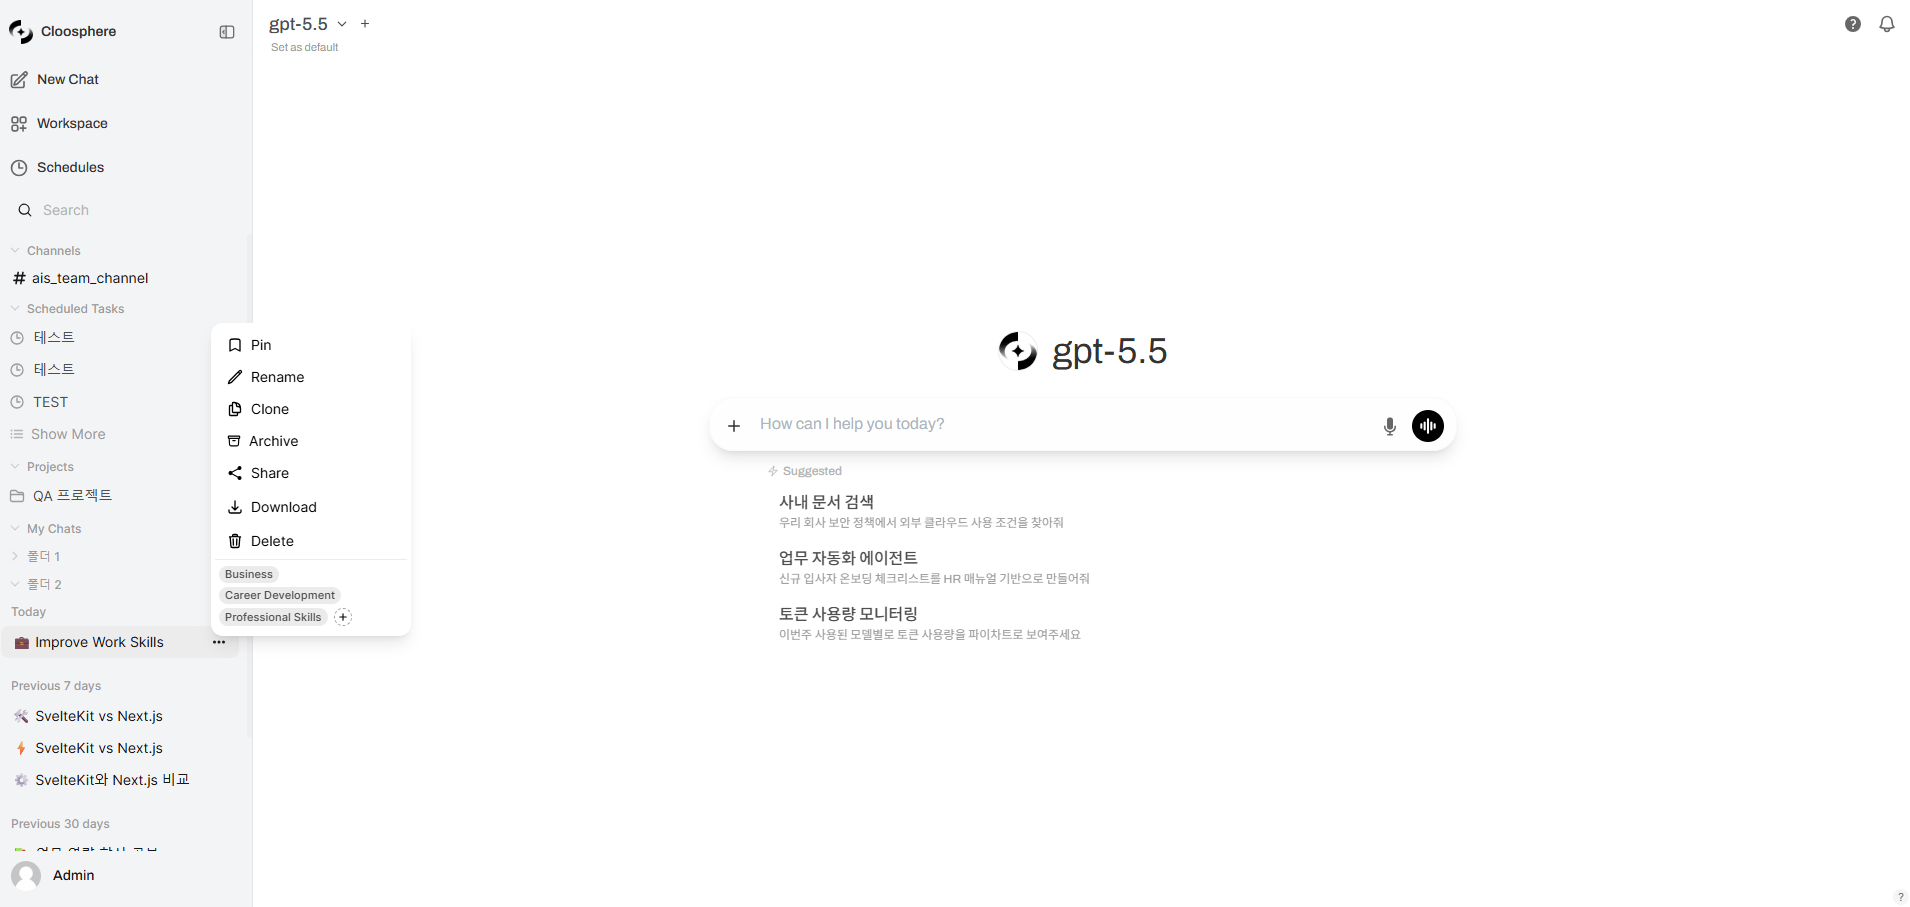
Chat context menu
Editing and Deleting Messages
Editing User Messages
When you edit a sent user message, the original message is preserved and the AI generates a new response based on the edit. This creates a conversation branch.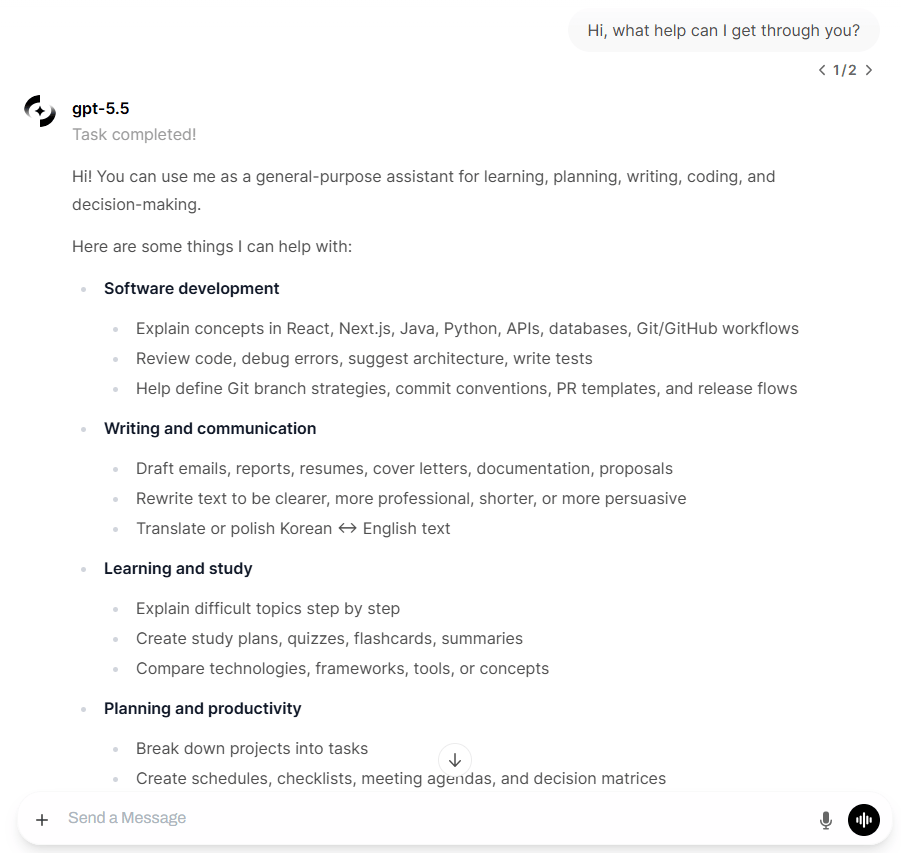
Original question (1/2)
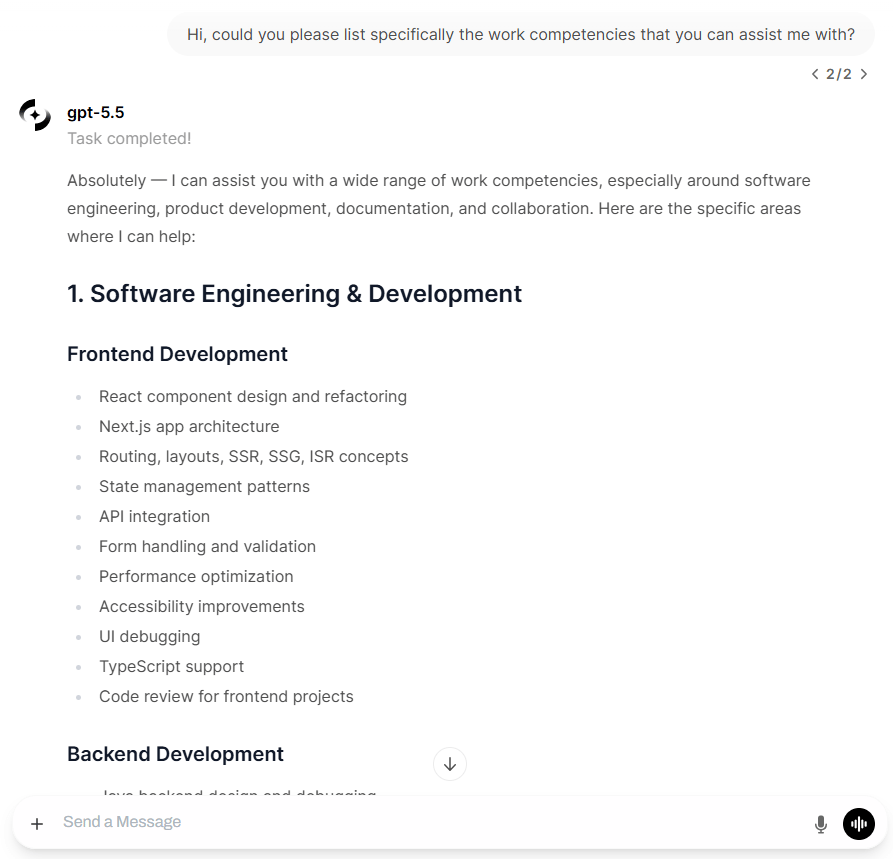
New branch after editing (2/2)
1
Hover the message
Hover over the message you want to edit.
2
Click the edit button
Click the Edit icon that appears on the right side of the message.
3
Edit and send
Type your edits and click Send — the AI generates a new response.
Click Save to update the content only without generating a new response.
Editing AI Responses
You can directly edit AI responses too. The edit box offers Save As Copy, Cancel, and Save.- Save: overwrites the response in place. There is no button to revert to the original.
- Save As Copy: adds your edit as a new branch, leaving the original in place and reachable with the left/right arrows next to the
1/2indicator.
Deleting Messages
Hover a message, click the Delete icon, and confirm in the dialog. Deleting removes the message together with the messages directly below it; anything further down is reattached to the parent message. Note that deleting a user message also removes the AI response to it.The first user message of a conversation can only be deleted when it has more than one branch. The Delete icon on an AI response likewise appears only when that response has more than one branch.
Branch Navigation
When a message has multiple branches, an indicator like1/3 appears below it. Use the left/right arrows to navigate between branch responses.
Project Management
Projects are independent workspaces isolated from personal chats. Instead of dragging chats in, you create and manage chats inside a project.1
Create a project
Hover over the Projects header in the sidebar — a + button (Create Project) appears on the right. Clicking it opens the project creation page.
2
Enter project details
Select a project type, enter a name and description, then click Create Project.
3
New chat in the project
From the project page, start new chats and manage the project with the Chat and Settings tabs.
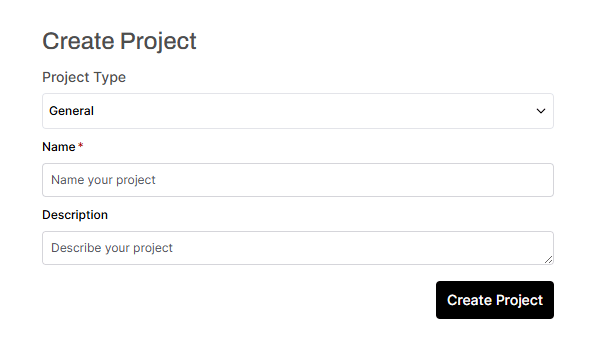
Create Project (1/2)
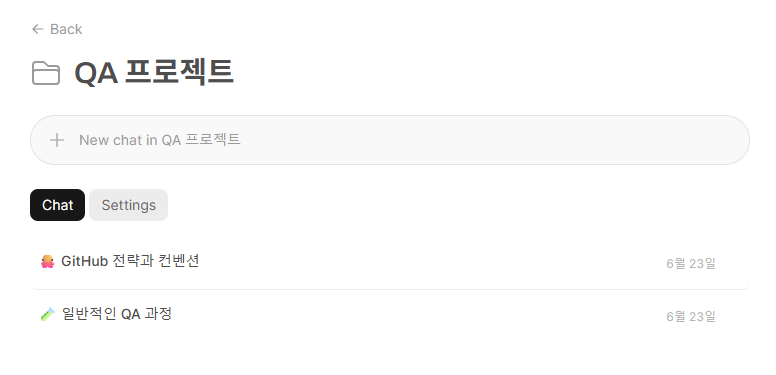
Inside a project — new chat (2/2)
Folder Management
Alongside projects, you can also organize conversations into plain folders.1
Create a folder
Hover over the My Chats header in the sidebar — a + button (New Folder) appears on the right. Clicking it creates a folder named Untitled; rename it via the folder’s More (…) > Rename menu.
2
Move a chat to a folder
Drag a chat item into the folder you want.
3
Manage folder structure
Drag one folder into another to nest it as a sub-folder for hierarchical management.
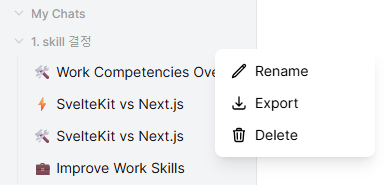
Sidebar folder structure and folder menu
Exporting Conversations
Exporting Individual Chats
Open the Download sub-menu from a chat item’s More (…) menu in the sidebar, or from the More (⋯) button at the right of the chat header, then pick a format.- JSON (.json)
- Text (.txt)
- PDF (.pdf)
Complete format including message history, metadata, and branch structure.
Can be imported into another Cloosphere instance.
Bulk Export / Import
Settings > Chats tab lets you manage all conversations at once.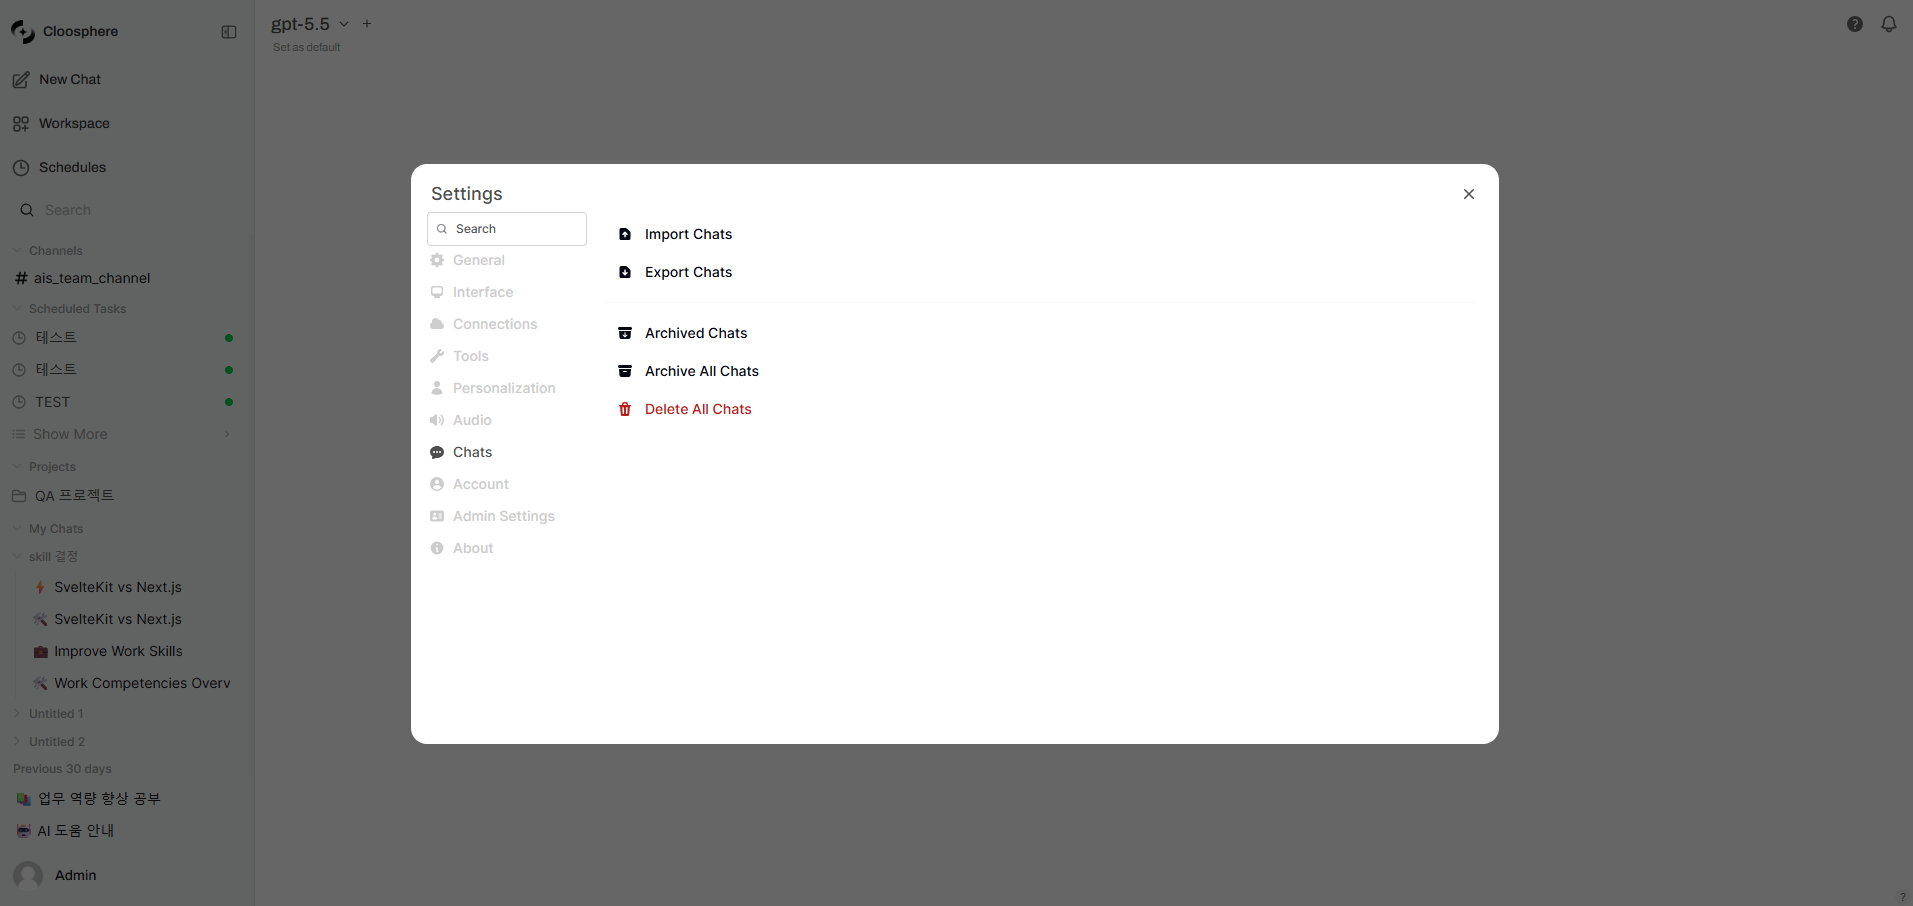
Settings — Chats tab
Quick Archive / Delete
Hold Shift while hovering over a chat item to replace the More (…) button with Archive and Delete icons, for fast one-at-a-time actions. To act on every conversation at once, use Archive All Chats / Delete All Chats in Settings > Chats.Archive Management
Archived conversations are hidden from the sidebar list but not deleted.1
View archived conversations
Click Settings > Chats > Archived Chats to open the archive list. You can also open the same list from the user menu at the bottom of the sidebar — click your name, then Archived Chats.
2
Restore or delete
Restore an individual conversation from the list back to the sidebar, or delete it permanently.
To bulk-restore all archived conversations, click the Unarchive All Archived Chats button and then select Unarchive All in the confirmation modal. You can also bulk-export them with the Export All Archived Chats button.