
How to Select a Model
Choose a model from the dropdown in the chat header.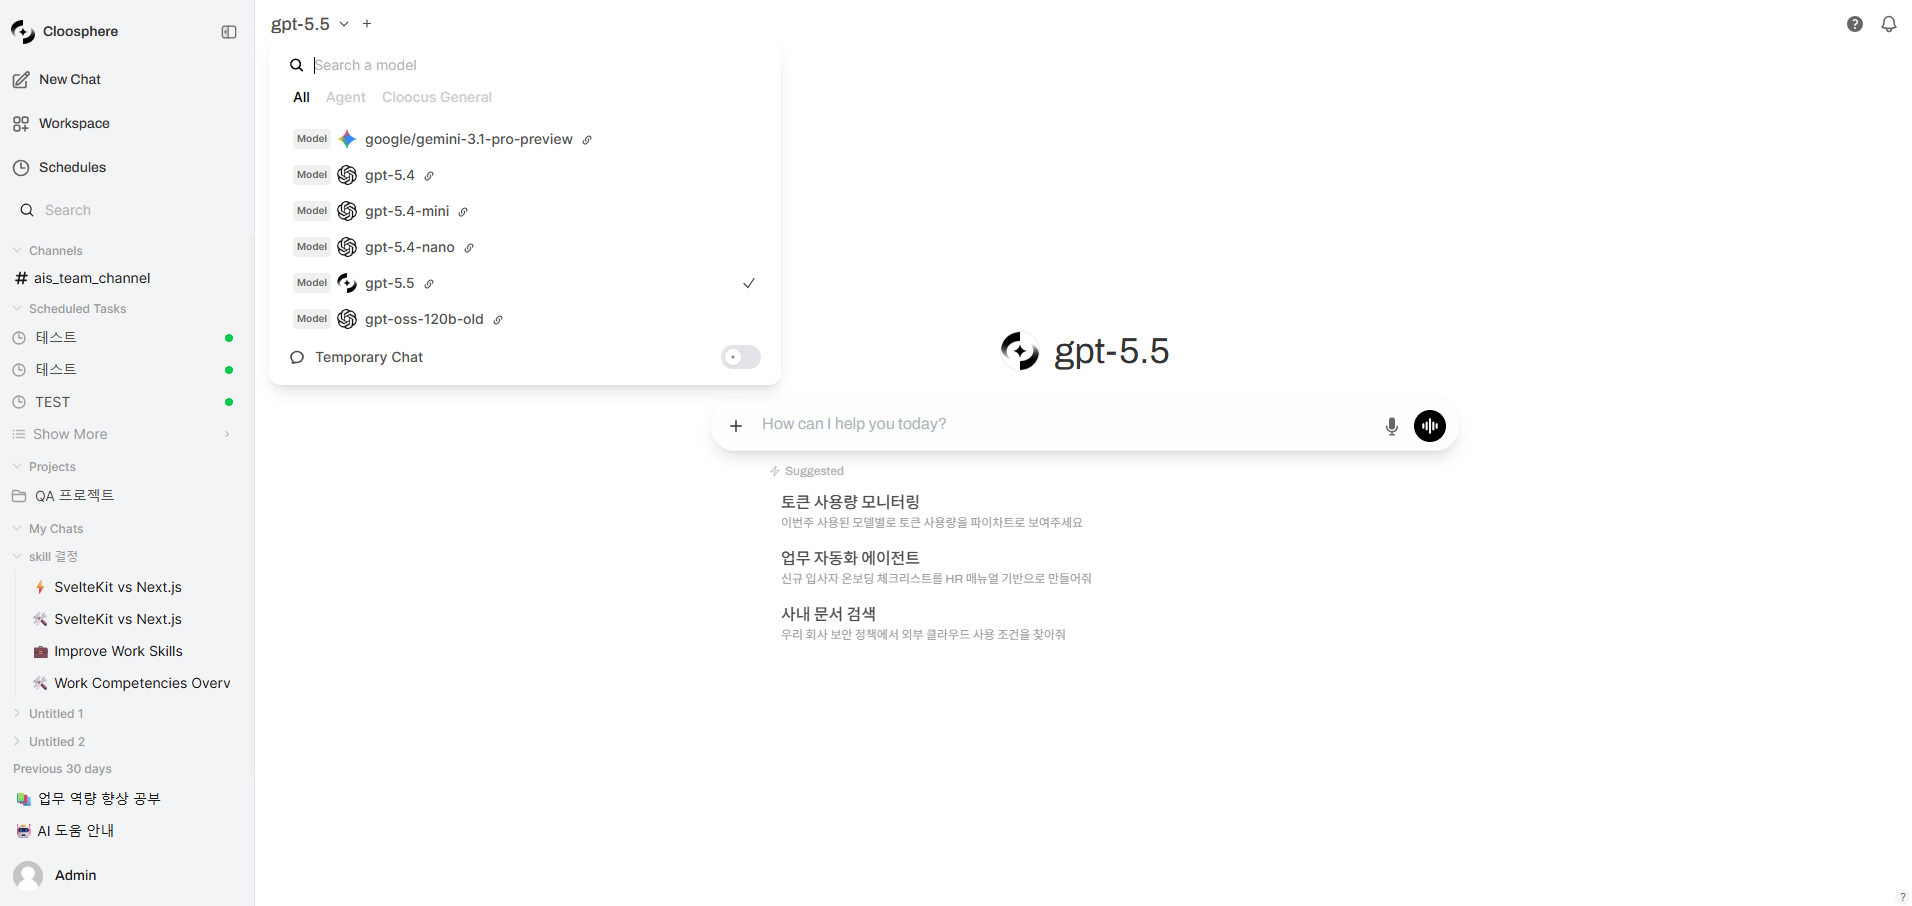
Chat header model selector
1
Open the dropdown
Click the model selection area at the top of the chat.
2
Search and select a model
Pick a model from the list, or type a name in the
Search a model box at the top to filter. The filter tabs below the search box narrow the list (which tabs appear depends on the models your admin registered), and each entry carries an Agent · Flow · Model badge, with the list grouped in that order.3
Set as default (optional)
On the new chat screen (before you send a message), click “Set as default” below the model selector to use this model as the default for new chats. The link is not shown once a conversation has started.
Default Model
When you set a frequently used model as default, it’s selected automatically every time you start a new chat.1
Pick a model
Choose the model you want as default in the dropdown.
2
Save as default
Click “Set as default” below the model selector. A “Default model updated” notification appears.
The default model is per-user. If multiple models are selected when you save the default, the multi-model selection is saved as default.
“Set as default” only appears on a fresh chat screen before you send the first message. To change the default model, open a New Chat, pick the model, and set it there.
Multi-model Conversations
Get answers from multiple models for the same question. Including the first one, you can select up to 4 models simultaneously.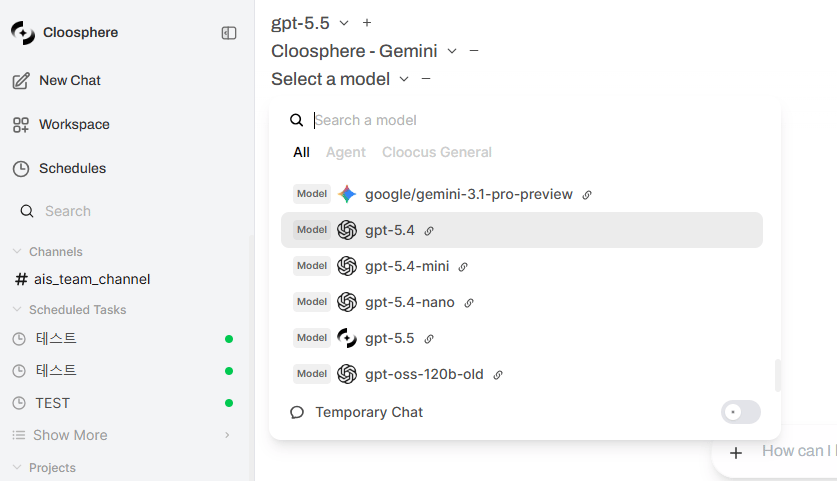
Multi-model selection
1
Add a model
Click the ”+” button to the right of the first model selector. Selectors stack vertically, one row per model.
2
Pick additional models
Choose models to compare from the new dropdown. Up to 4 total (including the first). Every selector after the first has a ”−” (Remove Model) button on its right; click it to remove that row.
3
Send the question
When you send the message, all selected models generate responses simultaneously.
4
Compare and merge responses
Compare the responses, and use Merge Responses to combine the best answers if needed.
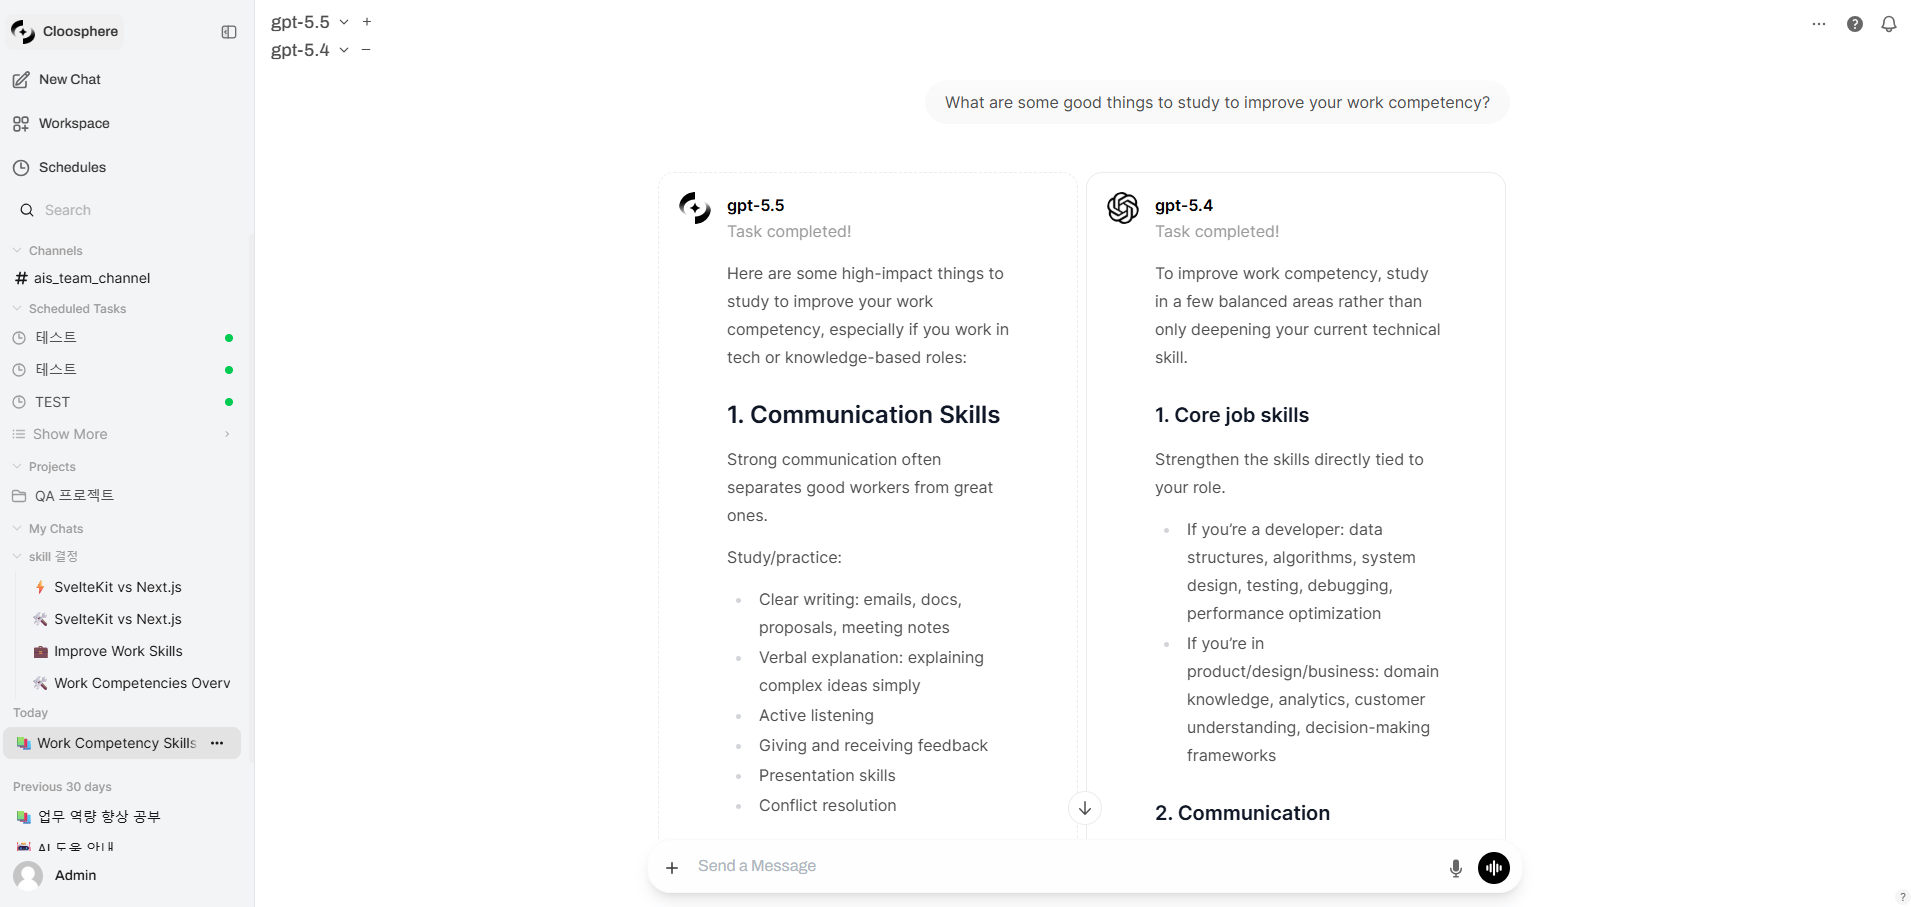
Comparing multi-model responses
Multi-model use cases
Multi-model use cases
- Quality comparison: Compare model performance with the same question
- Cross-validation: Get multiple opinions before important decisions
- Best-answer selection: Combine each model’s strengths into the best answer
- Cost vs. performance: Compare results from low-cost and high-performance models
The multi-model feature can be restricted for regular users by admin settings. If you don’t have permission, the ”+” button isn’t shown.
Tuning Model Parameters
You can tune the system prompt and model parameters in two places, with different scopes. Pick the one that matches your goal.Where to Tune
Opening the Chat Controls Panel
The desktop More (⋯) menu only appears after sending the first message.
In a fresh chat, send a prompt once to start the conversation, then tune parameters.
(Adjusted values apply to subsequent messages.) To decide values ahead of a new chat, use Settings → General above.
Artifacts in the More (⋯) menu opens the same panel, but if the conversation has no HTML/CSS/JavaScript output the panel’s top bar is not rendered, so there is no ← arrow to reach Chat Controls. Use the Overview path when you want Chat Controls.Overview first shows the conversation flow diagram. Pressing the ← (back) arrow there switches the same panel to the Chat Controls view.
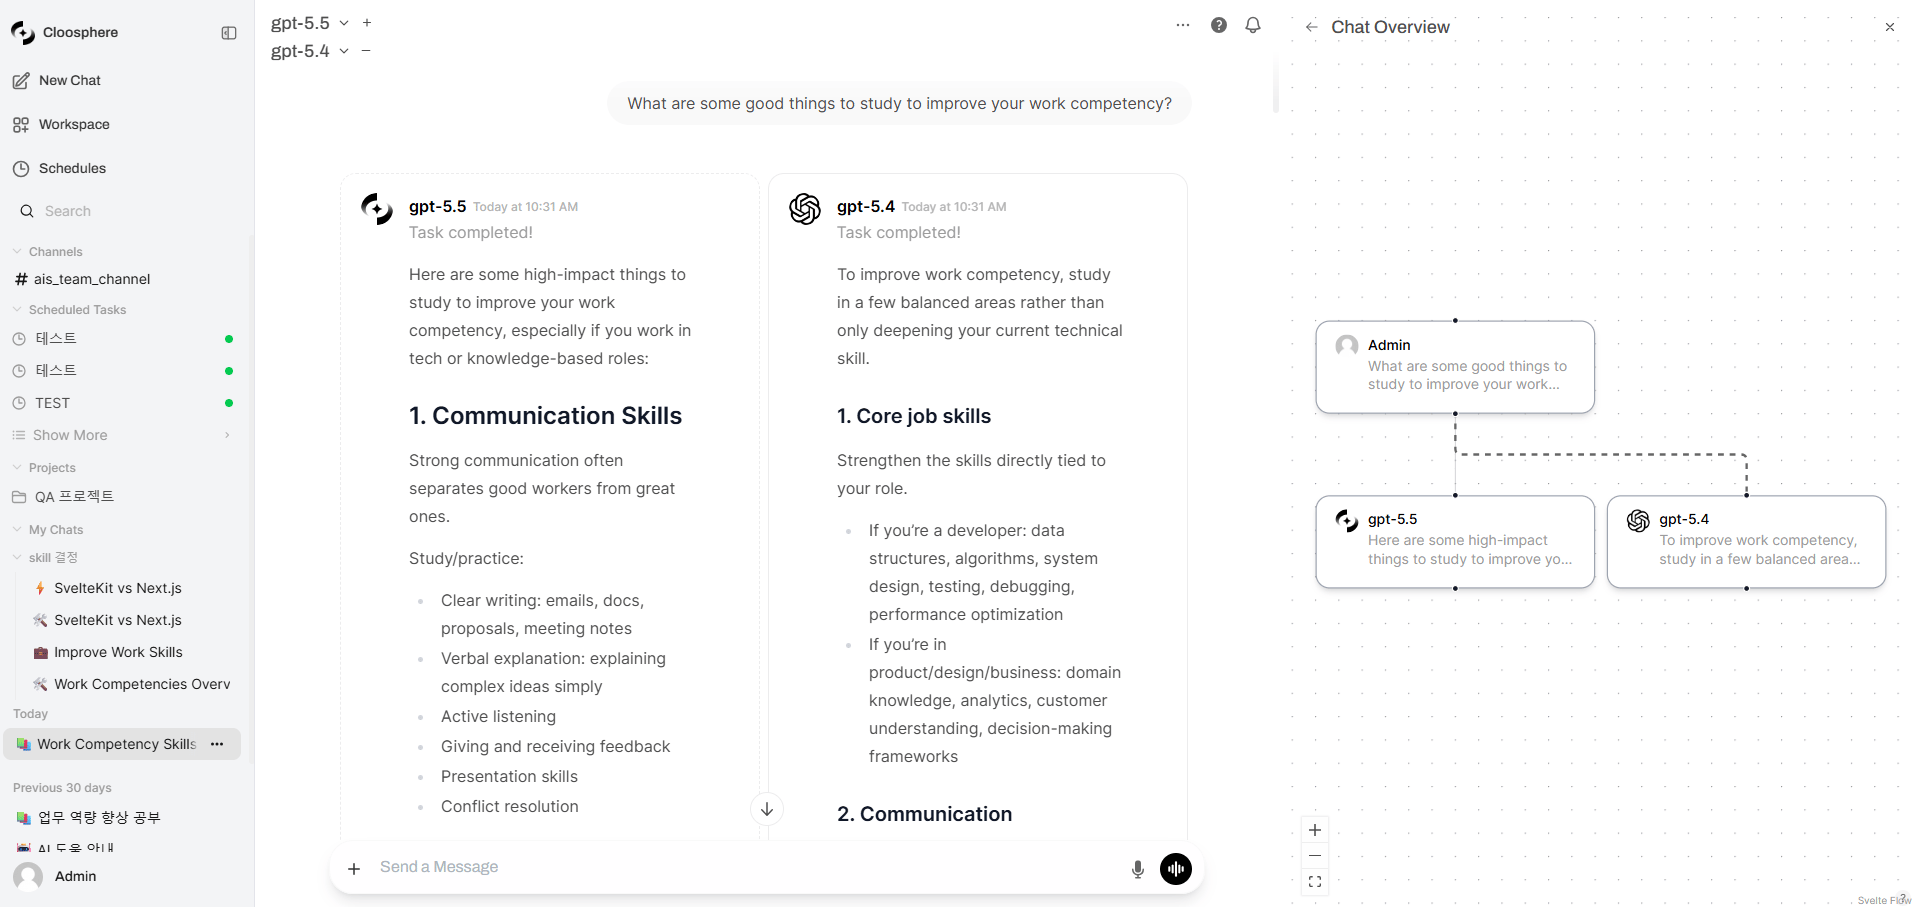
Conversation flow diagram in the Overview view (use the ← arrow at the top to switch to Chat Controls)
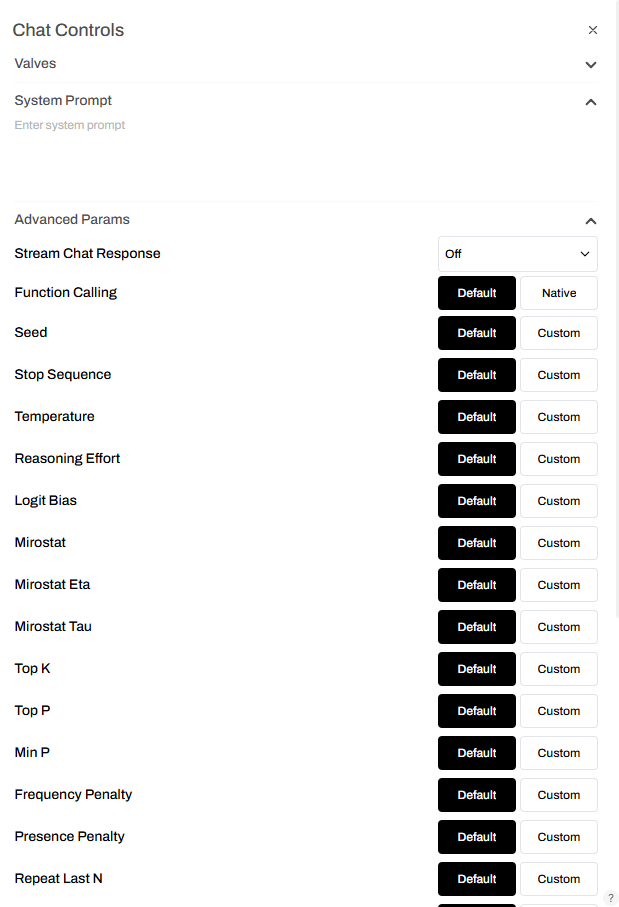
Chat Controls panel
System Prompt
Set a system prompt that applies to the entire conversation.Key Parameters
Seed
Seed
Setting a fixed seed produces (nearly) identical responses for the same prompt.
Useful when you need reproducible results.
Stop Sequence
Stop Sequence
When the specified string appears, the model stops generating.
Use it to control specific output formats.
Temperature
Temperature
Controls response creativity (randomness).
Range:
0.0 ~ 2.0 (UI slider initial value: 0.8 — the value shown when switching to custom; this may differ from the model’s actual default)Reasoning Effort
Reasoning Effort
Applies only to reasoning models. Controls how much effort goes into reasoning.
- Use values like
low,medium,high. - Not supported by all models.
Top P
Top P
Limits the probability range the model considers when picking the next token.
- 0.1: Considers only the top 10% probability tokens — very focused
- 0.9: Considers the top 90% — diverse expression
- Generally used together with Temperature; we recommend tuning only one at a time.
Frequency Penalty
Frequency Penalty
Discourages reuse of tokens that already appeared. Higher values reduce repetition.Range:
-2.0 ~ 2.0 (UI slider initial value: 1.1 — the value shown when you switch to Custom; in the Default state the model’s own value is used)Max Tokens (num_predict)
Max Tokens (num_predict)
Limits the maximum length of the AI response in tokens. If unset, the model’s default max applies.
Other Advanced Parameters
The four items use_mmap · use_mlock · num_thread · num_gpu are shown to admins only.
The Chat Controls panel itself is visible to all users, but the System Prompt and Advanced Params sections appear only for admins or users whose group grants the Chat Controls permission.
Model Capability Display
Agent models manage each capability (Web Search · Image Generation · Gmail · Google Calendar · Google Drive) individually. Code execution is not one of them — see the code execution section in Capabilities.
For a base model (not an agent), if the admin has not set capabilities on that model, the features enabled in system settings (Web Search · Image Generation) appear as-is. If the admin has set capabilities on the model, the states in the table above apply — so a feature can stay hidden from the input menu even when system settings enable it. Google Workspace (Gmail · Google Calendar · Google Drive) appears only on models allowed via capabilities, and never on a base model without capability settings, even when the admin has enabled it and you have linked your Google account.