
Tag Management
In the Workspace > Tags tab, create, edit, and delete tags. The number beside the title is the current tag count, and each row shows the tag name, its creation date, and the edit and delete buttons.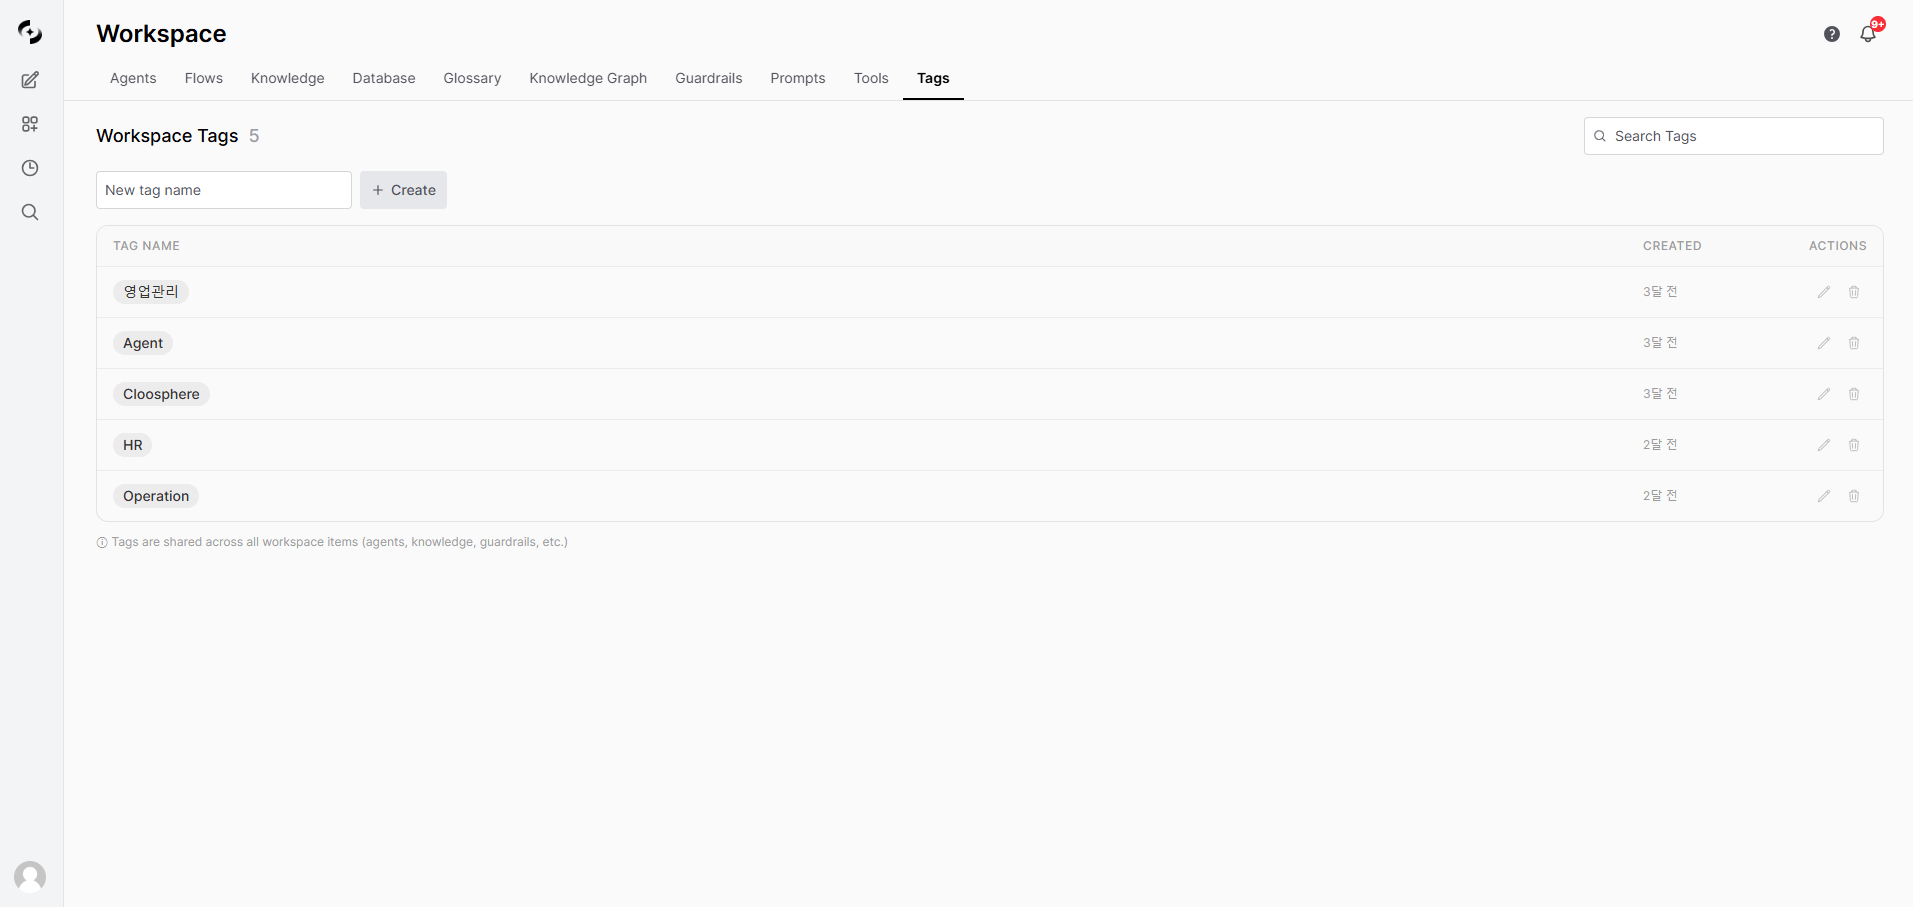
Just enter a tag name to create it instantly.
Create a Tag
Type a name in the “New tag name” field at the top left and click + Create. Duplicate names aren’t allowed. As tags pile up, use Search tags at the top right to filter by name.Edit a Tag
Click the pencil icon on the right of a tag row to rename it instantly. Save with the Enter key or the check mark, or cancel editing with the Esc key or the X mark.Delete a Tag
Click the trash icon on the right of a tag row to delete it. Deleting removes it from all workspace resources that had it.Applying Tags
Add or remove tags at the top of each workspace resource’s detail or edit screen. Click the ⊕ button next to the name to open an input — type an existing tag name to attach it, or a new name to create the tag and attach it in one step. Supported resource types:Permissions
Tag actions follow the Workspace > Tags permission in the admin panel. The default grants write to all users, and admins can lower it per group.A user with read tag permission can attach existing tags to resources, but typing a new name to create a tag is rejected.
Use Cases
Classify by department
Classify by department
Create “Marketing”, “Engineering”, “HR”, “Finance” tags to distinguish agents and Knowledge Bases used by each department.
Lifecycle management
Lifecycle management
Manage resource lifecycle with tags like “Production”, “Experimental”, “Deprecating”.
Group by project
Group by project
Apply a “Project-A” tag across agents, Knowledge Bases, and prompts to see related resources at a glance.